
This page isn't finished yet!
95%
- Missing rewards by number of Emblems found.
Kingdom Hearts 3 Lucky Emblems
These emblems, that look like Mickey's head, can be found in every world. If you take a picture, it will be added to your Gummiphone and you will get a reward if you find several of them.
Rewards
| Emblems number | Reward |
|---|---|
| 1 | AP Boost |
| 3 | Mega-Potion |
| 5 | Expert's Ring |
Olympus
| Number | Picture | Location | How to find it |
|---|---|---|---|
| #1 |  | Thebes / Overlook | From the Thebes / Overlook Save Point, go down the stairs and fall down the roof. It's on a wall to the right, next to some steps. |
| #2 | 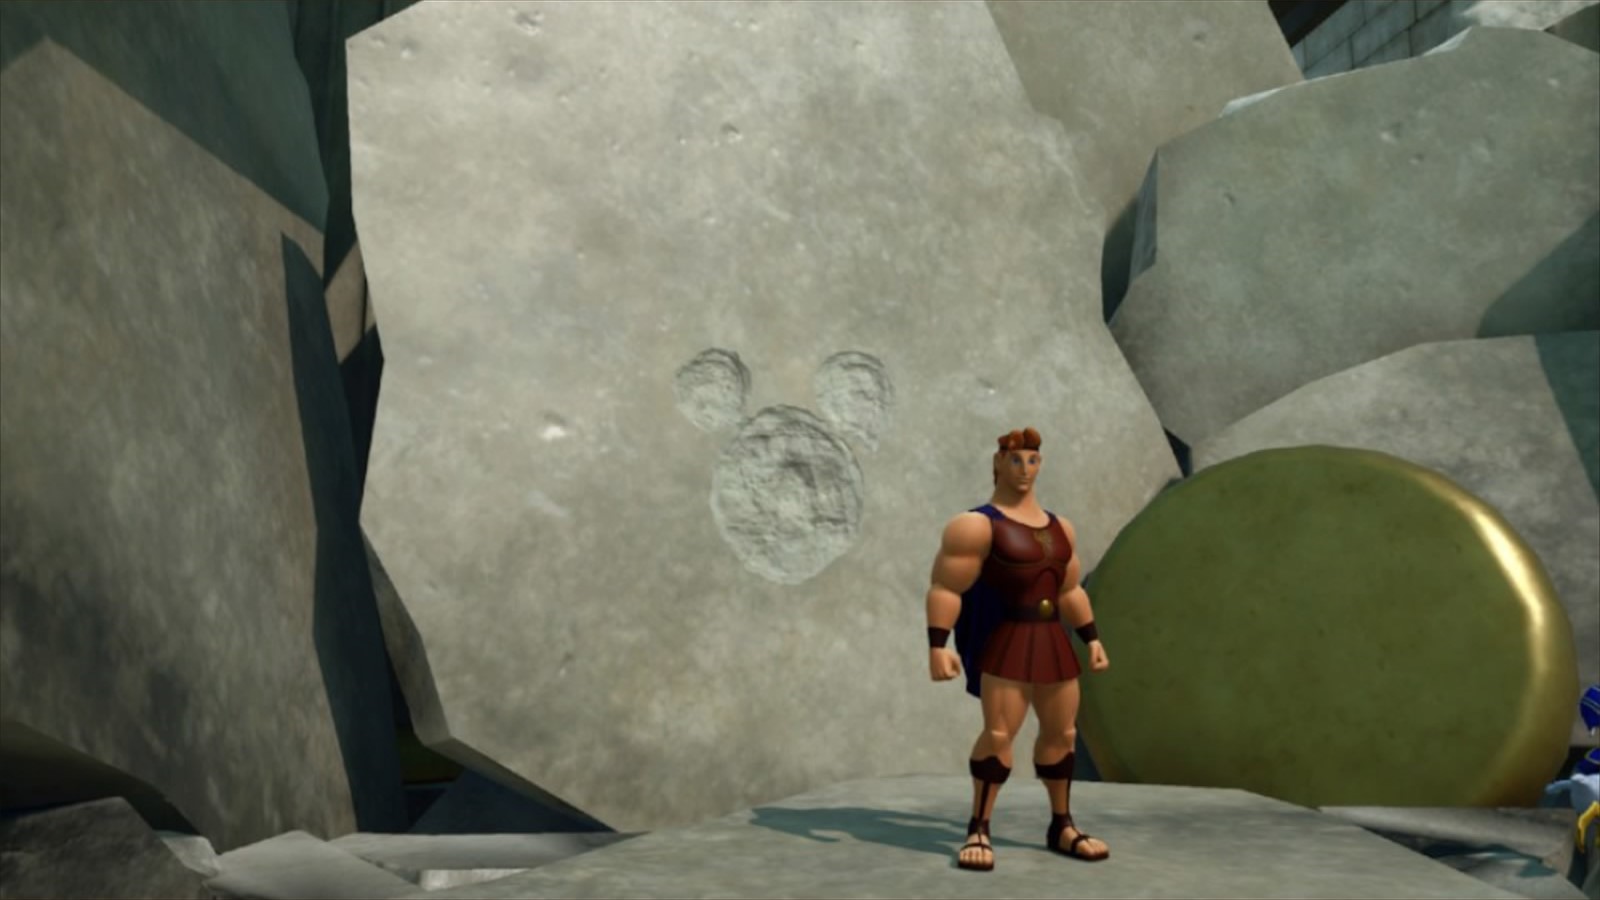 | Thebes / The Big Olive | From the Thebes / Agora Save Point, go towards Hercules' statue, turn left after the sea serpent statue and go up the stairs. Turn right, step on the broken stones and you'll find the emblem at the next junction. |
| #3 |  | Thebes / Agora | From the Thebes / Agora Save Point, go towards Hercules' statue and stick to the right wall. You'll see the emblem on the steps of the stairs. |
| #4 |  | Thebes / Overlook | From the Thebes / Overlook Save Point, go up the stairs and it's right in front of you. |
| #5 | 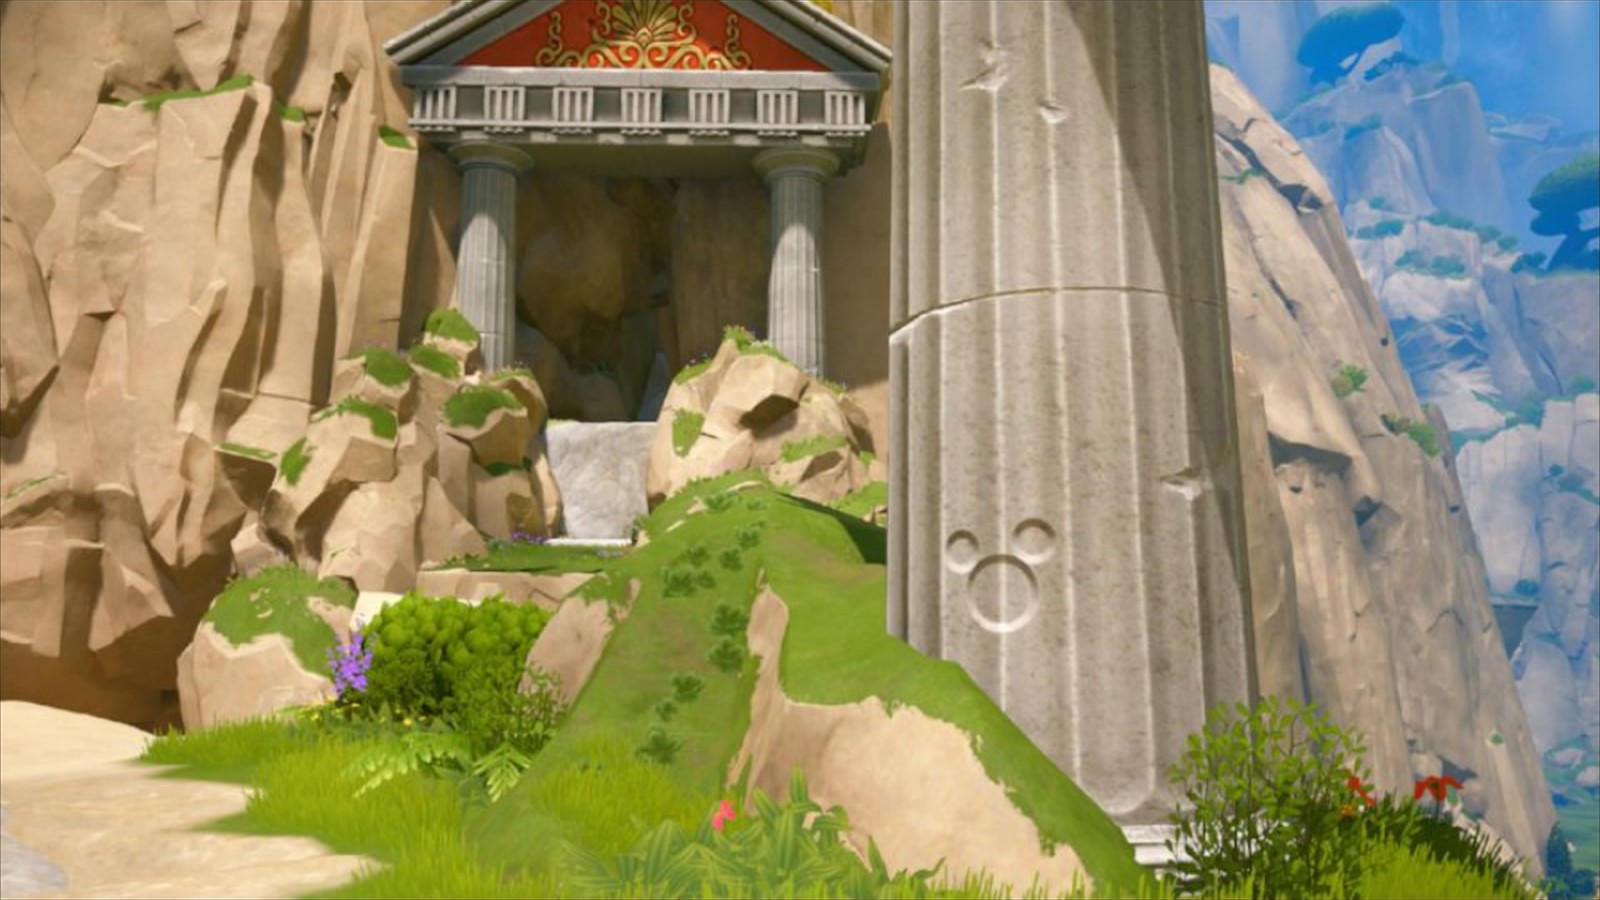 | Mount Olympus / Cliff Ascent | From the Thebes / Agora Save Point, go on Mount Olympus. There, follow the river until you reach a dead-end and some pillars. Turn left so you're walking with the pillars on your right. Climb the walls, then jump over the small edge to reach an intersection. Go left, climb two walls. The emblem is on the pillar to your right. |
| #6 |  | Mount Olympus / Cliff Ascent | Follow the same path as previously, but instead of going left at the last intersection, go right. The emblem is next to the waterfall. |
| #7 | 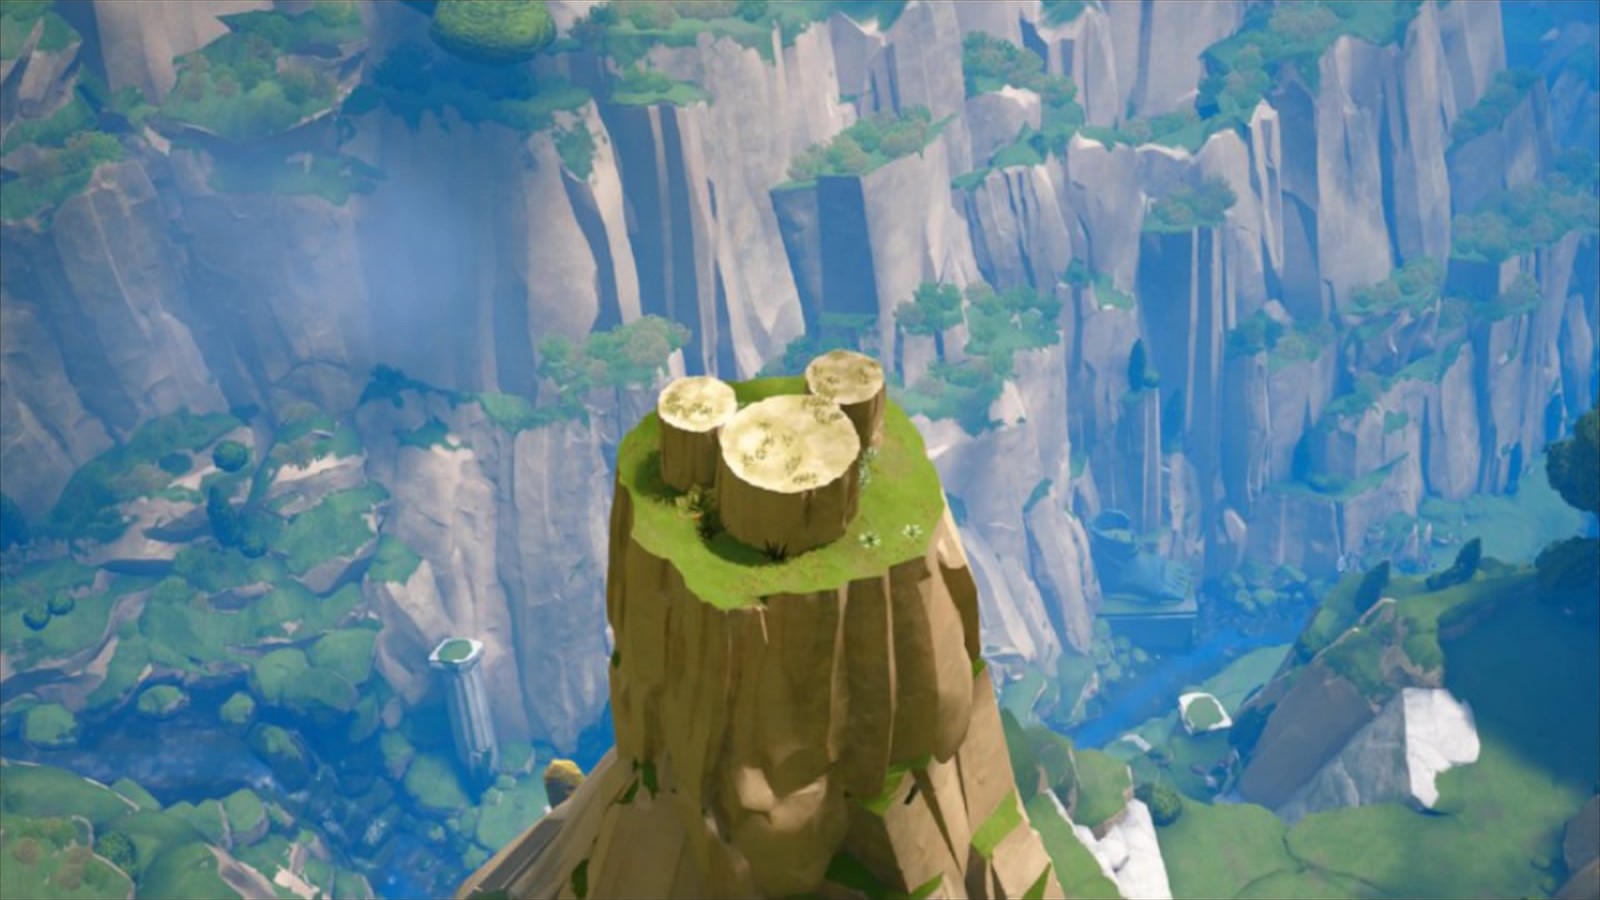 | Mount Olympus / Cliff Ascent | From the previous emblem, climb the waterfall. Go left, climb the wall, turn around and jump on the other side to continue your ascension until your reach an open cave. Go left and look down over the edge. |
| #8 |  | Mount Olympus / Mountainside | From the Mount Olympus / Summit Save Point, turn around and go down the mountainside. Check the trees on the right until you find the emblem. |
| #9 | 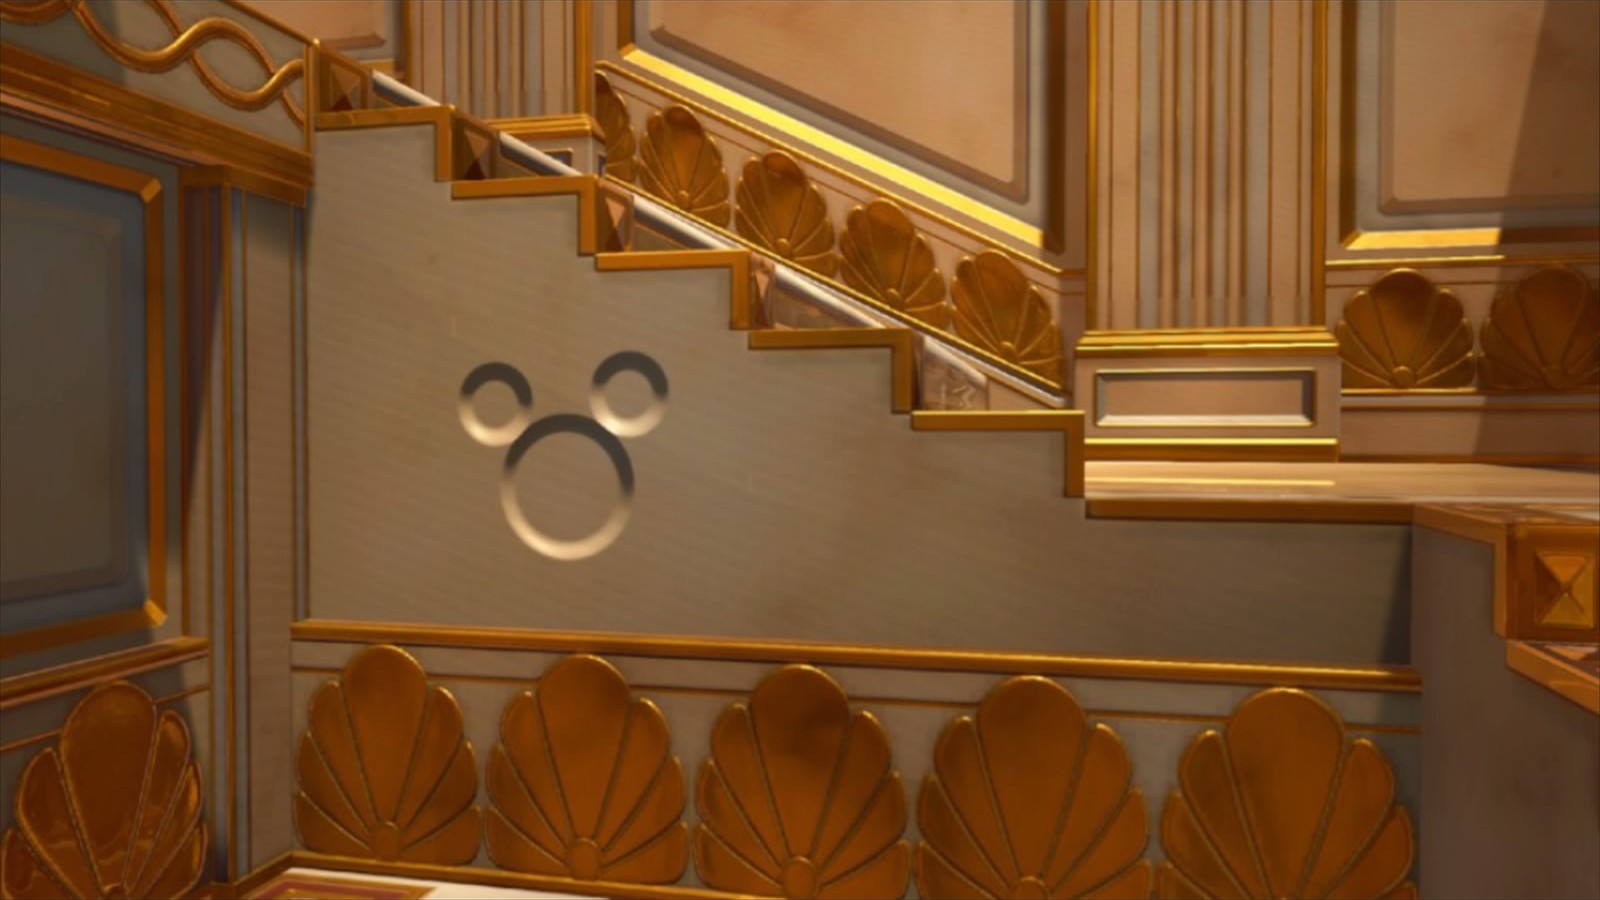 | Realm of the Gods / Corridors | From the Realm of the Gods / Corridors Save Point, go up the stairs and check the second flight of stairs, next to the blue ramp. |
| #10 | 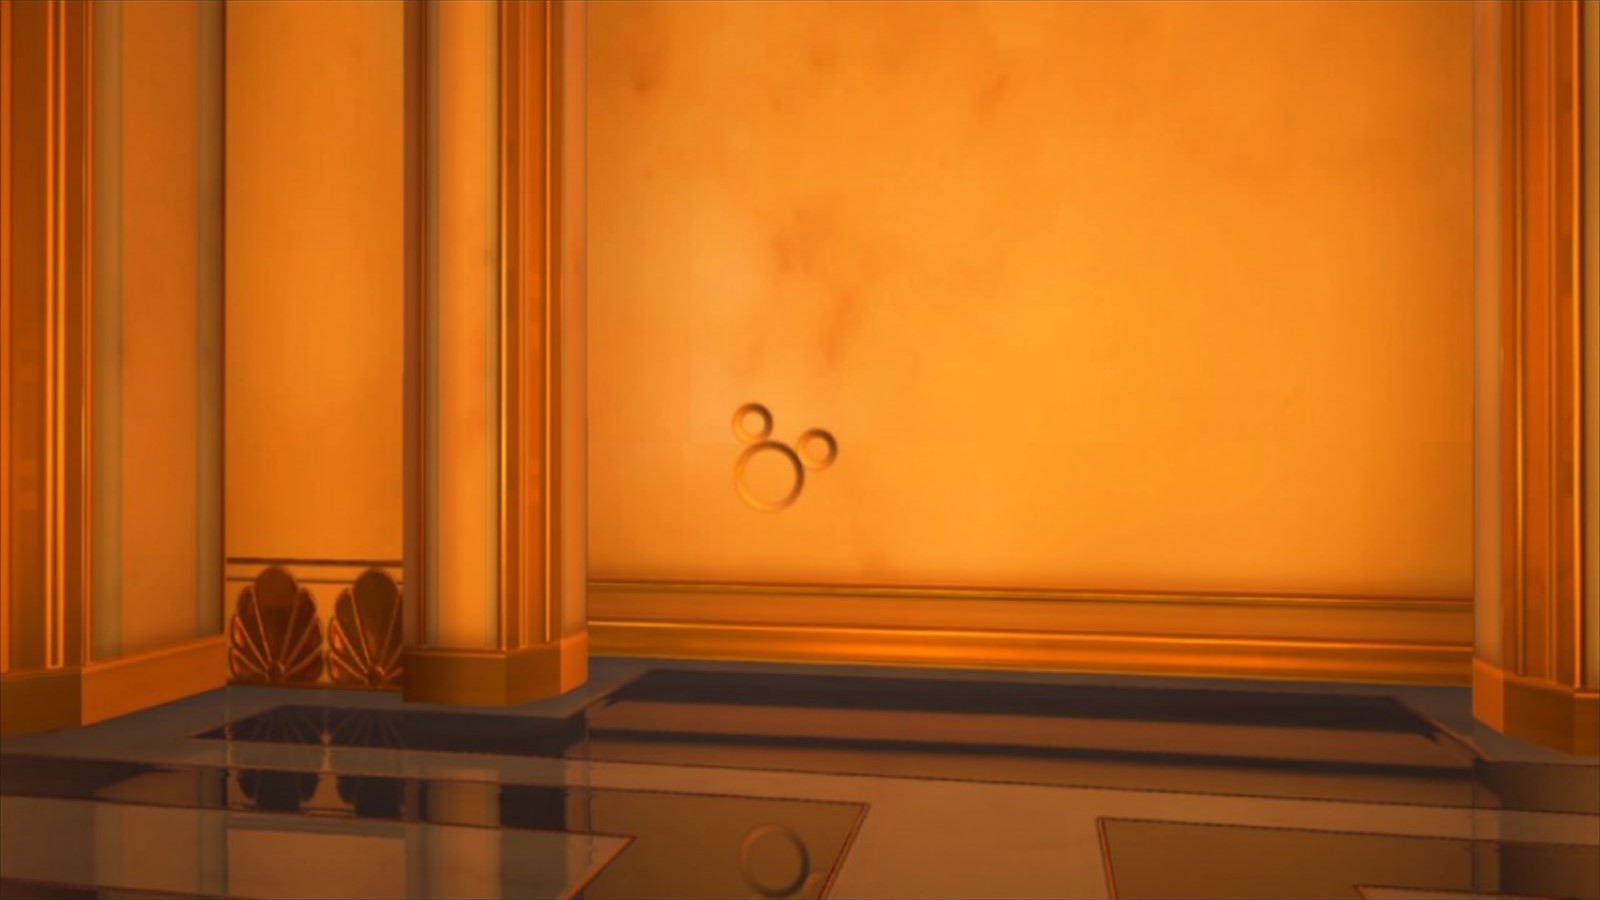 | Realm of the Gods / Corridors | From the #11, exit the Secluded Forge by using the ramp of light, then turn left. Use the blue ramp to find yourself in a spacious room. The emblem is behind some urns. |
| #11 | 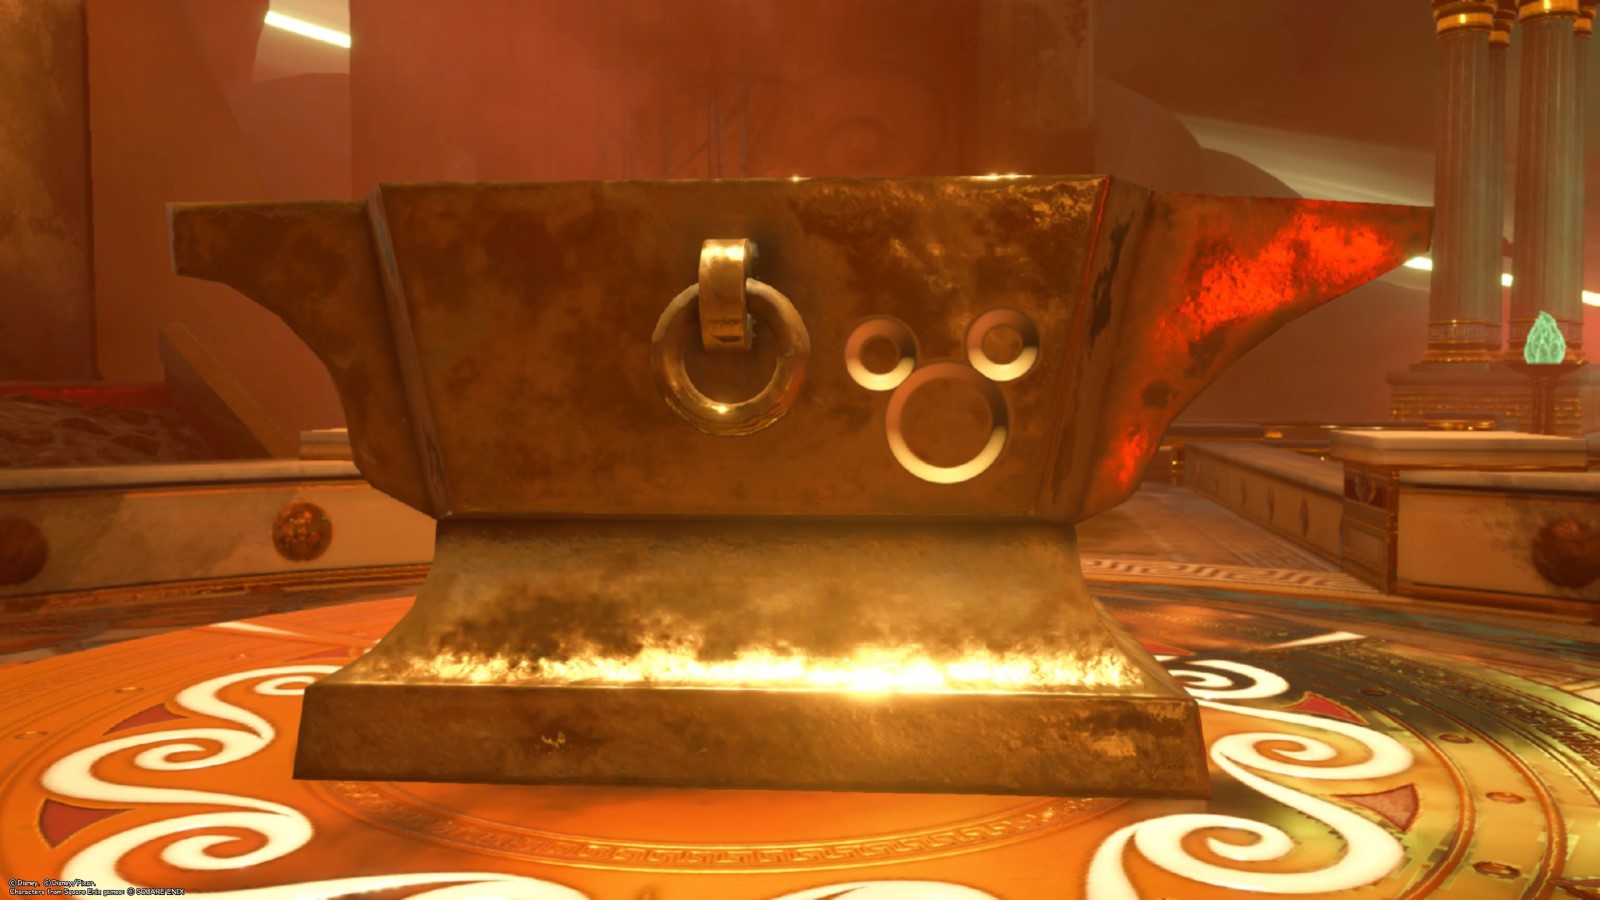 | Realm of the Gods / Secluded Forge | From the emblem #9, use the stairs and glide along the ramp. Fall down the waterfall to reach the Forge. The emblem is on the anvil. |
| #12 | 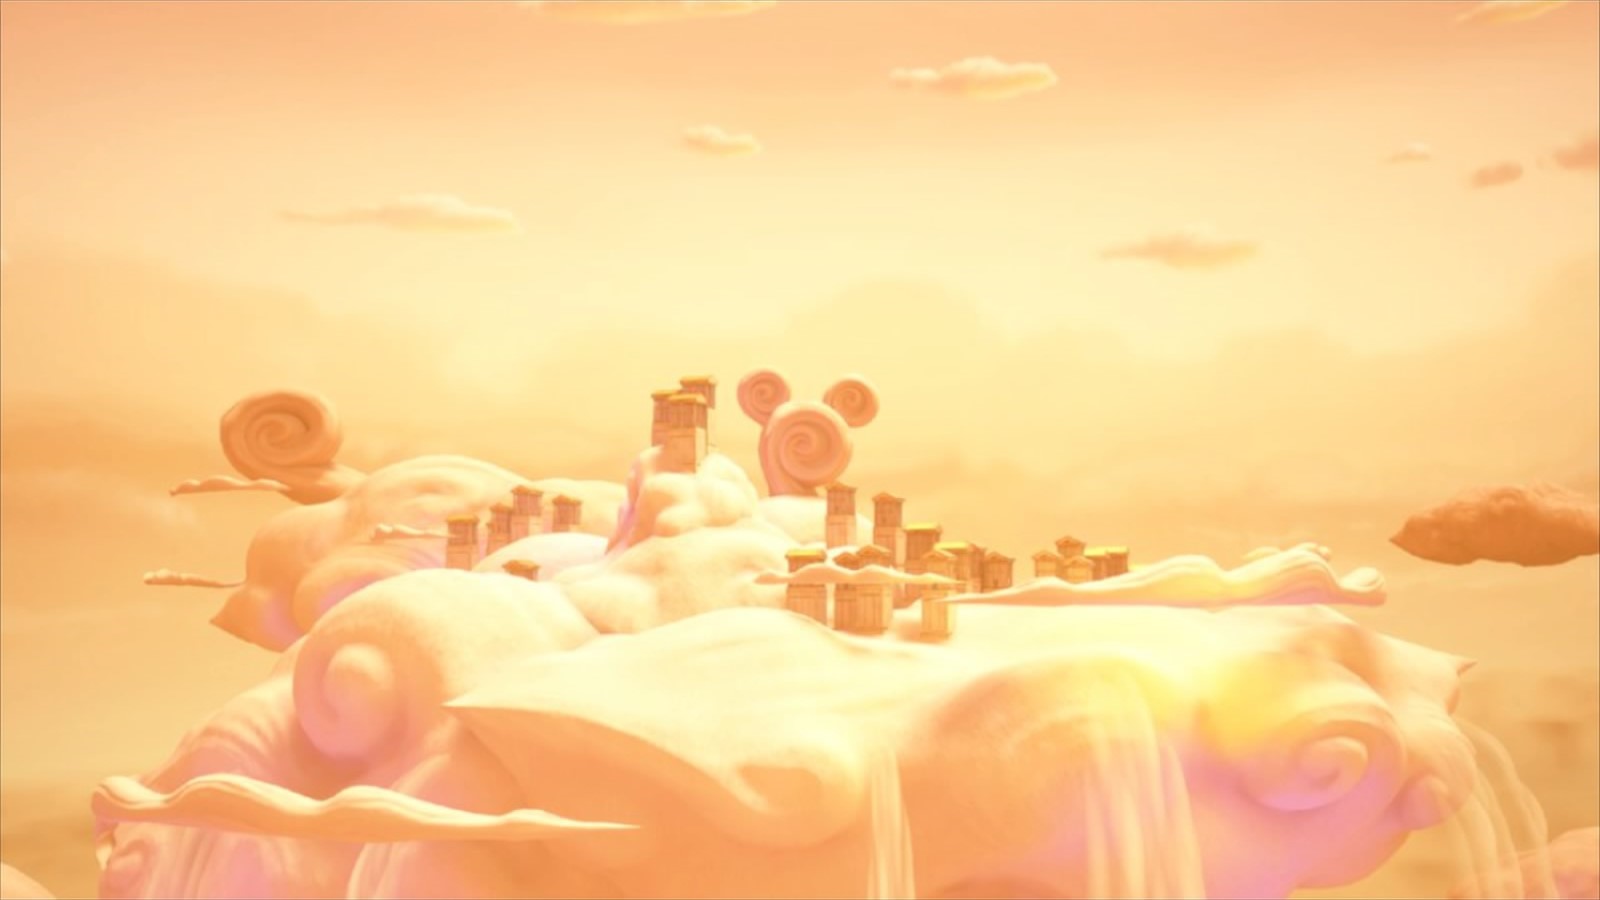 | Realm of the Gods / Cloud Ridge | From the Realm of the Gods / Corridors Save Point, go up the slope on the left until you reach a ramp of light. Go through the arch and look at the clouds. |
Twilight Town
| Number | Picture | Location | How to find it |
|---|---|---|---|
| #1 |  | The Neighborhood / Tram Common | From the Neighborhood / Tram Commons Save Point, look on the wall to the left. |
| #2 |  | The Neighborhood / Tram Common | Jump on the roof of the tram: it's on top of it. Be careful to not fall down while you take the picture! |
| #3 | 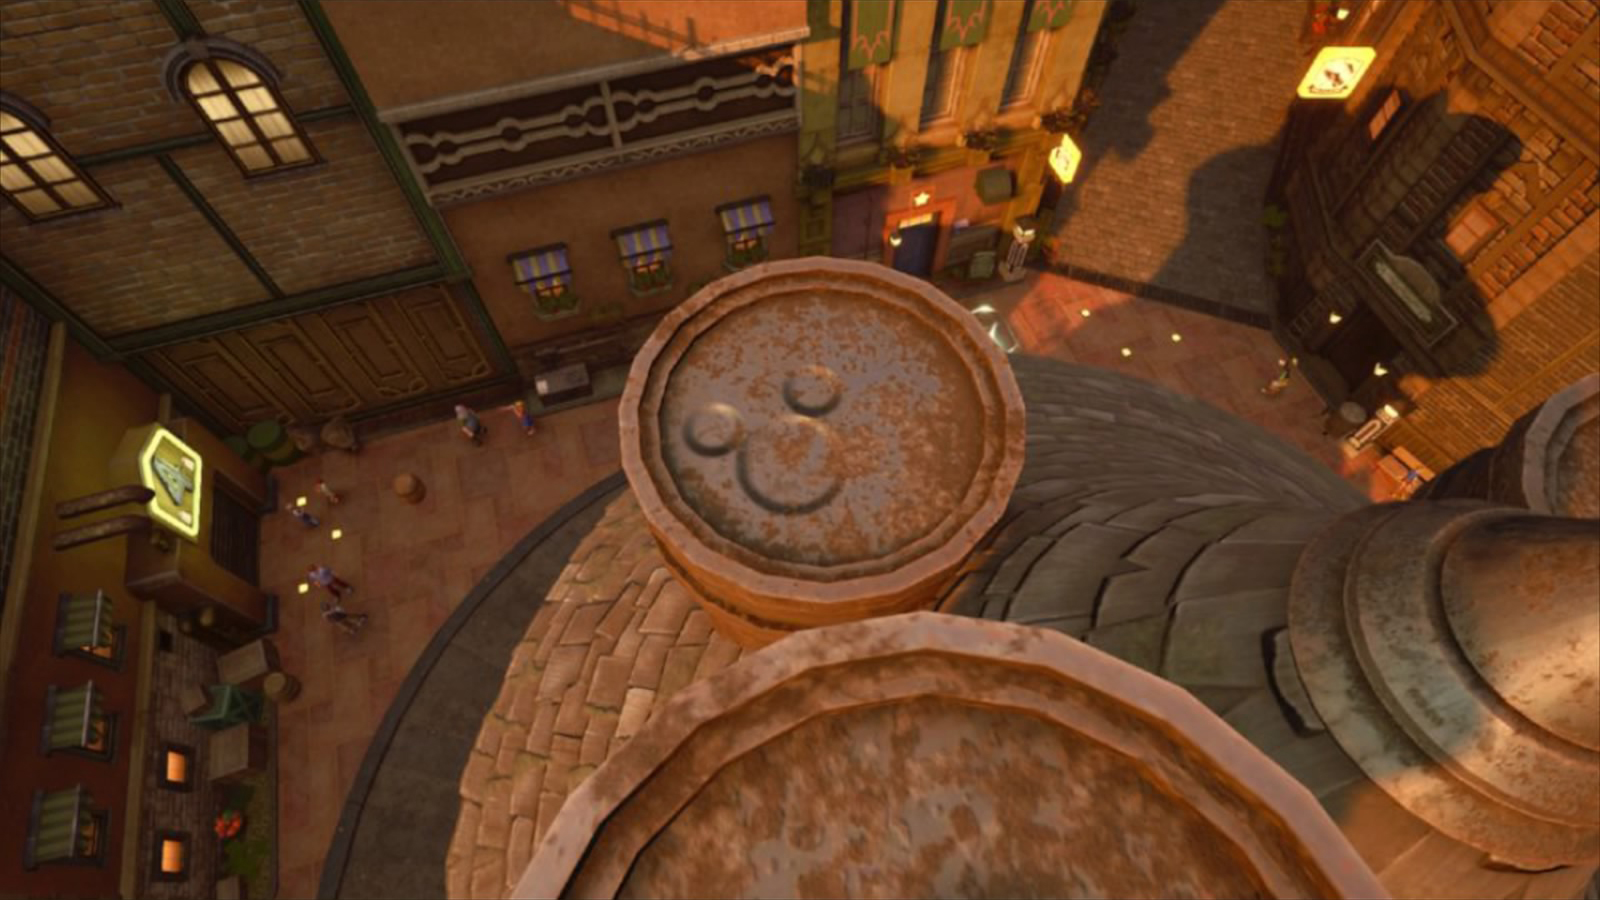 | The Neighborhood / Tram Common | Climb on top of the Moogle Shop next to the Save point, and look down. |
| #4 | 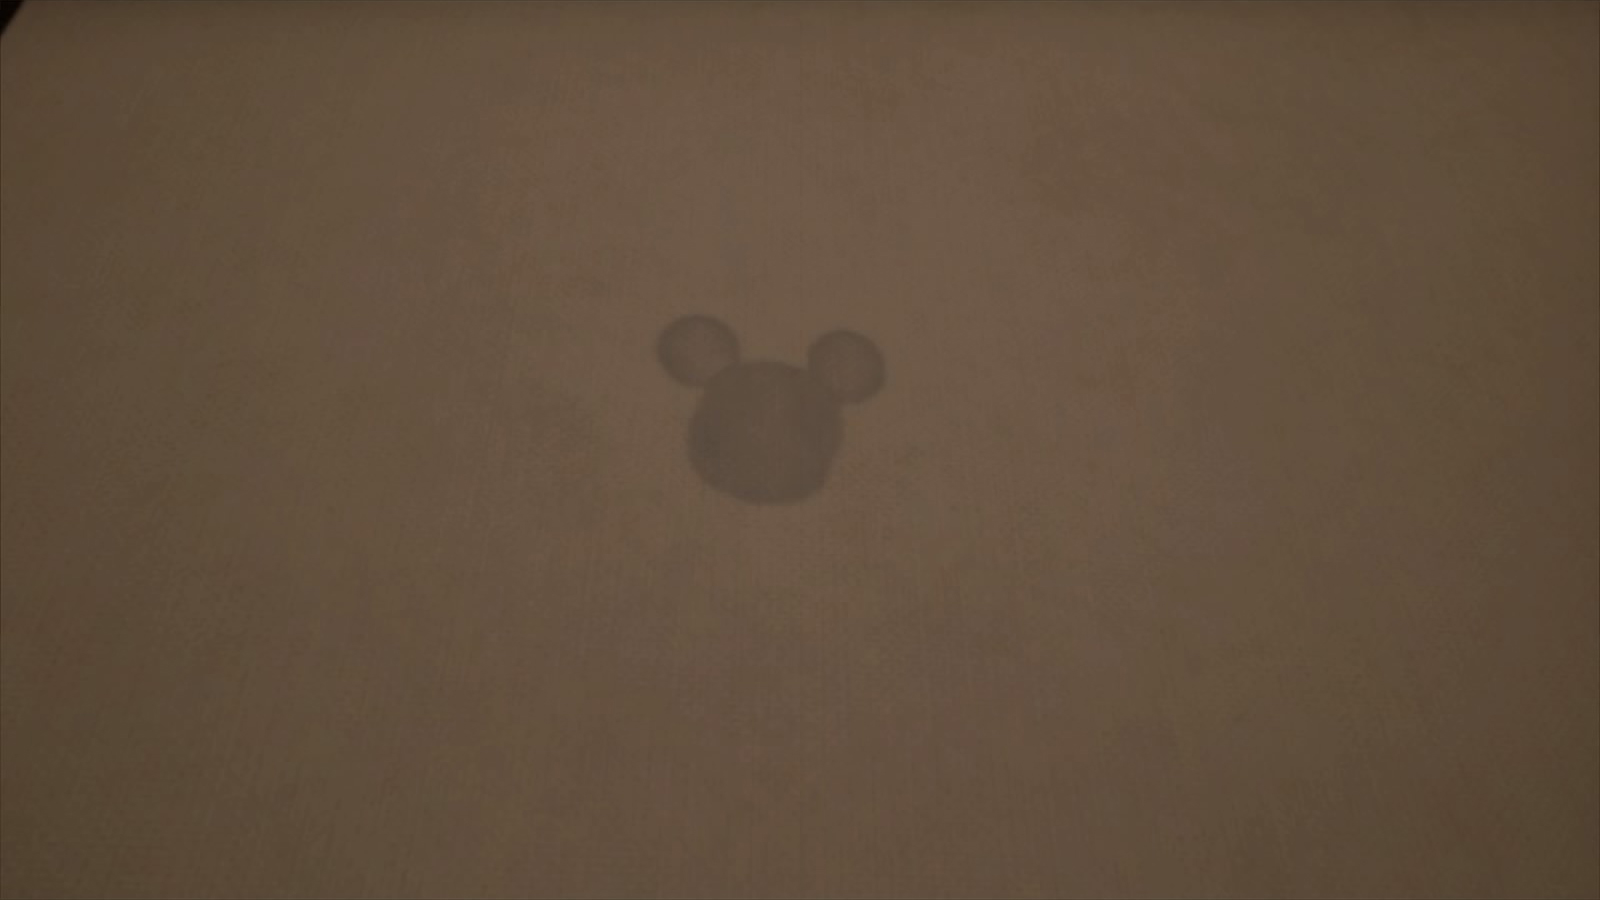 | The Neighborhood / Tram Common | From the Neighborhood / Tram Common Save Point, follow the wall on your left and the tram tracks until you reach the open-air movie theatre. Wait until the movie is over: the Emblem is on the screen. |
| #5 | 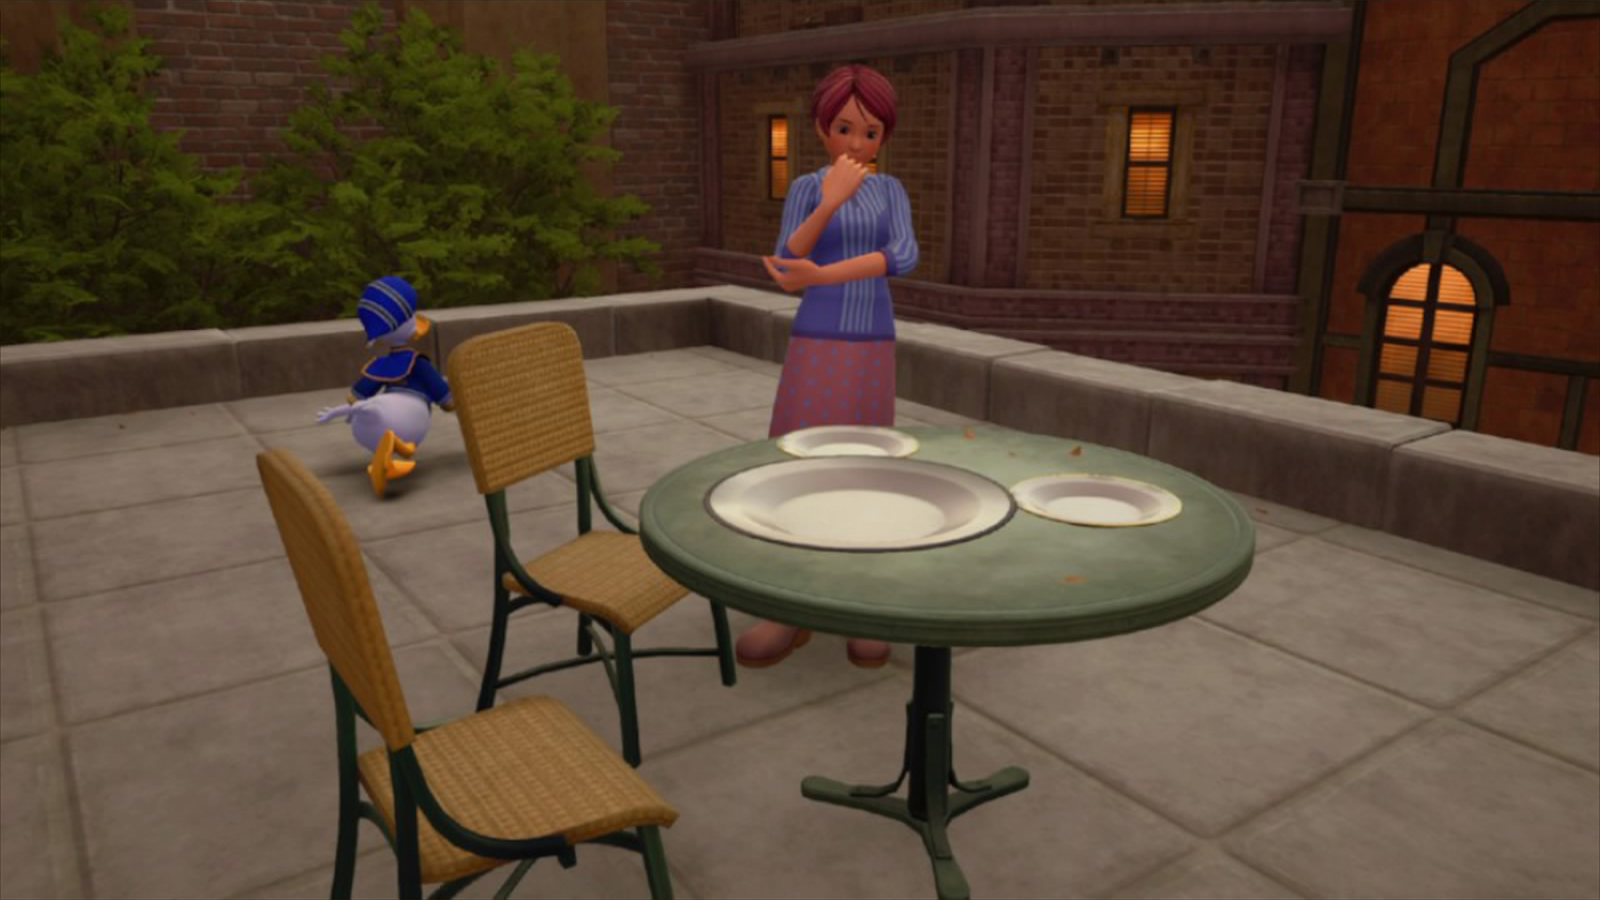 | The Neighborhood / Tram Common | From the theatre exit, jump on the buildings until you reach a table with a woman standing next to it. There are three plates forming an Emblem. |
| #6 | 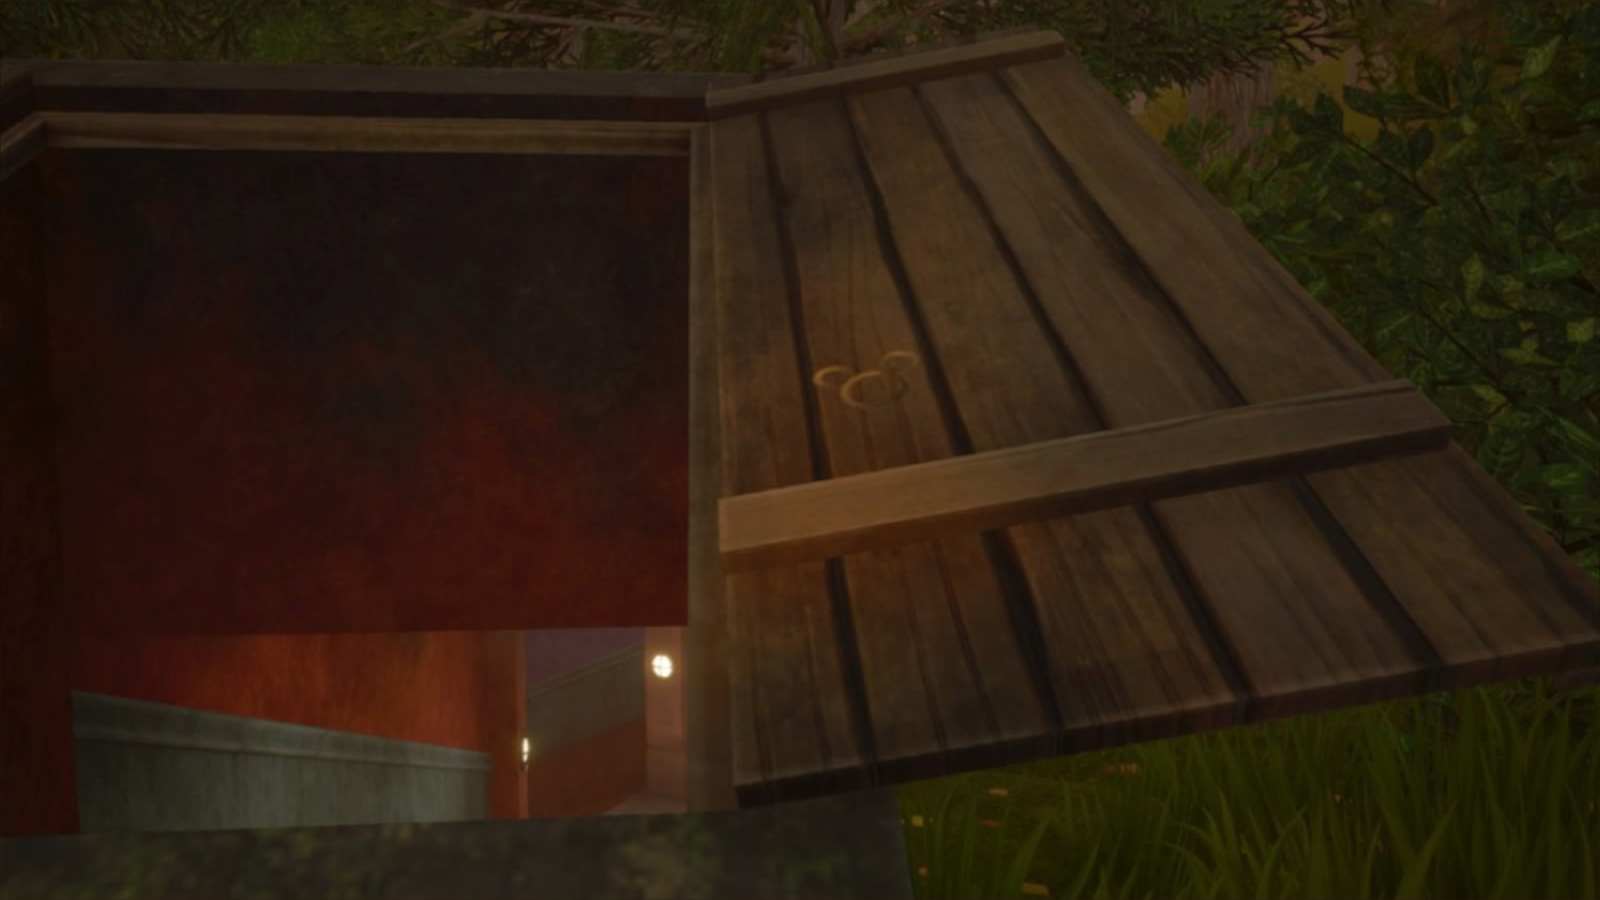 | The Neighborhood / The Woods | From the The Neighborhood / The Old Mansion Save Point, go back until you reach the trap door to the Underground Conduit. It's on the one on the right. |
| #7 |  | The Neighborhood / The Woods | From the previous one, climb on the tall wall right next to you. |
| #8 |  | The Neighborhood / The Woods | From the Neighborhood / The Old Mansion Save Point, go into the forest and look on your left side. When you see the first chest under a tree trunk, go around it and you'll find the Emblem. |
| #9 |  | The Neighborhood / The Old Mansion | From the Neighborhood / The Old Mansion Save Point, just exit through the gate and check the wall on your right. |
Toy Box
| Number | Picture | Location | How to find it |
|---|---|---|---|
| #1 |  | Andy's House | Jump on the shelf opposite to the Save Point. It's on a box there. |
| #2 |  | Andy's House | From the Save Point, go outside from the closest window. The Emblem is on the roof, on the right corner. |
| #3 | 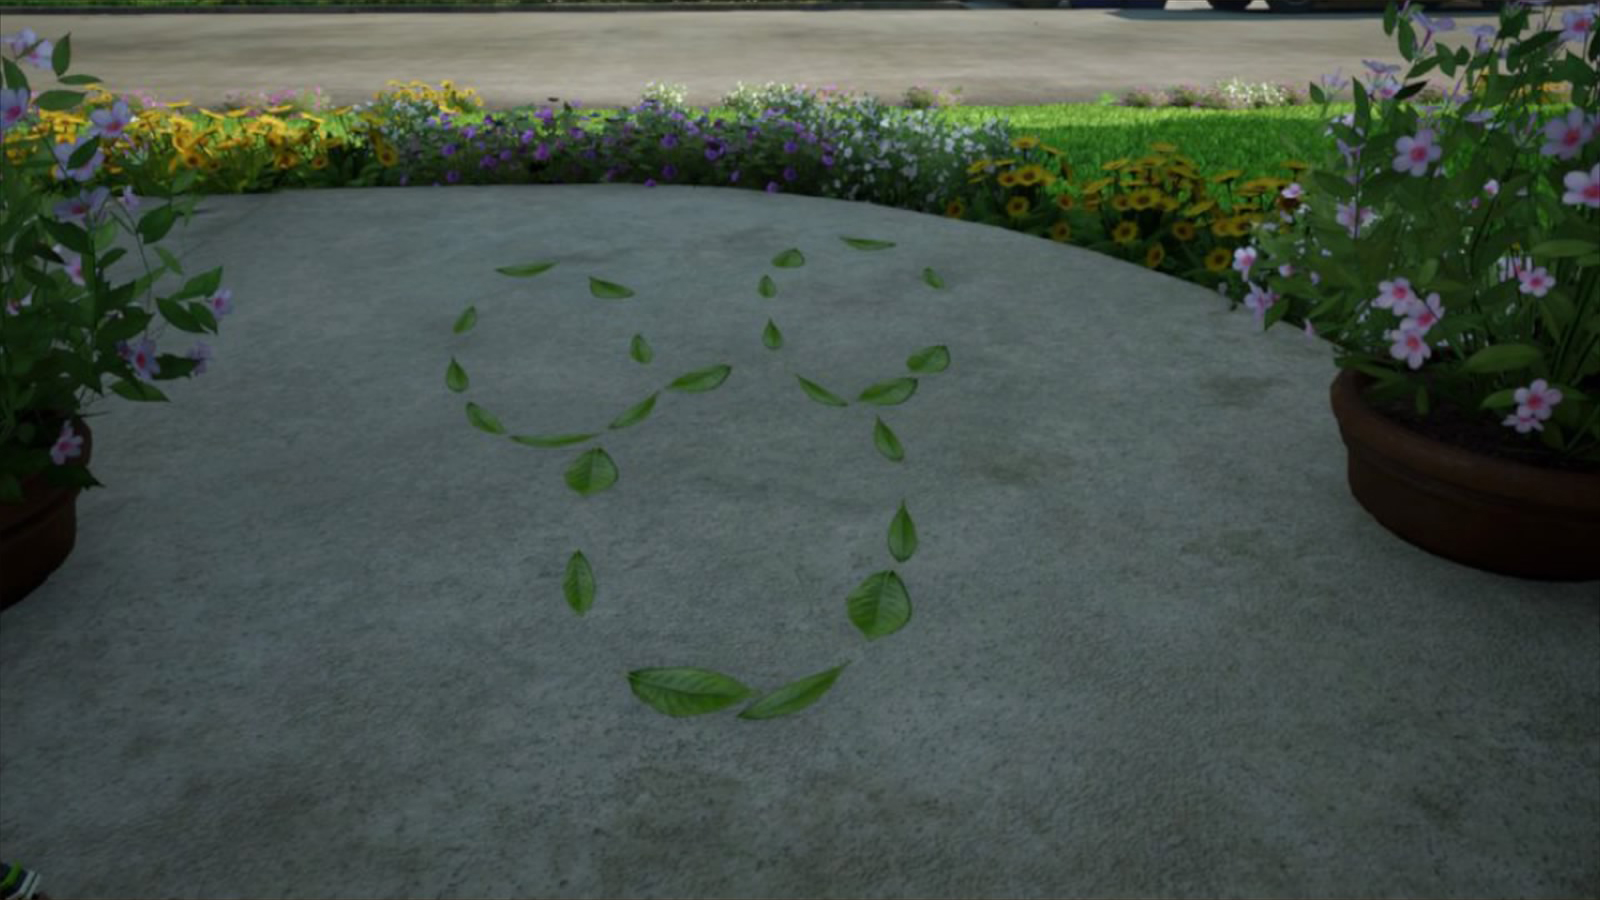 | Andy's House | From the #2, go down and follow the right wall. The Emblem is in front of a door, made of leaves. |
| #4 | 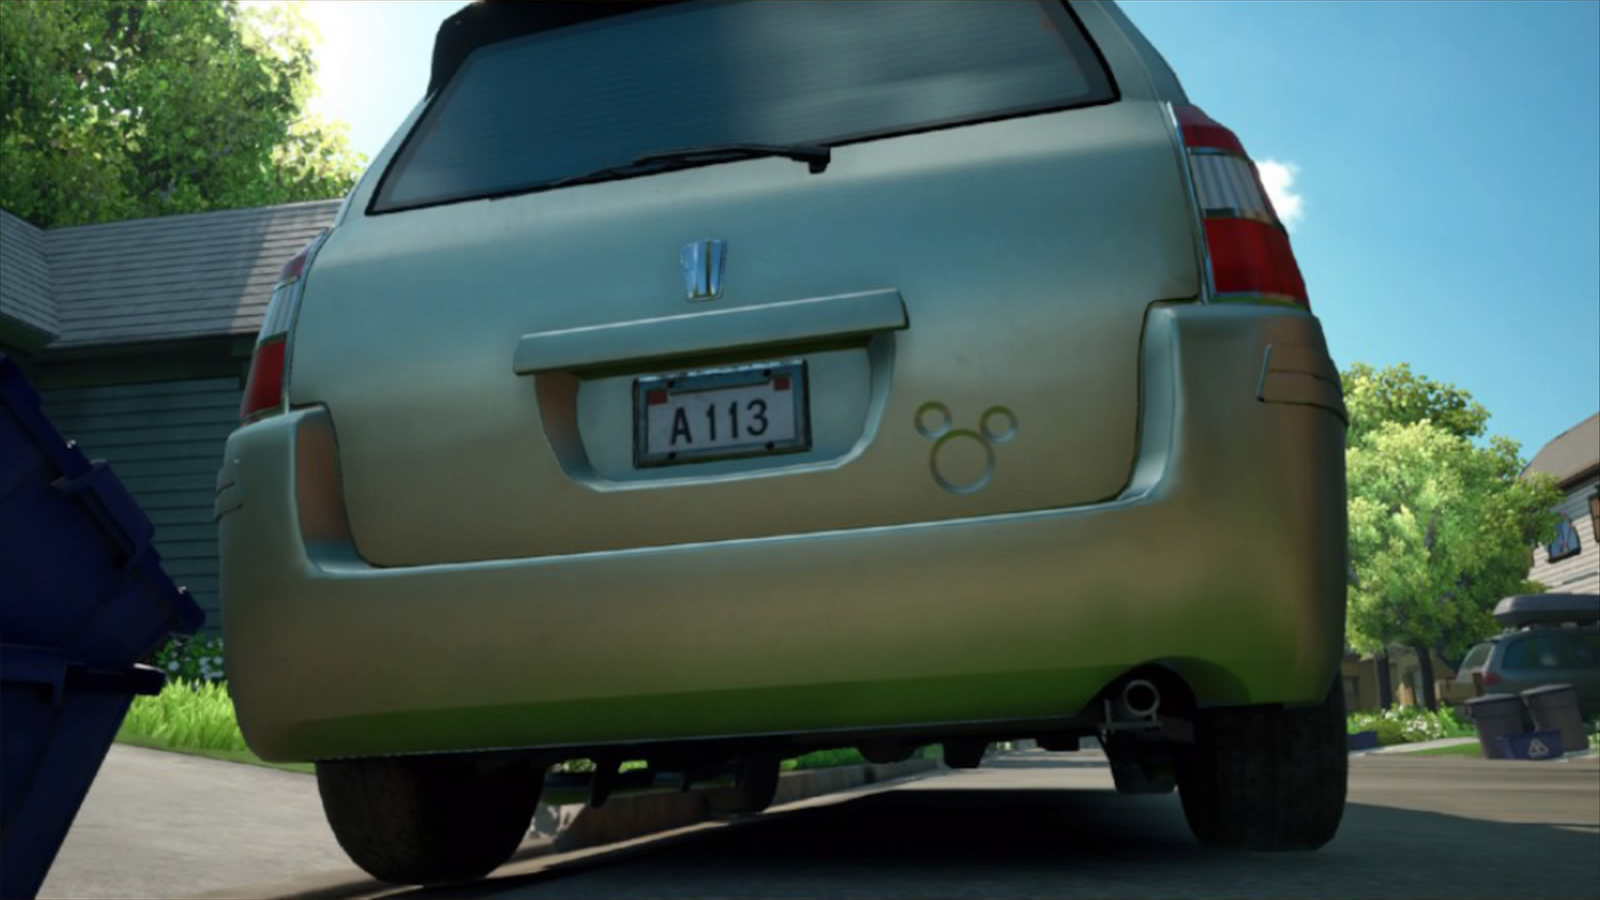 | Andy's House | From the #3, cross the street and check the back of the car. |
| #5 |  | Galaxy Toys / Main Floor: 1F | From the Save Point, go to the middle cashier on the right and look at the wall. The Emblem is made of tape. |
| #6 | 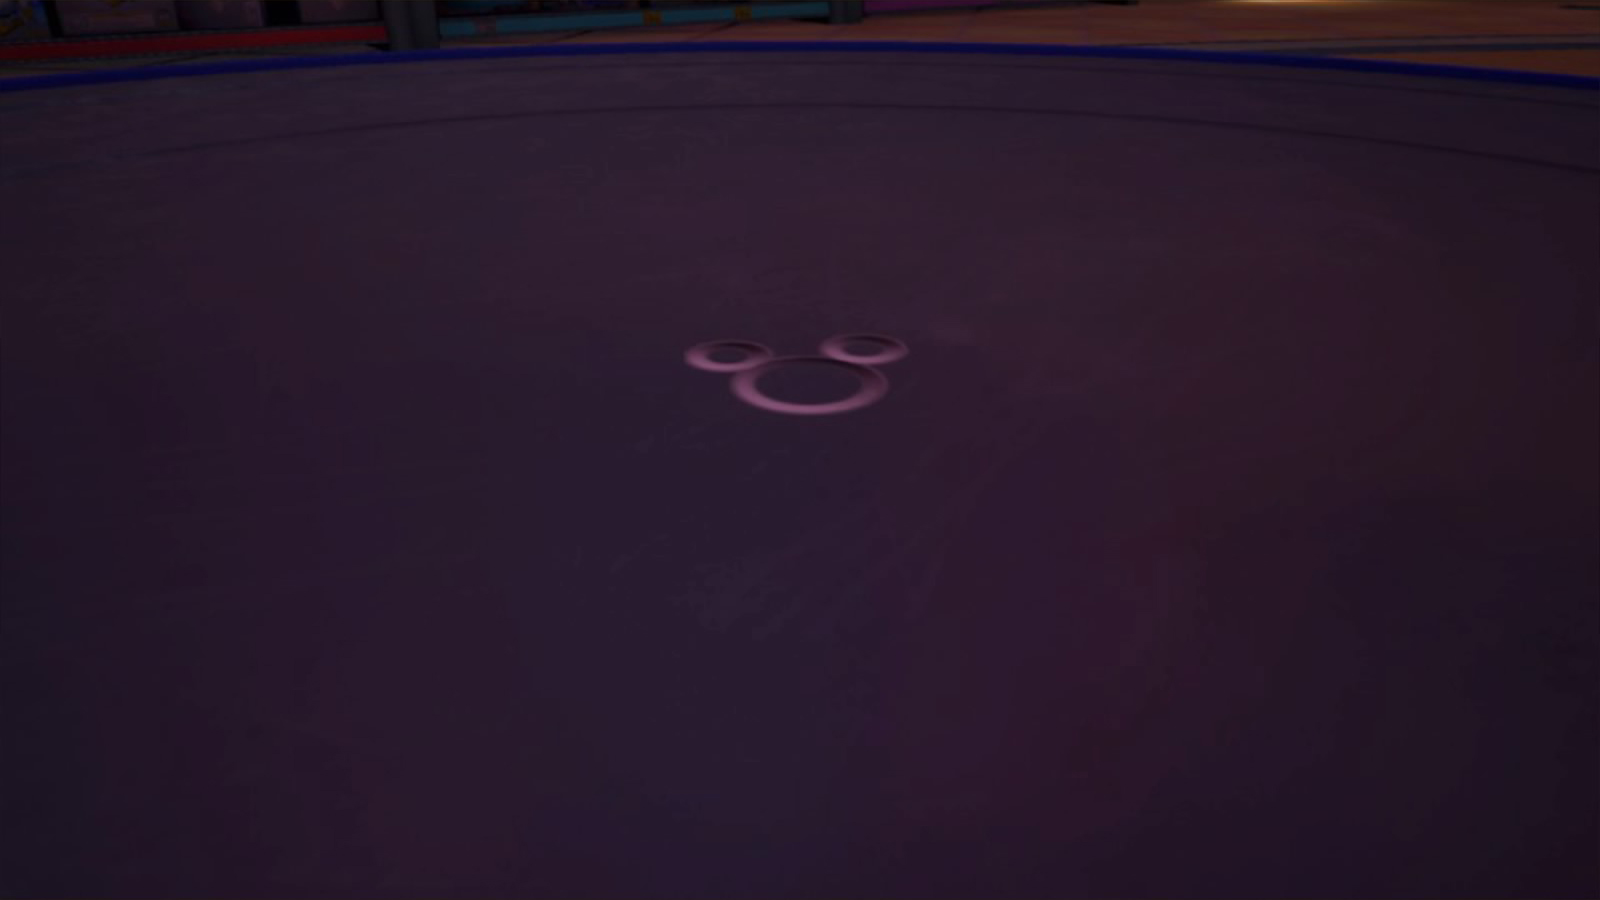 | Galaxy Toys / Main Floor: 1F | From the Save Point, board a Gigas and walk towards the back of the floor. Shoot the tower of toys and you'll see the Emblem on the stand. |
| #7 |  | Galaxy Toys / Lower Vent | From the Galaxy Toys / Lower Vents Save Point, go up the vent (the slope opposite to the fan) and you'll find the Emblem at the end of the path. |
| #8 | 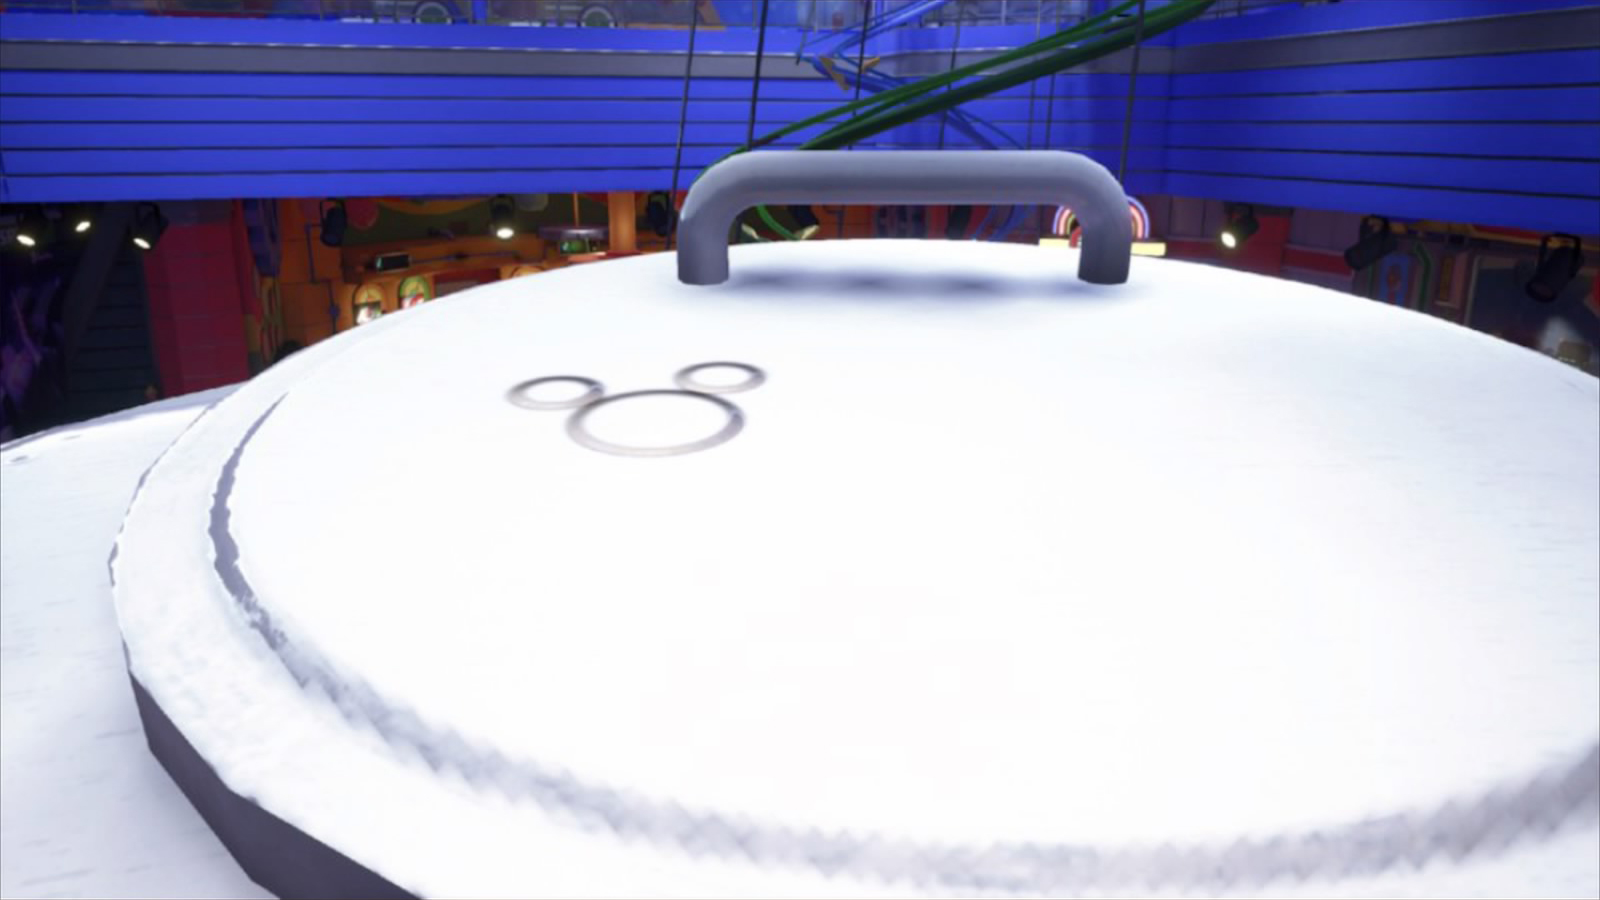 | Galaxy Toys / Main Floor: 3F | From the Galaxy Toys / Main Floor: 3F Save Point, go in front of the "Lovely Party" front window and jump down on the flying saucer. |
| #9 | 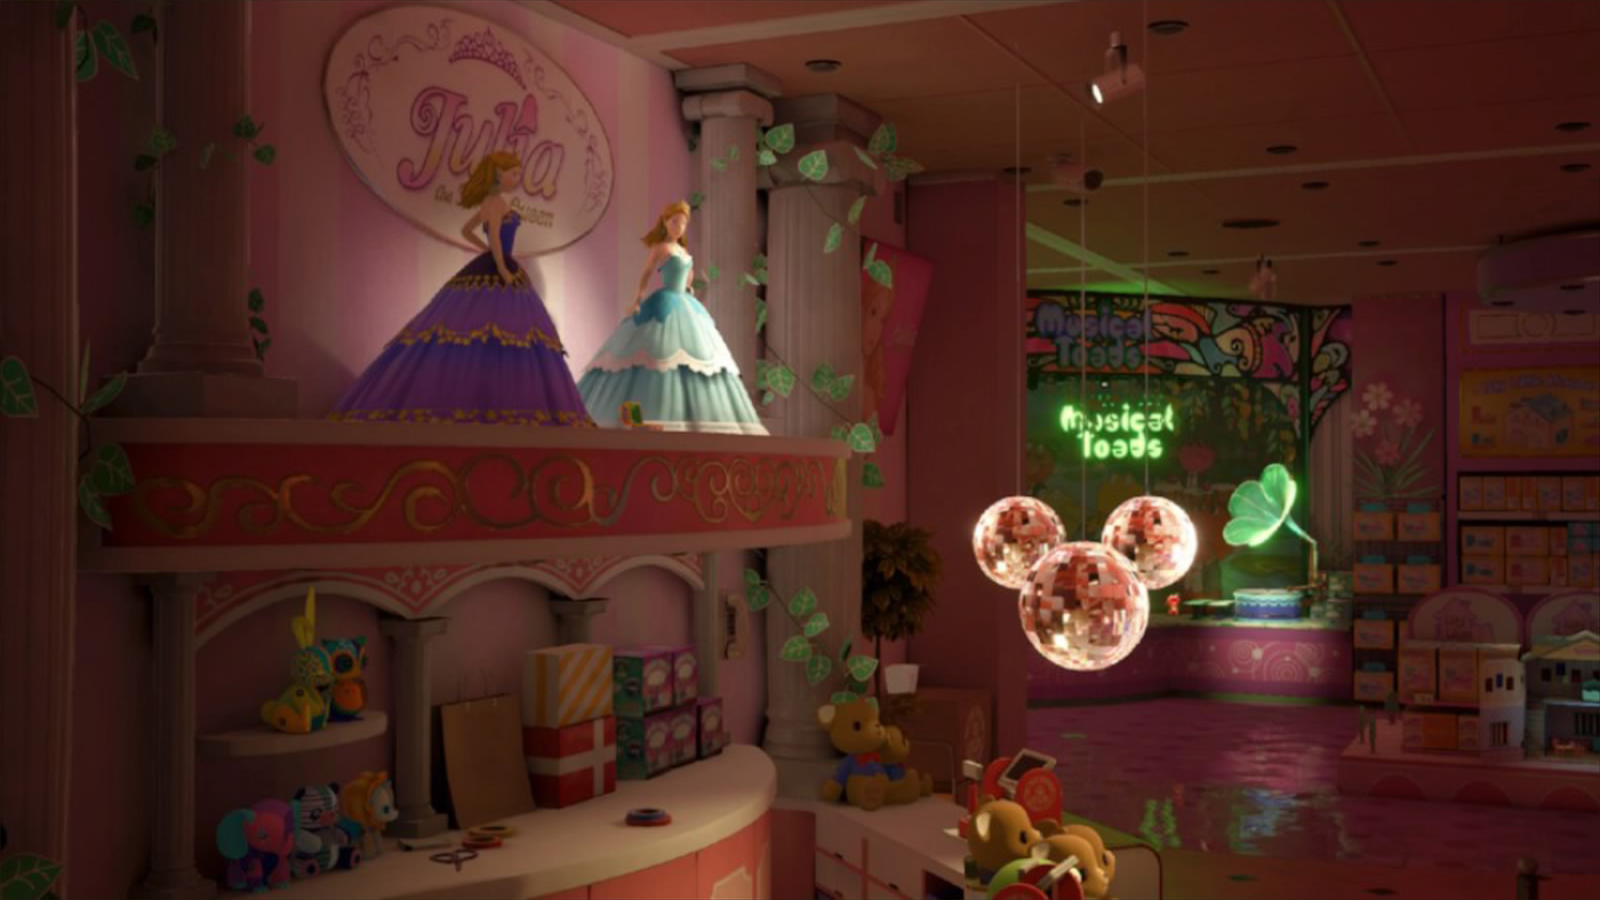 | Galaxy Toys / Babies & Toddlers: Dolls | From the Galaxy Toys / Lower Vents Save Point, use the fan to go up. Then exit on the right, jump on the roof of the display of a Julia doll and aim at the red disco balls with your Gummiphone. |
| #10 | 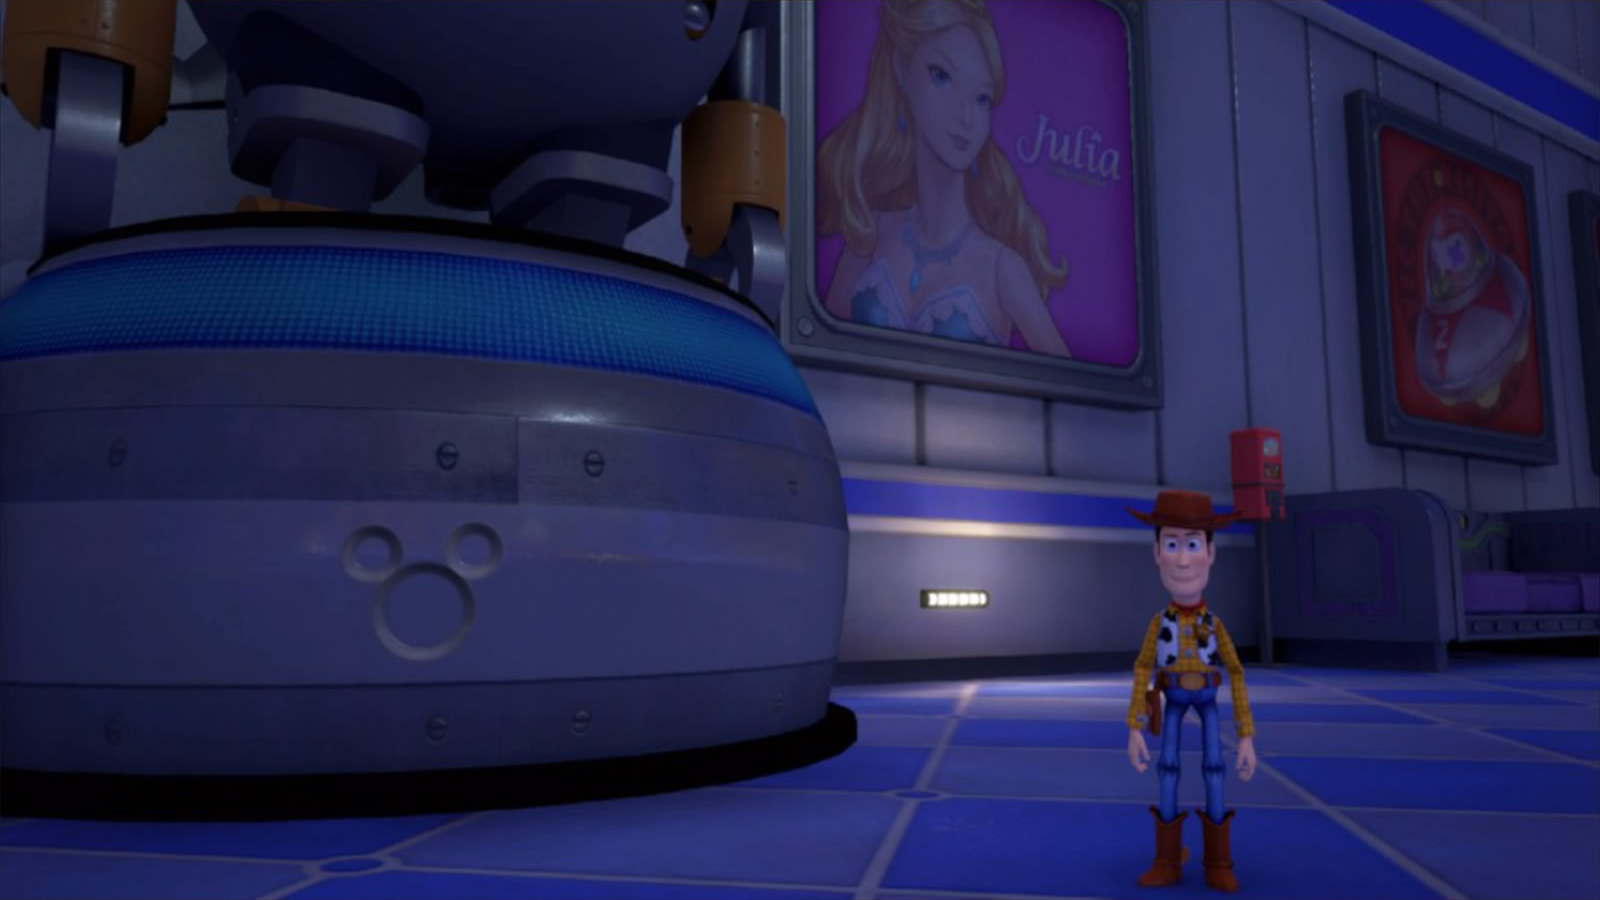 | Galaxy Toys / Main Floor: 3F | From the Galaxy Toys / Main Floor: 3F Save Point, just look at the stand next to the Julia poster. |
| #11 | 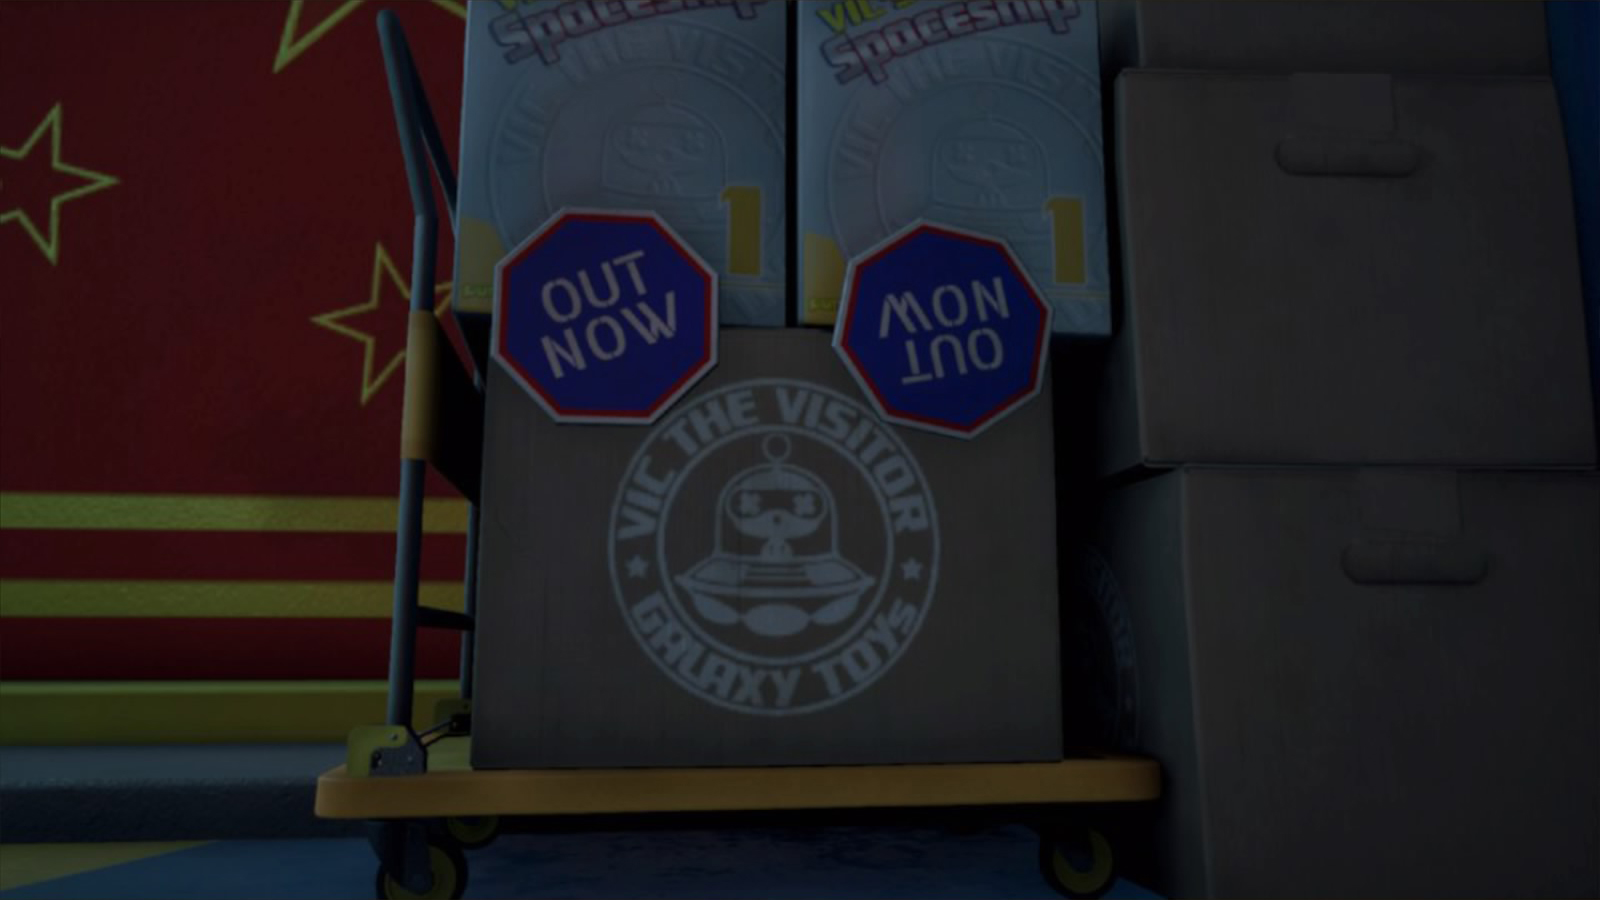 | Galaxy Toys / Main Floor: 1F | From the Galaxy Toys / Main Floor: 1F Save Point, go outside and look on your right. |
Kingdom of Corona
| Number | Picture | Location | How to find it |
|---|---|---|---|
| #1 | 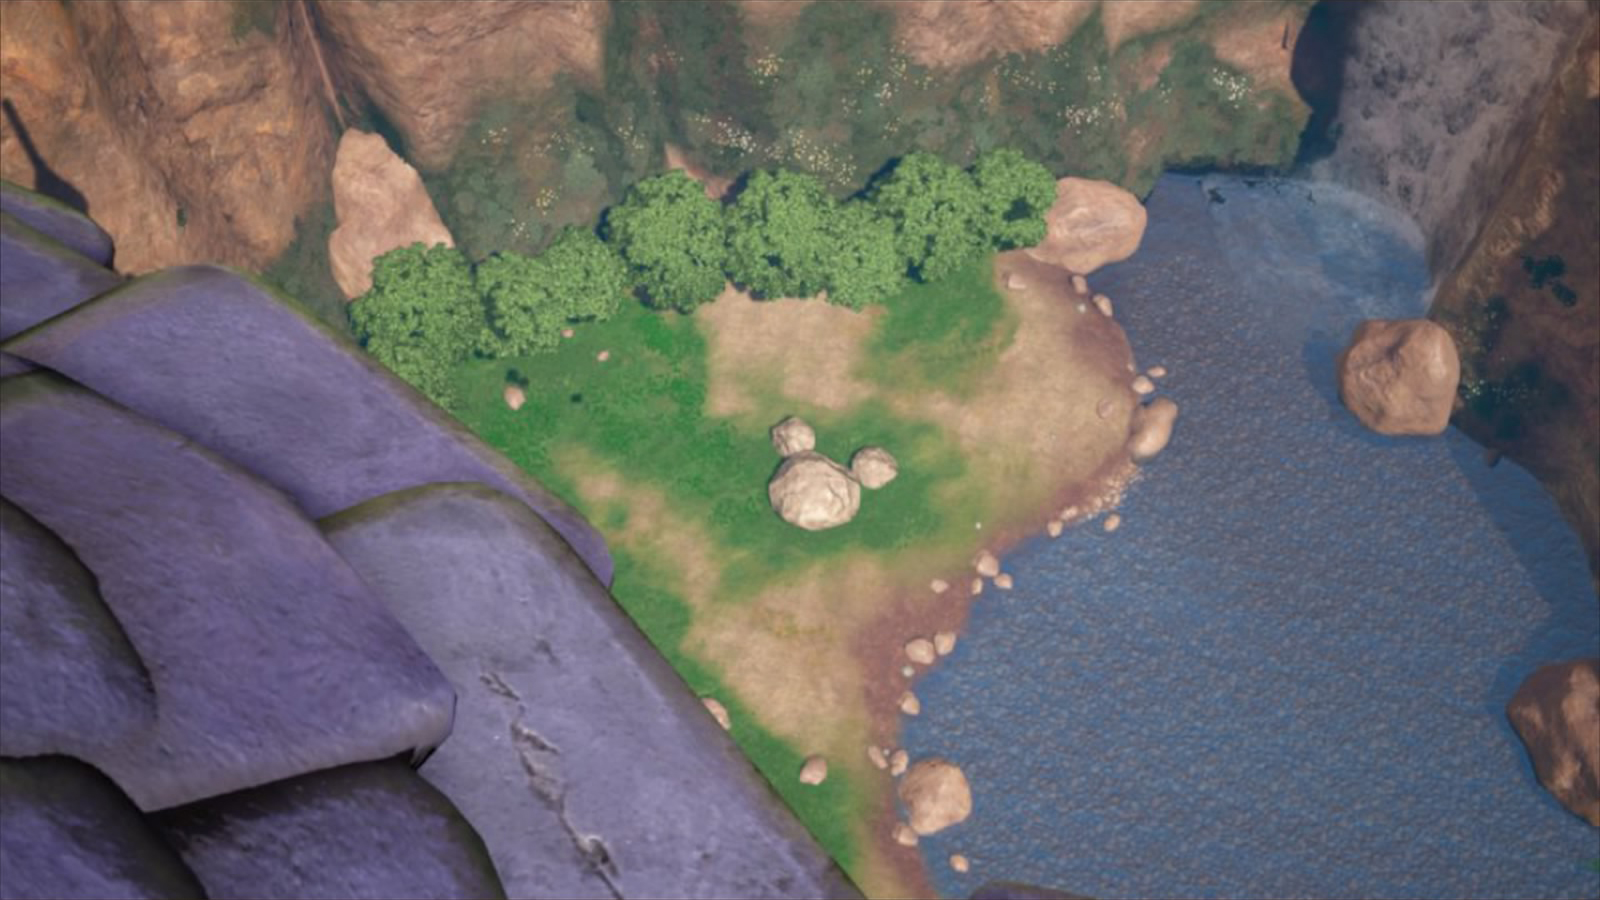 | The Forest / Tower | From the Forest / Tower Save Point, climb the tower and look down towards the waterfall. |
| #2 | 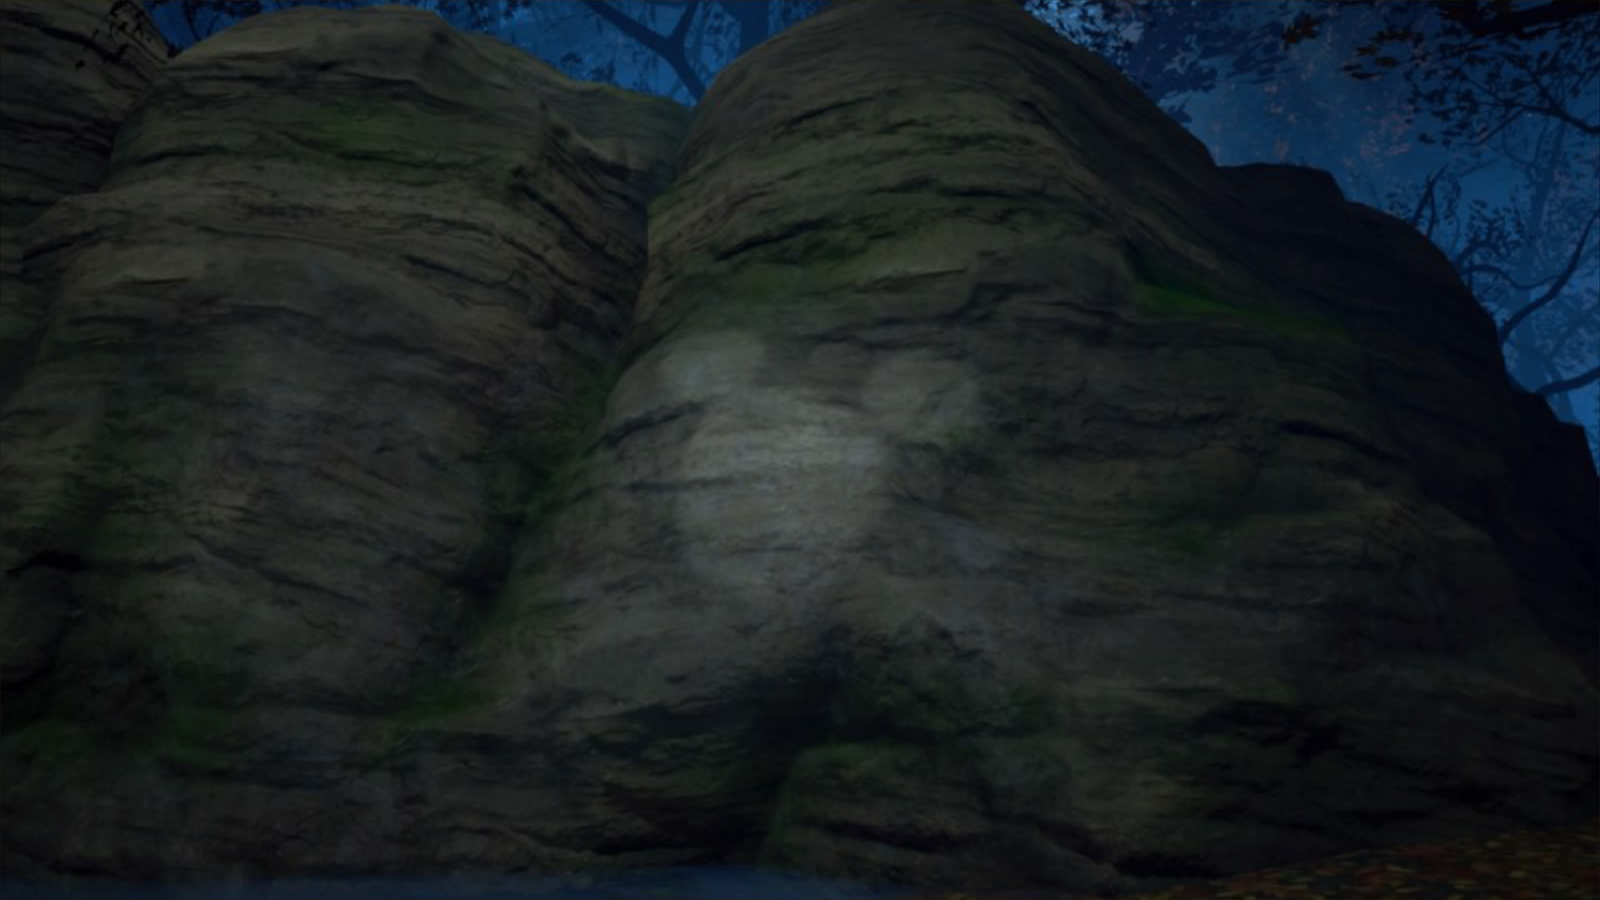 | The Forest / Marsh | From the Forest / Marsh Save Point, follow the wall on your right until you find a nook. The Emblem is on the wall, between two trees. |
| #3 | 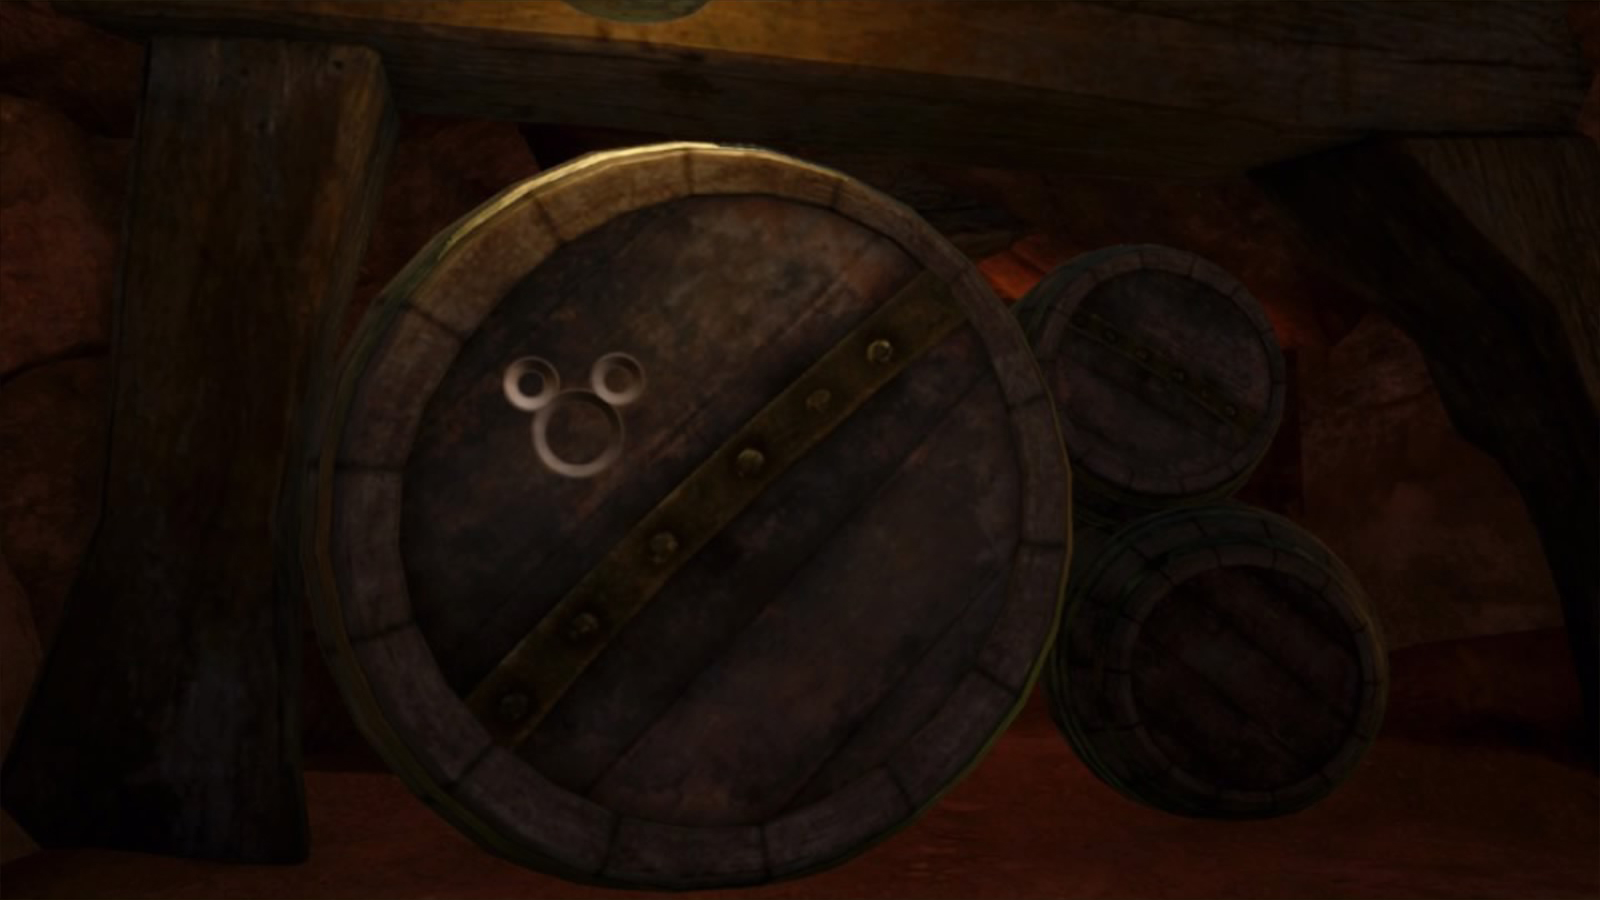 | The Forest / Wetlands | From the Forest / Wildflower Clearing Save Point, go west, jump down towards the cave and climb the wall to enter it. Go down and you'll find the Emblem on a huge barrel. |
| #4 | 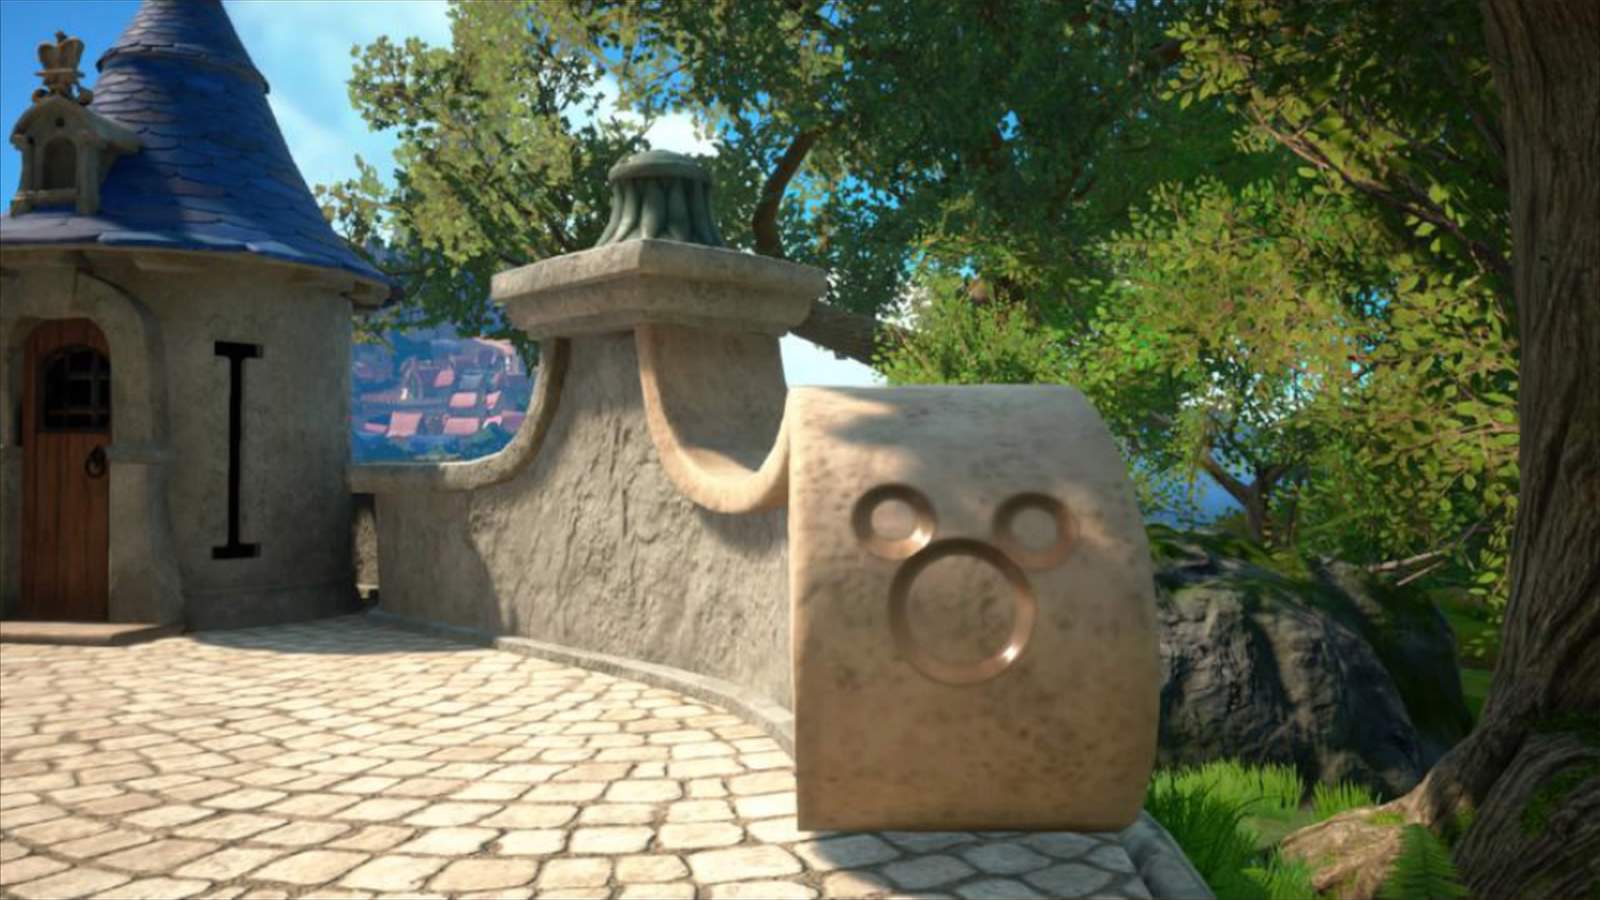 | The Forest / Shore | From the Kingdom / Thouroughfare Save Point, exit the town and look to your left. |
| #5 | 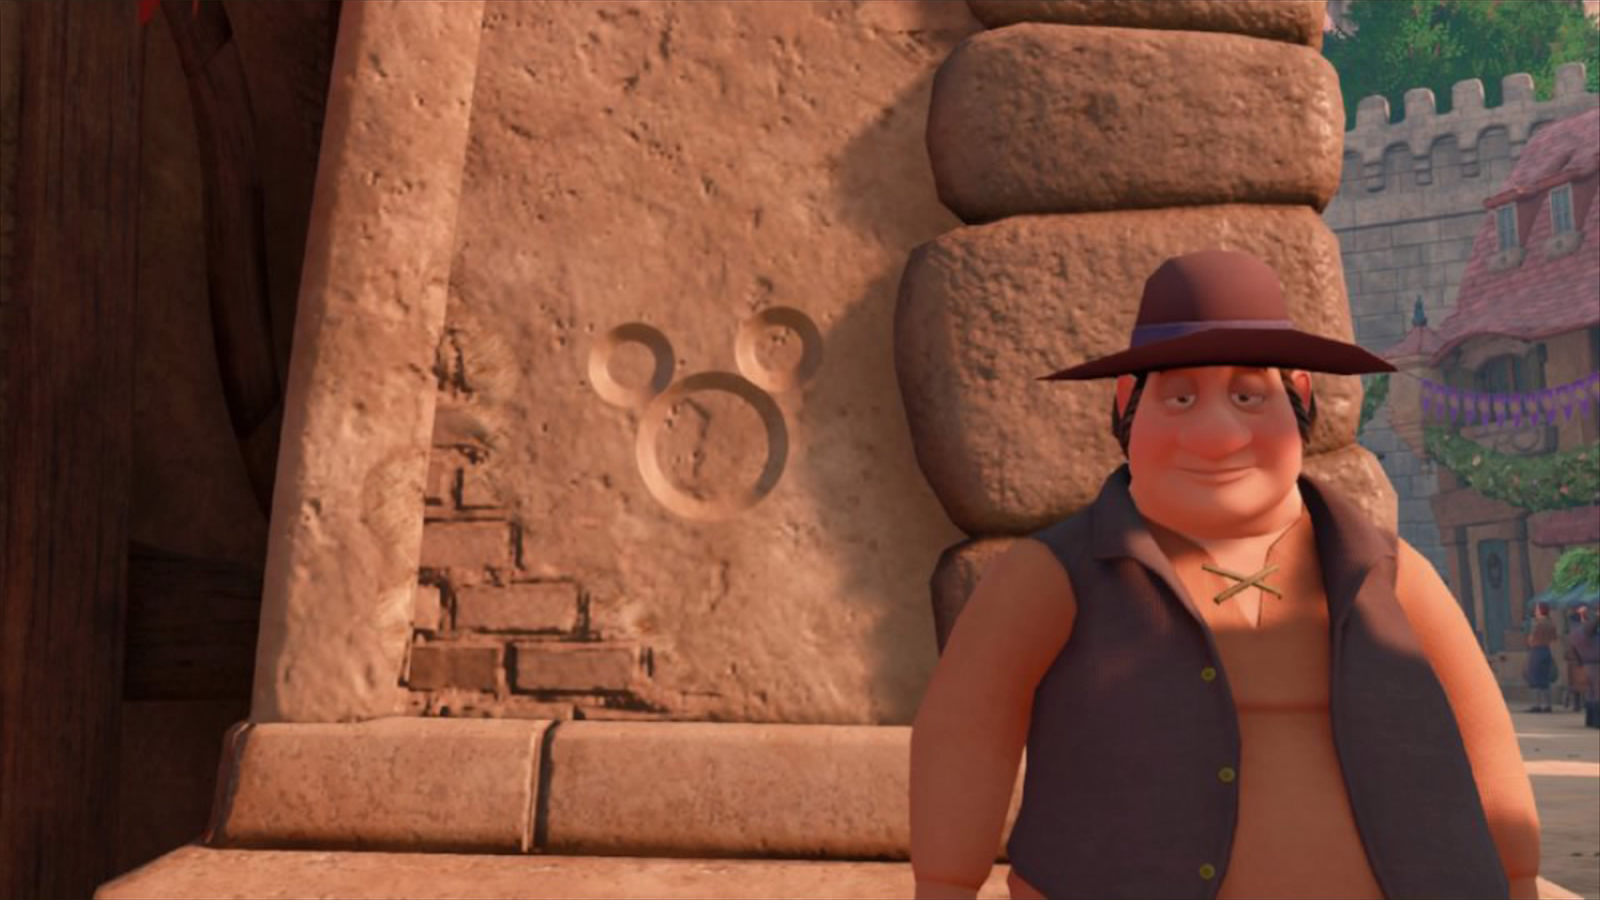 | The Kingdom / Thouroughfare | From the Kingdom / Thouroughfare Save Point, continue until the next arch where you'll find the Emblem on its left side. |
| #6 | 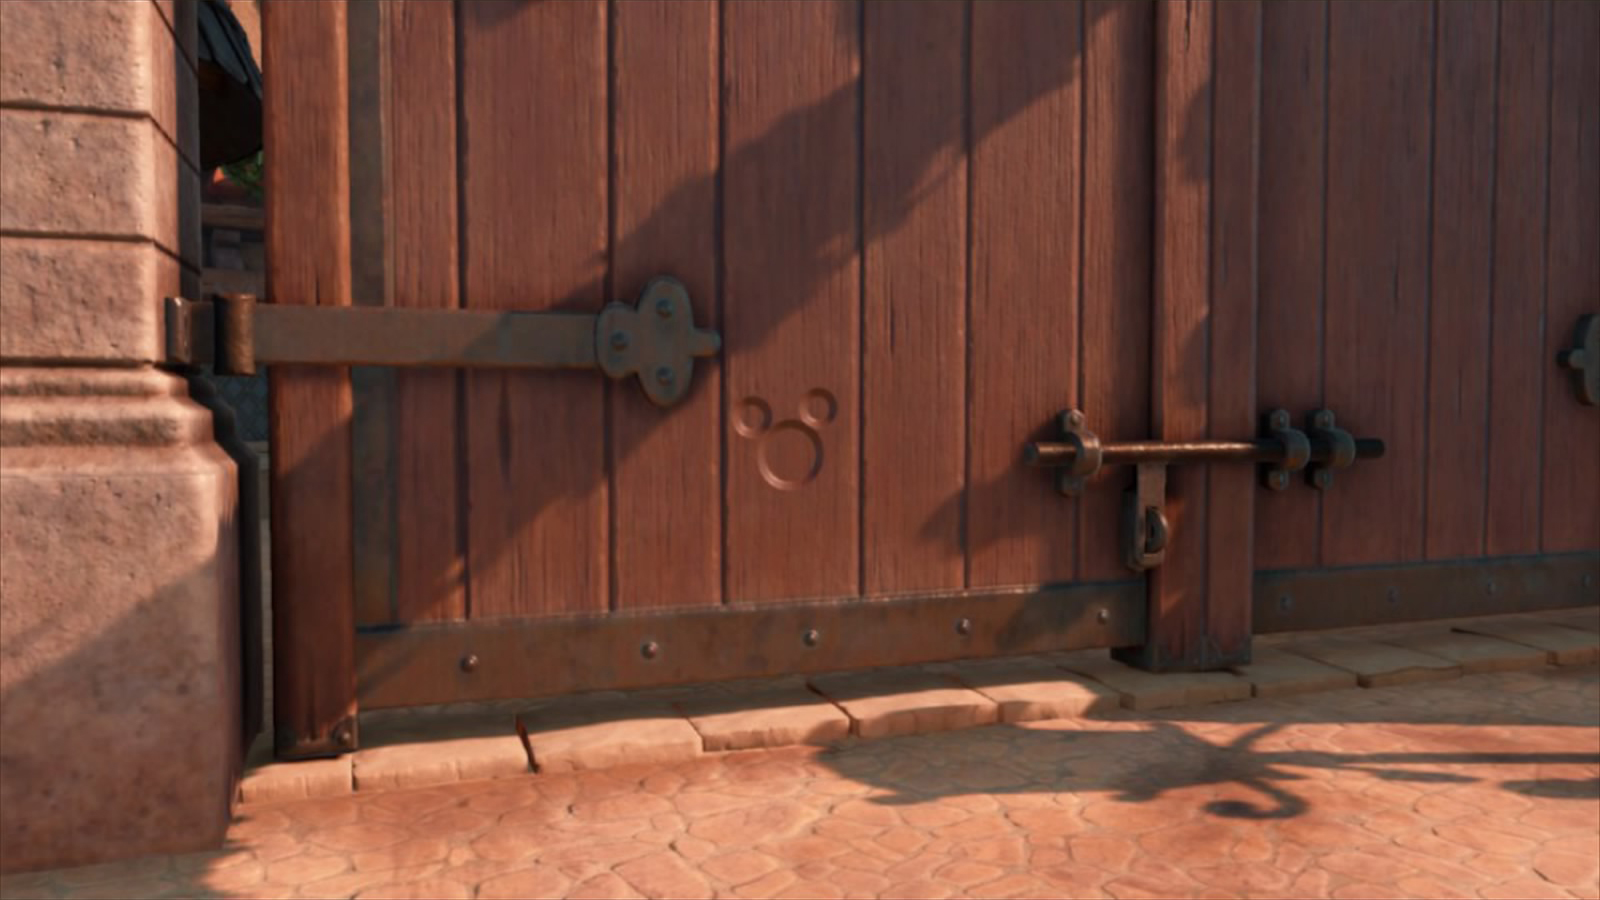 | The Kingdom / Thouroughfare | From #5, cross the Festival place and go left. The Emblem is on a wooden door on the right. |
| #7 | 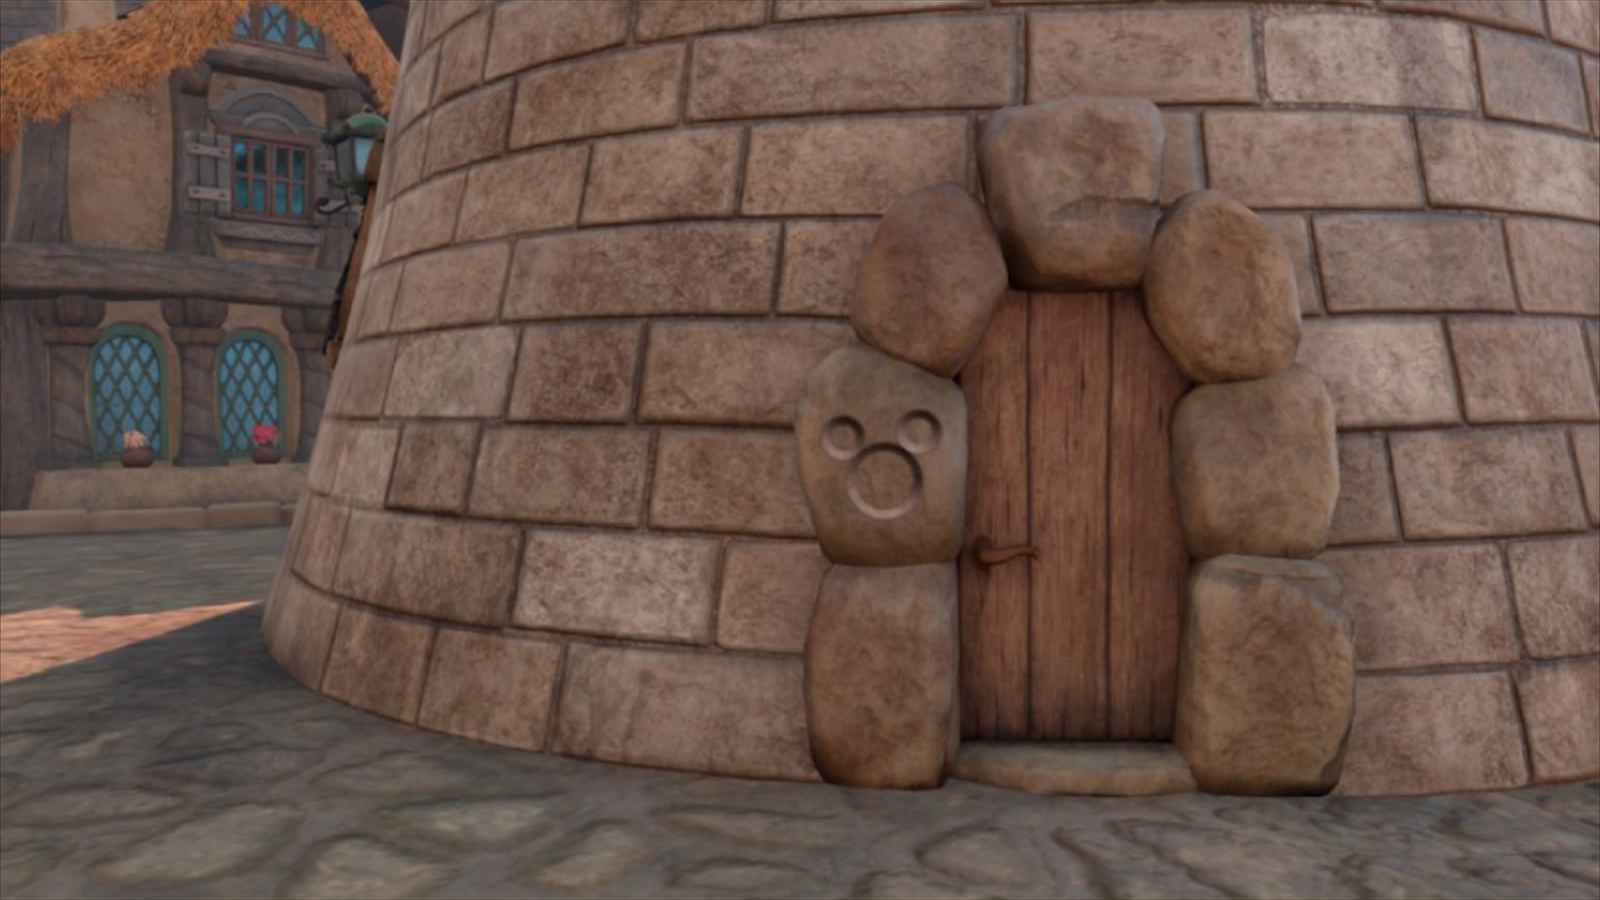 | The Kingdom / Thouroughfare | From #8, continue towards the center of the city. When you see a small tower, go around it to find the Emblem on the doorframe. |
| #8 | 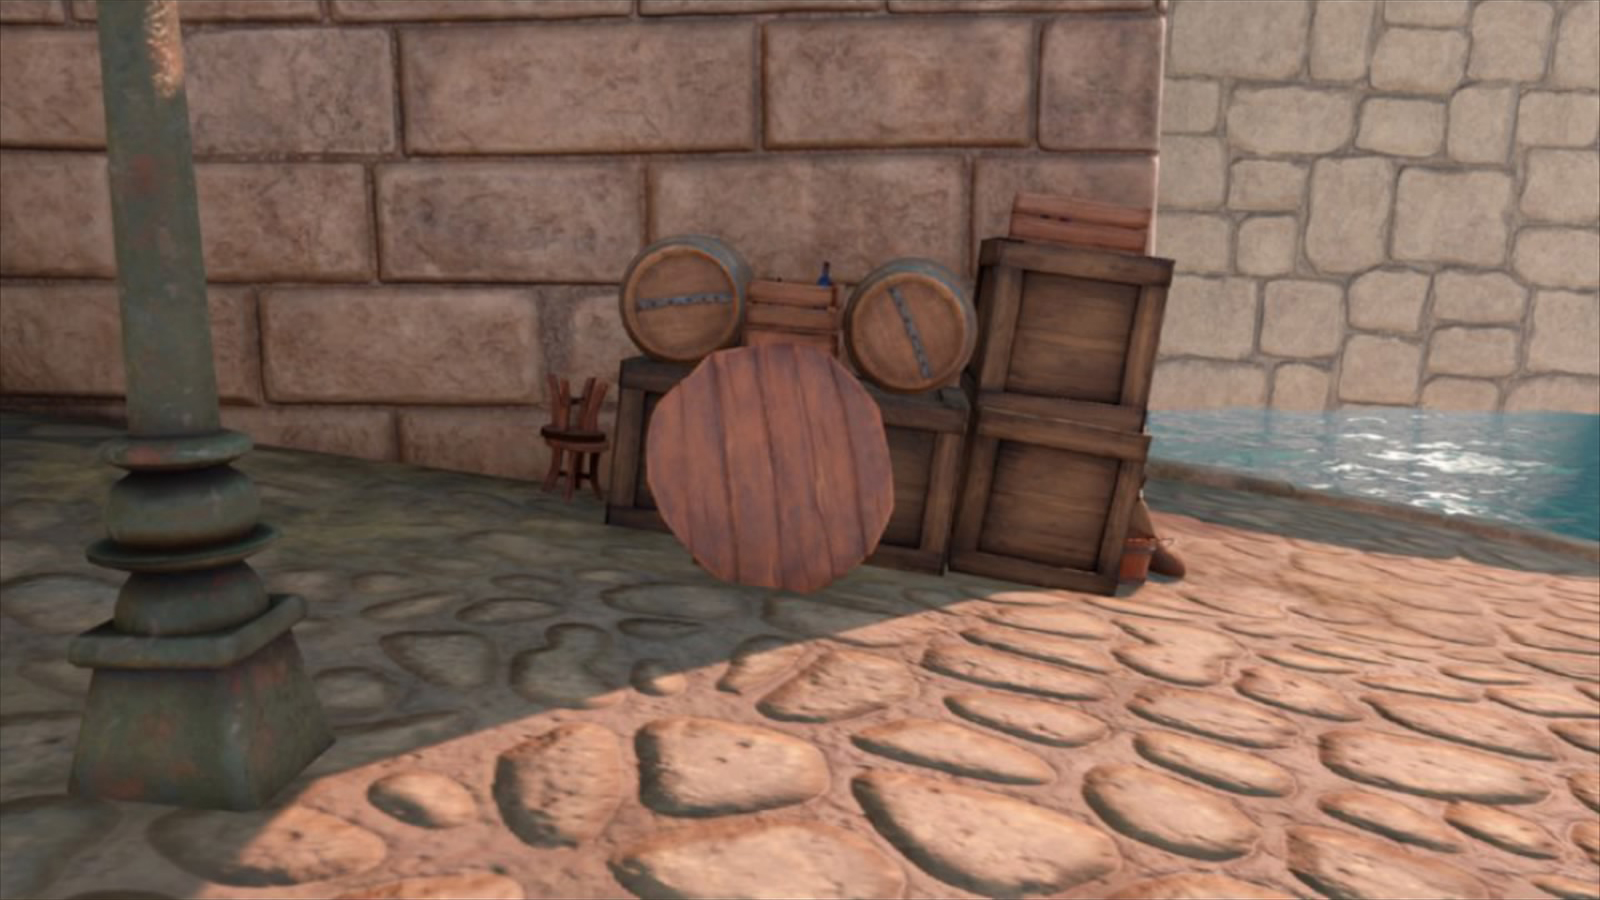 | The Kingdom / Thouroughfare | From the Kingdom / Thouroughfare Save Point, go to your left, then down the stairs. Check the pile of crates on the left. The Emblem is make of two barrels and a table. |
| #9 | 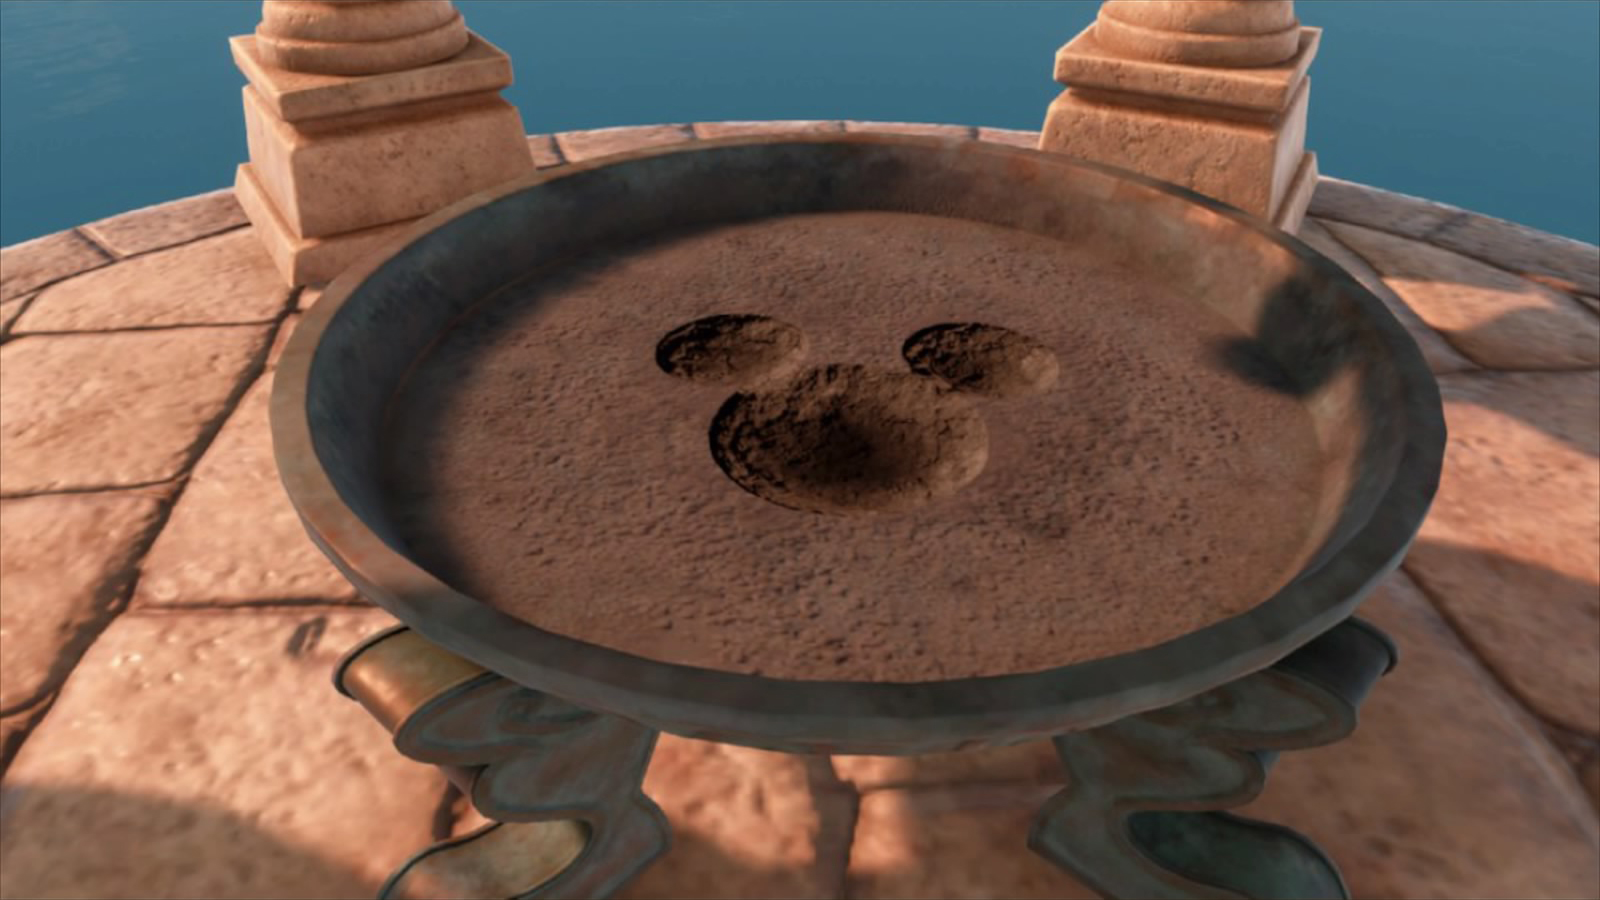 | The Kingdom / Thouroughfare | From #7, either swim or walk towards the lighthouse and climb it. The Emblem is in the dirt at the top. |
Monstropolis
| Number | Picture | Location | How to find it |
|---|---|---|---|
| #1 | 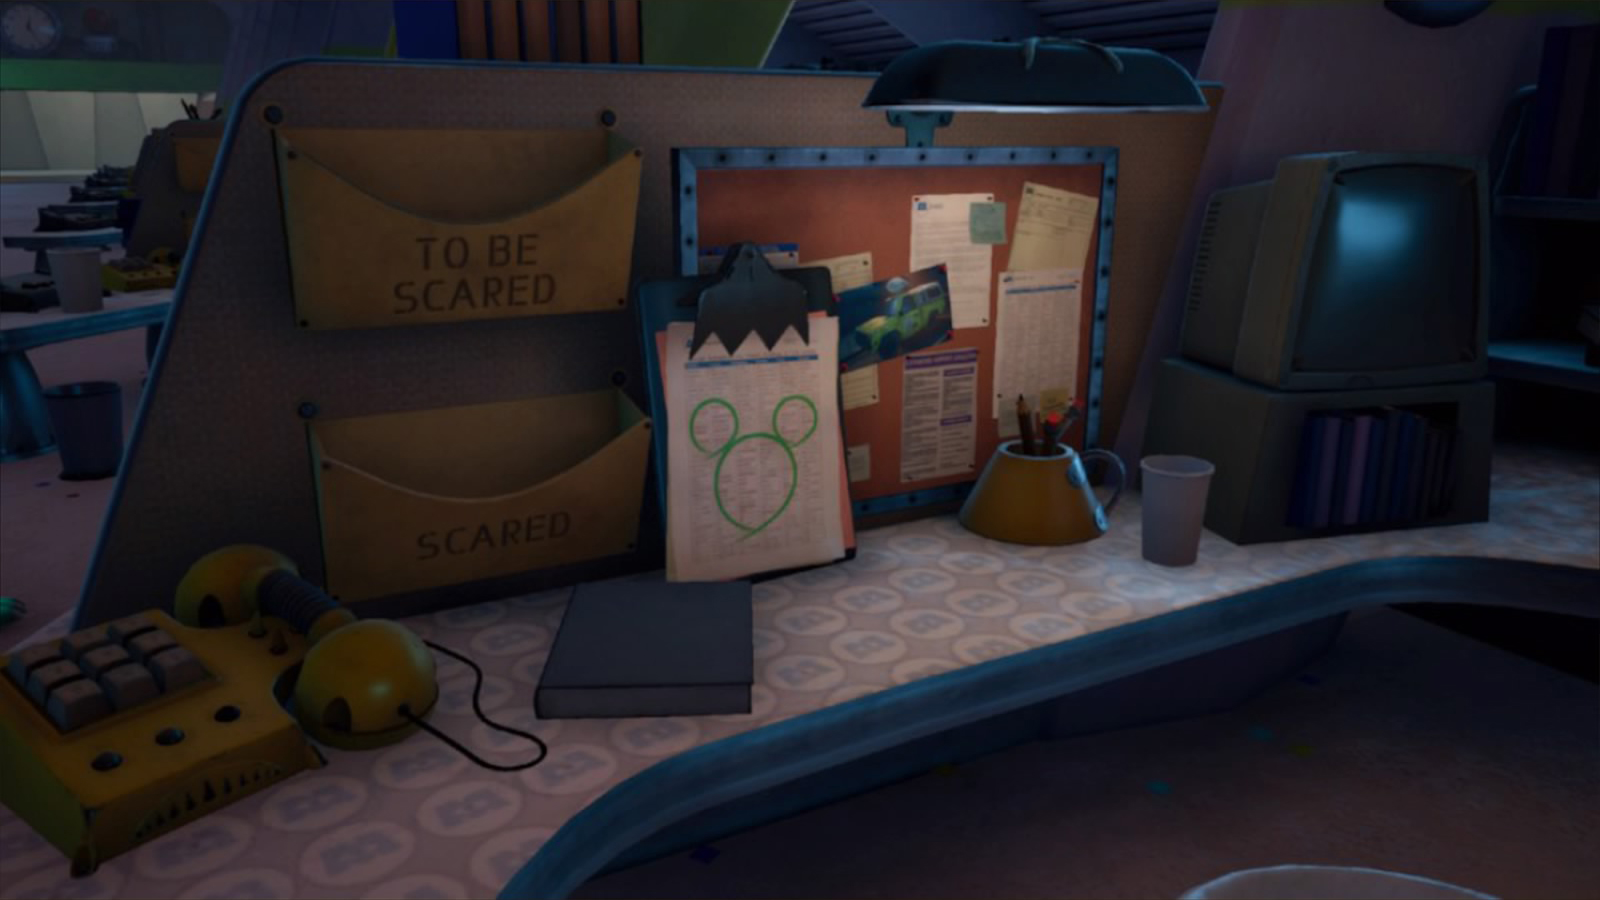 | Monsters, Inc. / Laugh Floor | From the Monsters, Inc. / Lobby & Offices Save Point, go right then left until you reach the Laugh Floor. The Emblem is on the 7th desk to the left. |
| #2 |  | Monsters, Inc. / Laugh Floor | In the same room as #1, push the round giant clown to reveal the Emblem on the floor. |
| #3 | 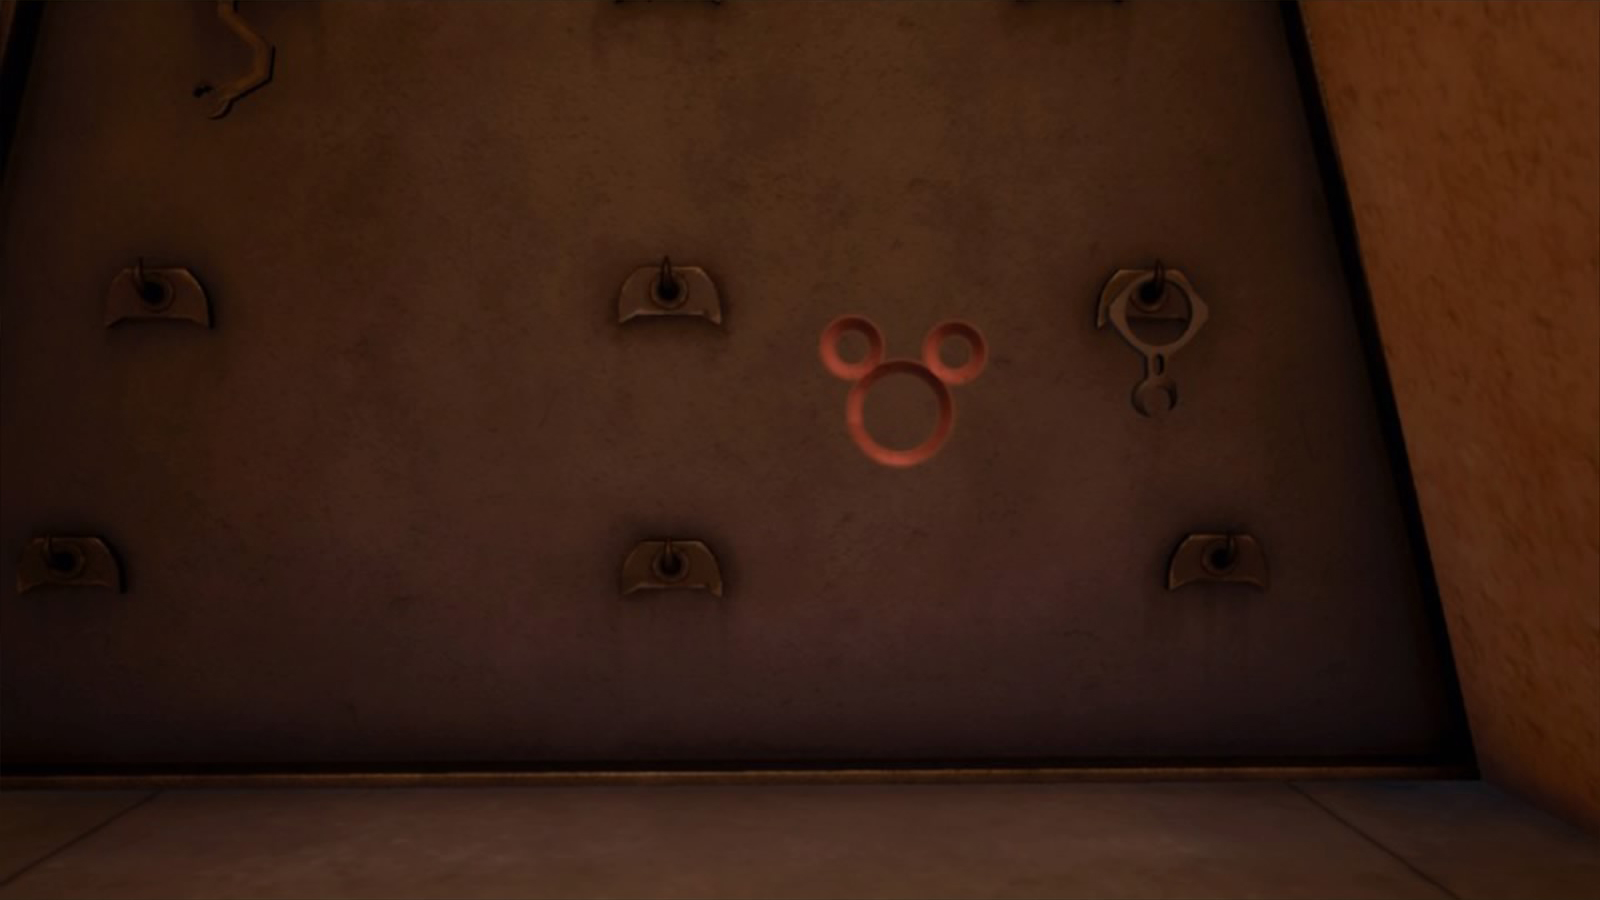 | The Door Vault / Upper Level | From the Door Vault / Upper Level Save Point, glide on the rail then go to the right, at the end of the corridor. |
| #4 |  | The Door Vault / Upper Level | From #3, open the yellow door, then the door on the right. Turn around to find a Flantastic and the Emblem on the wall behind it. |
| #5 |  | The Factory / Ground Floor | From the Factory / Ground Floor Save Point, go through the corridor and after the room, check under the window. |
| #6 | 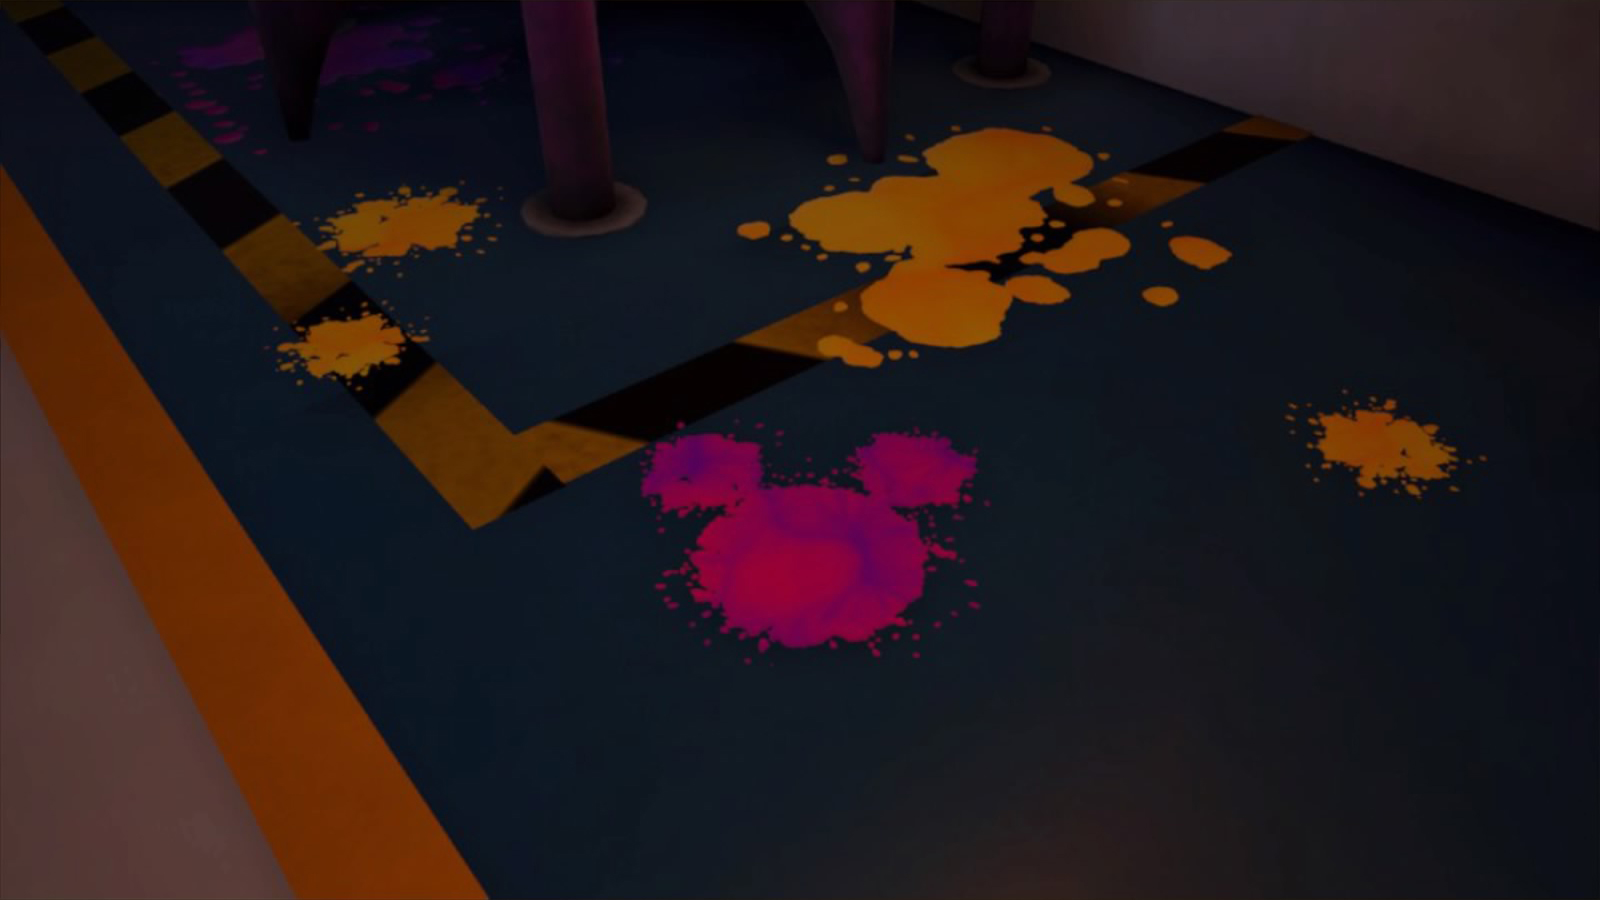 | The Factory / Ground Floor | From the Factory / Ground Floor Save Point, check the paint stains on the floor right in front of the Painting Booth. |
| #7 |  | The Factory / Second Floor | From the Factory / Ground Floor Save Point, take the elevator, then follow the only available path. At some point, you'll see a stair to your right. Ignore it and continue. There, you'll see railings coming through an opening with steam, and the Emblem is right next to it. |
| #8 | 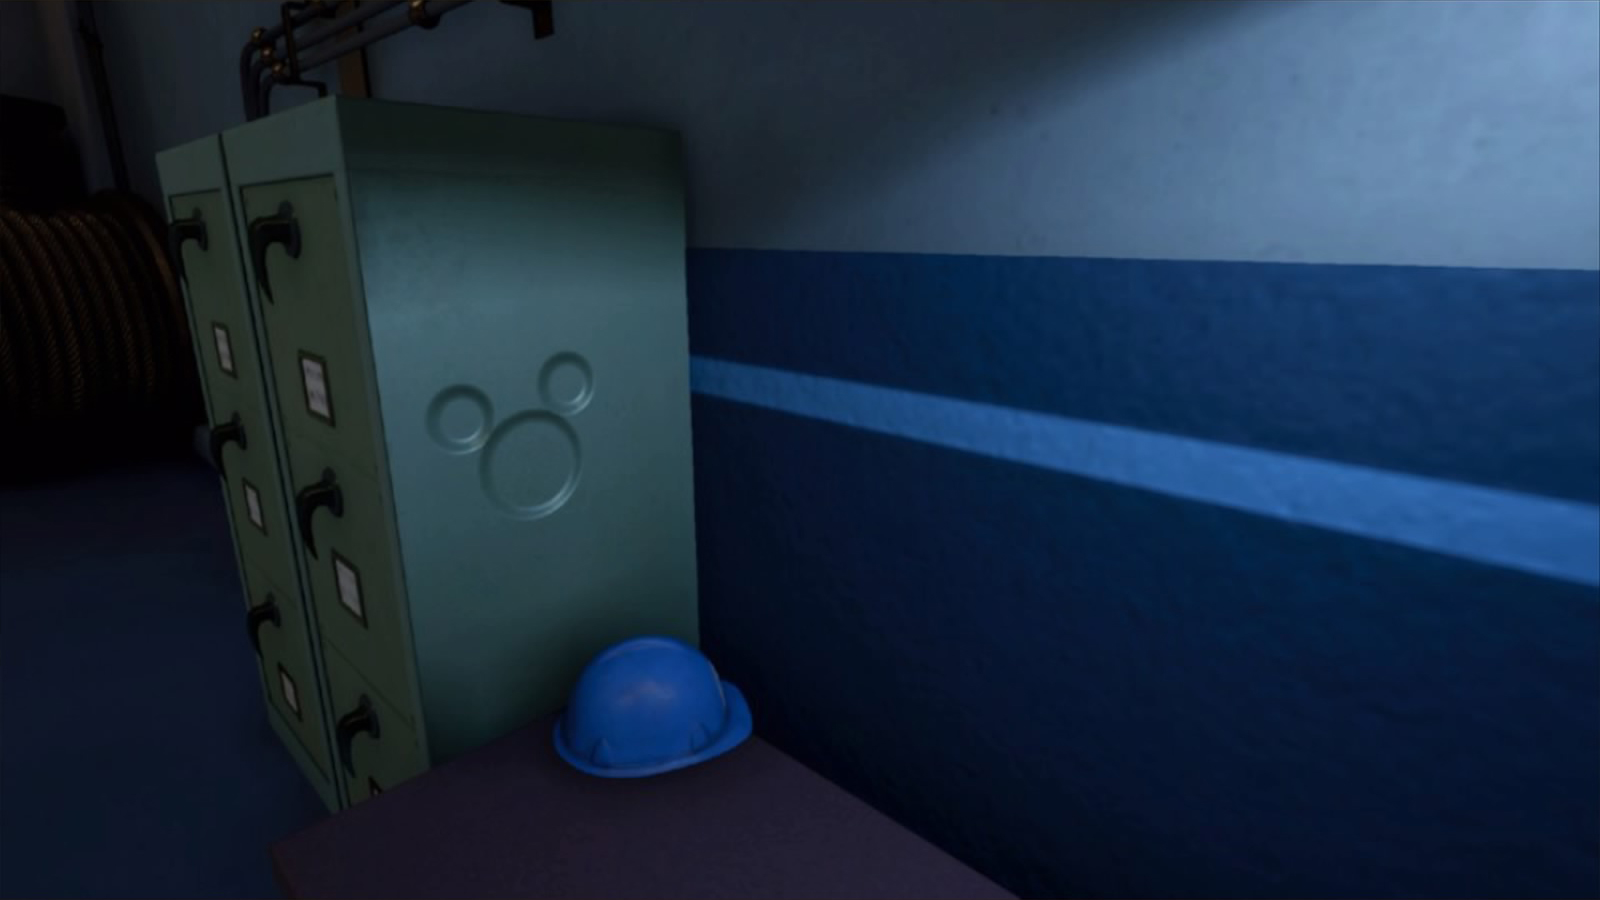 | The Power Plant / Accessway | Check the desk near the The Power Plant / Accessway Save Point. |
| #9 | 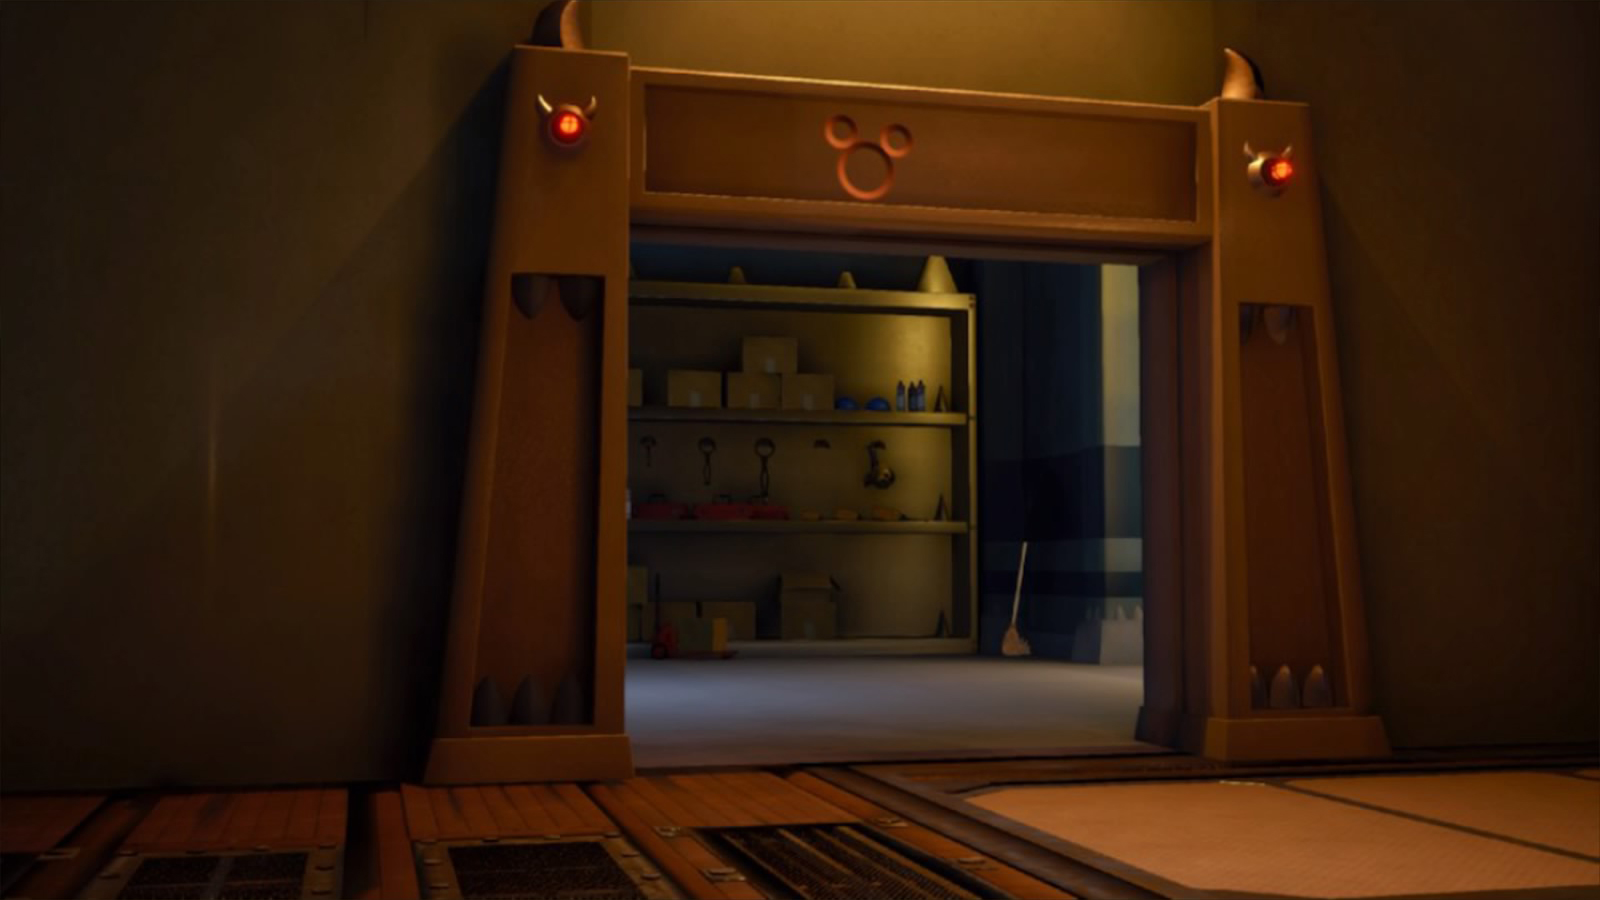 | The Power Plant / Accessway | From the Powerplant / Accessway Save Point, follow the red brick corridor. At the end of the second corridor leading to a room, go outside, turn around and check above the door. |
| #10 | 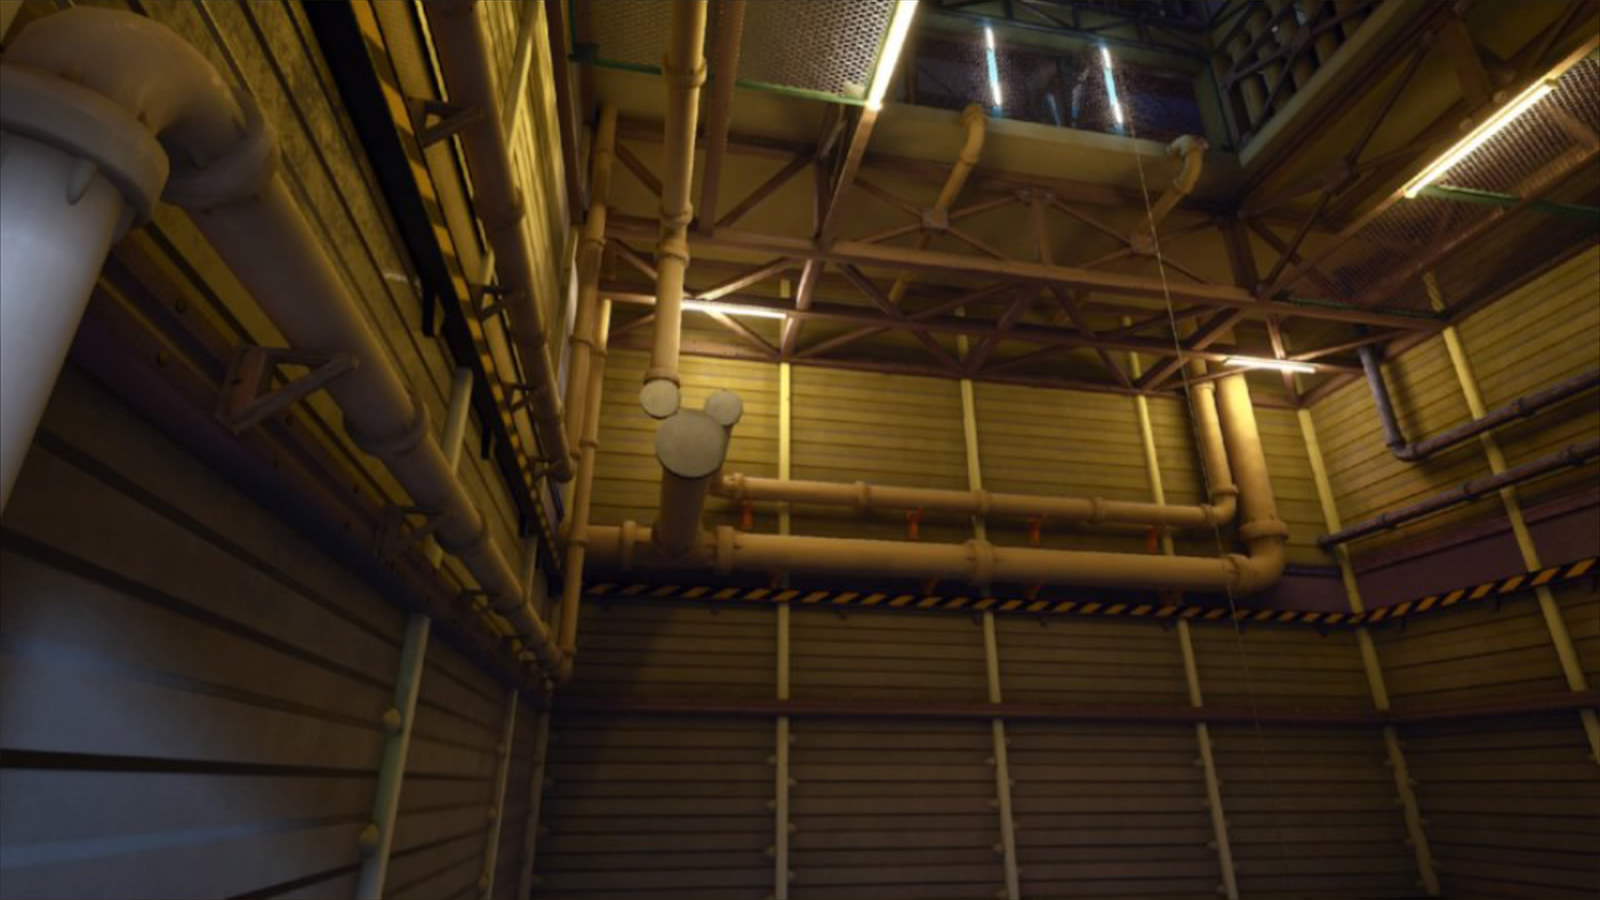 | The Power Plant / Tank Yard | From the Power Plant / Tank Yard, climb the blue crates opposite to the Save Point and jump on the yellow platform. Above the Save Point is the Emblem. |
| #11 | 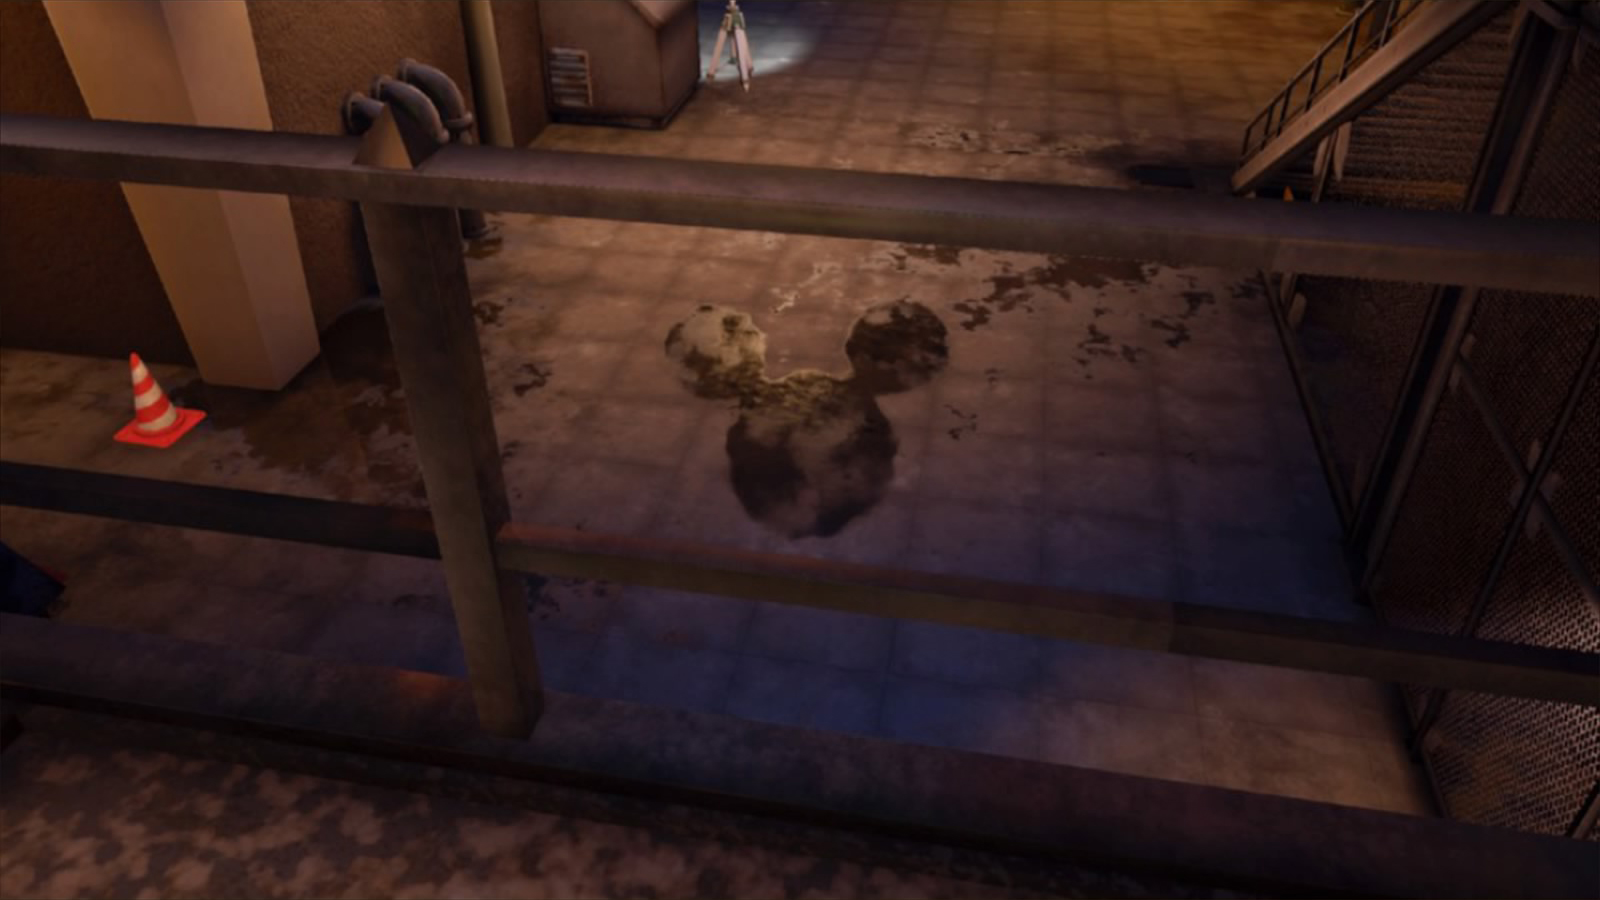 | xxx / xxx | From the Power Plant / Tank Yard Save Point, go through the door, ride the pipe, then up the stairs. Look down towards where you came from. The Emblem is made of water on the ground. |
Arendelle
| Number | Picture | Location | How to find it |
|---|---|---|---|
| #1 | 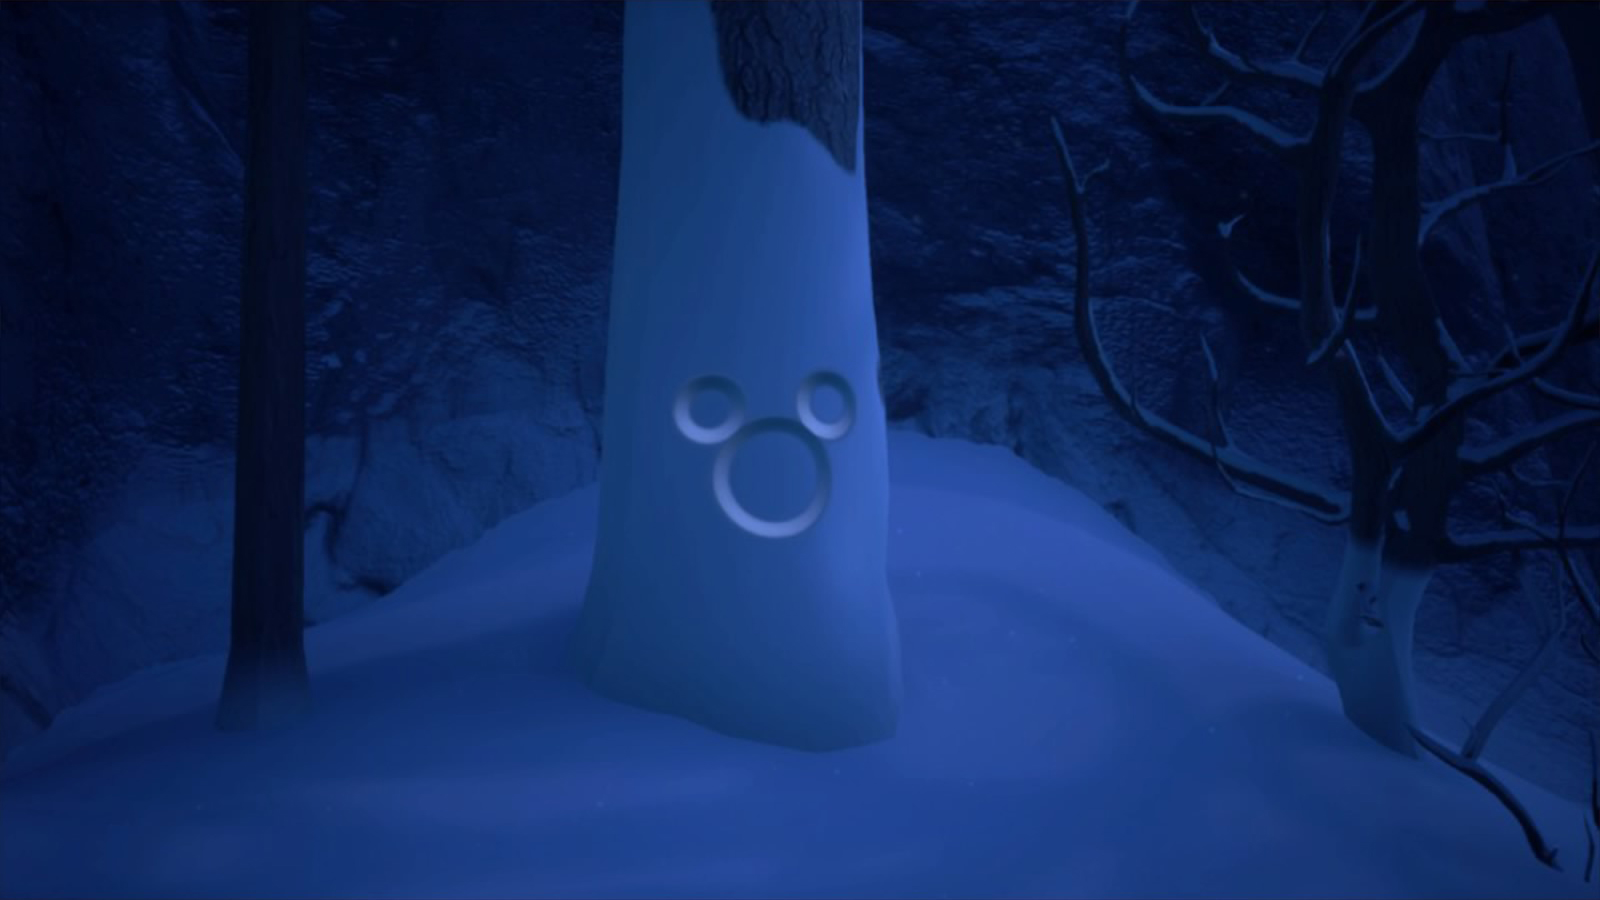 | The North Mountain / Treescape | From The North Mountain / Gorge Save Point, go southwest and fall down the cliff. At the end of the platform, you'll find a tree with the Emblem on it. |
| #2 | 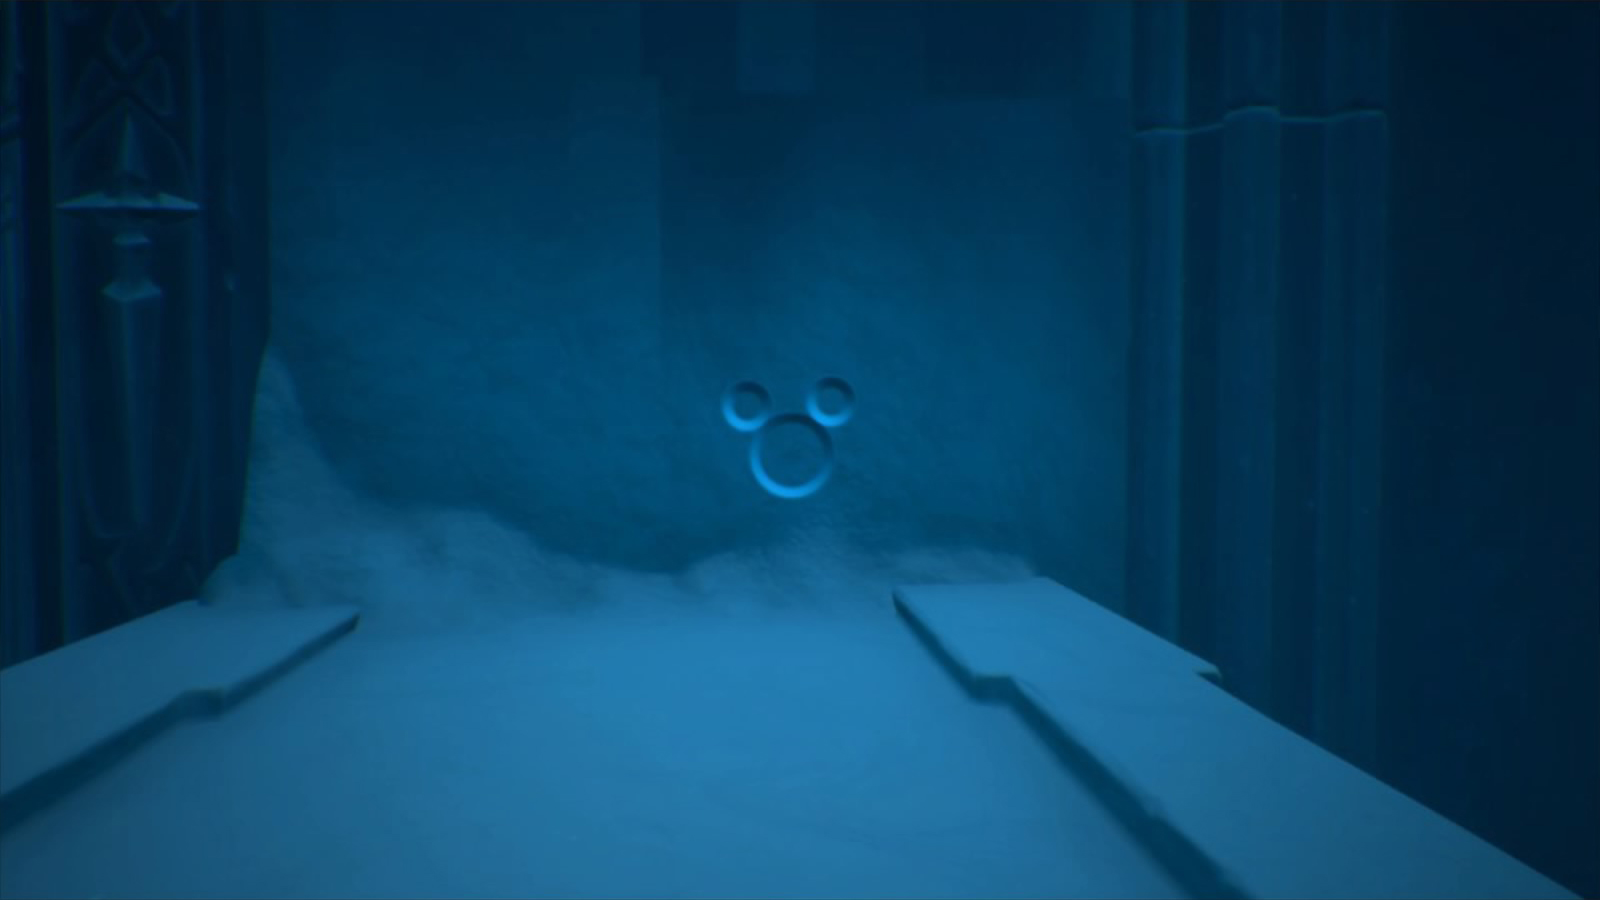 | The Labyrinth of Ice / Middle Tier | From the North Mountain / Gorge Save Point, use the portal to go inside the Labyrinth. Use Flowmotion on the pillar to go to the Middle Tier. Follow the corridor until you reach the first breakable wall. Break it, go up the natural steps on the left and check at the end of the 'bridge' to find the Emblem. |
| #3 | 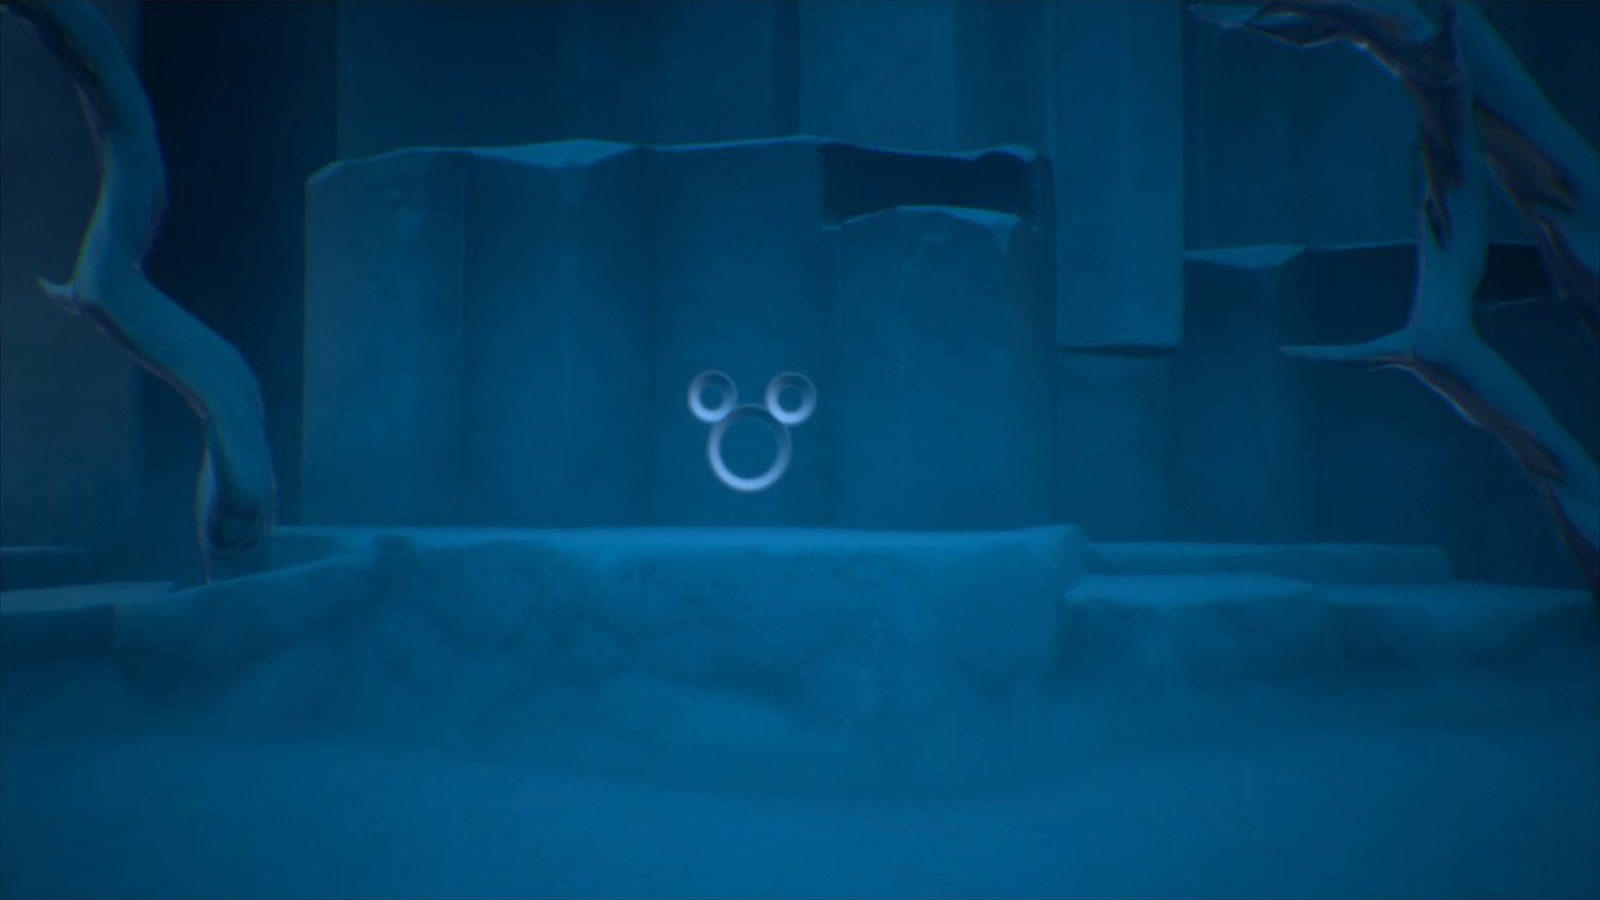 | The Labyrinth of Ice / Lower Tier | From The Labyrinth of Ice / Lower Tier Save Point, go through the door next to the Moogle Shop and right in front of you is the Emblem. |
| #4 | 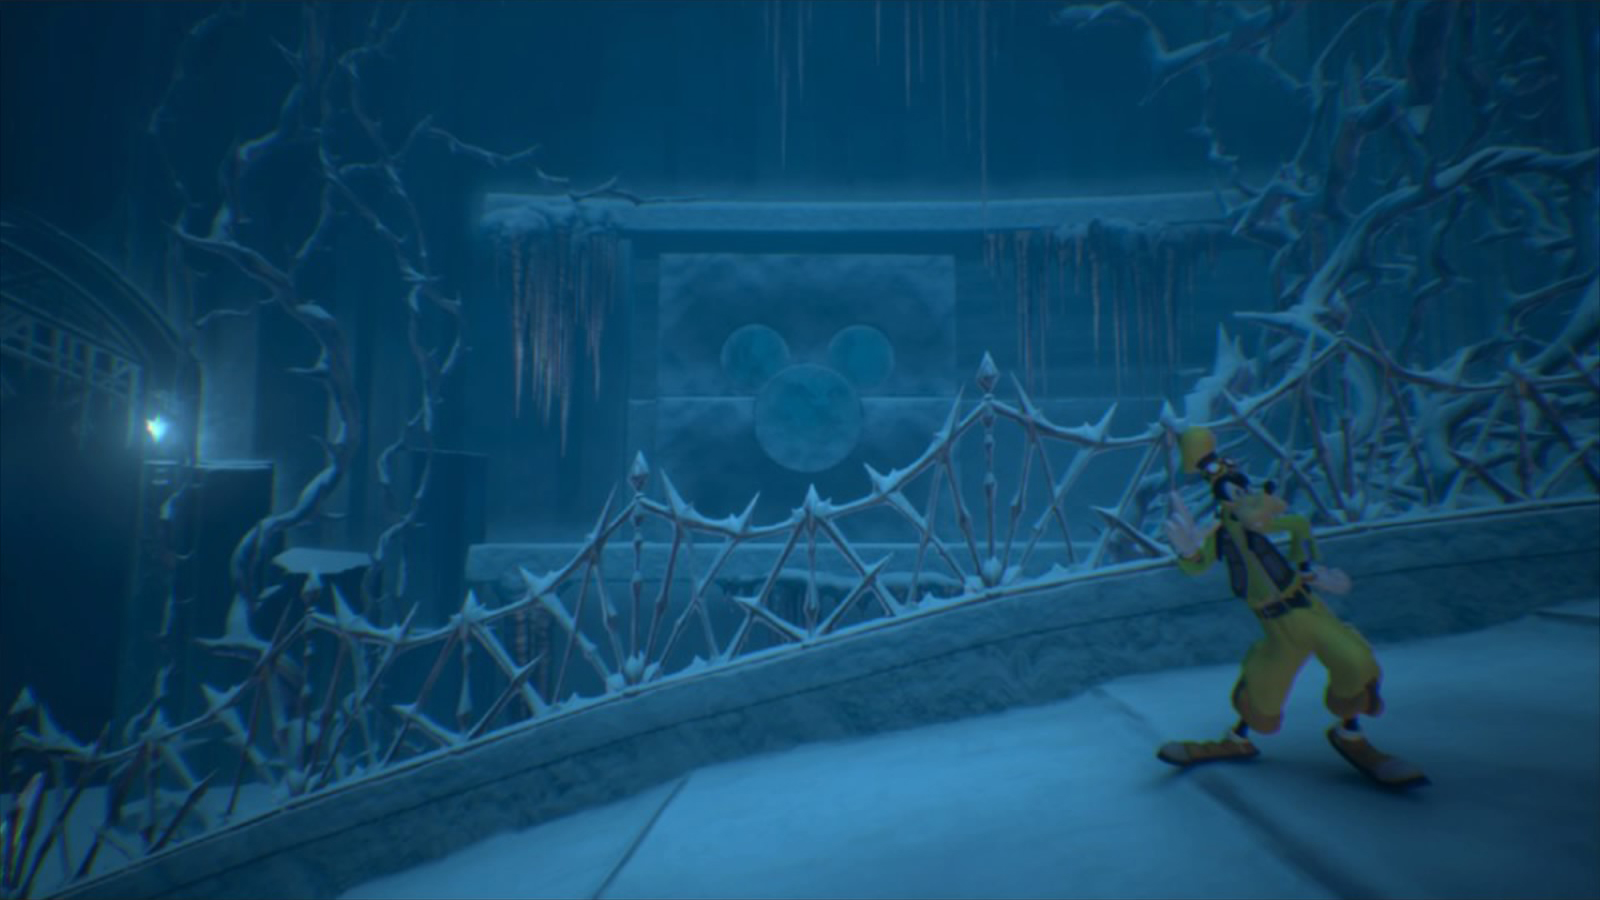 | The Labyrinth of Ice / Middle Tier | From The Labyrinth of Ice / Lower Tier Save Point, go up the huge wall of ice using Flowmotion. Go towards the bridge and check the wall on its left to find the Emblem. |
| #5 | 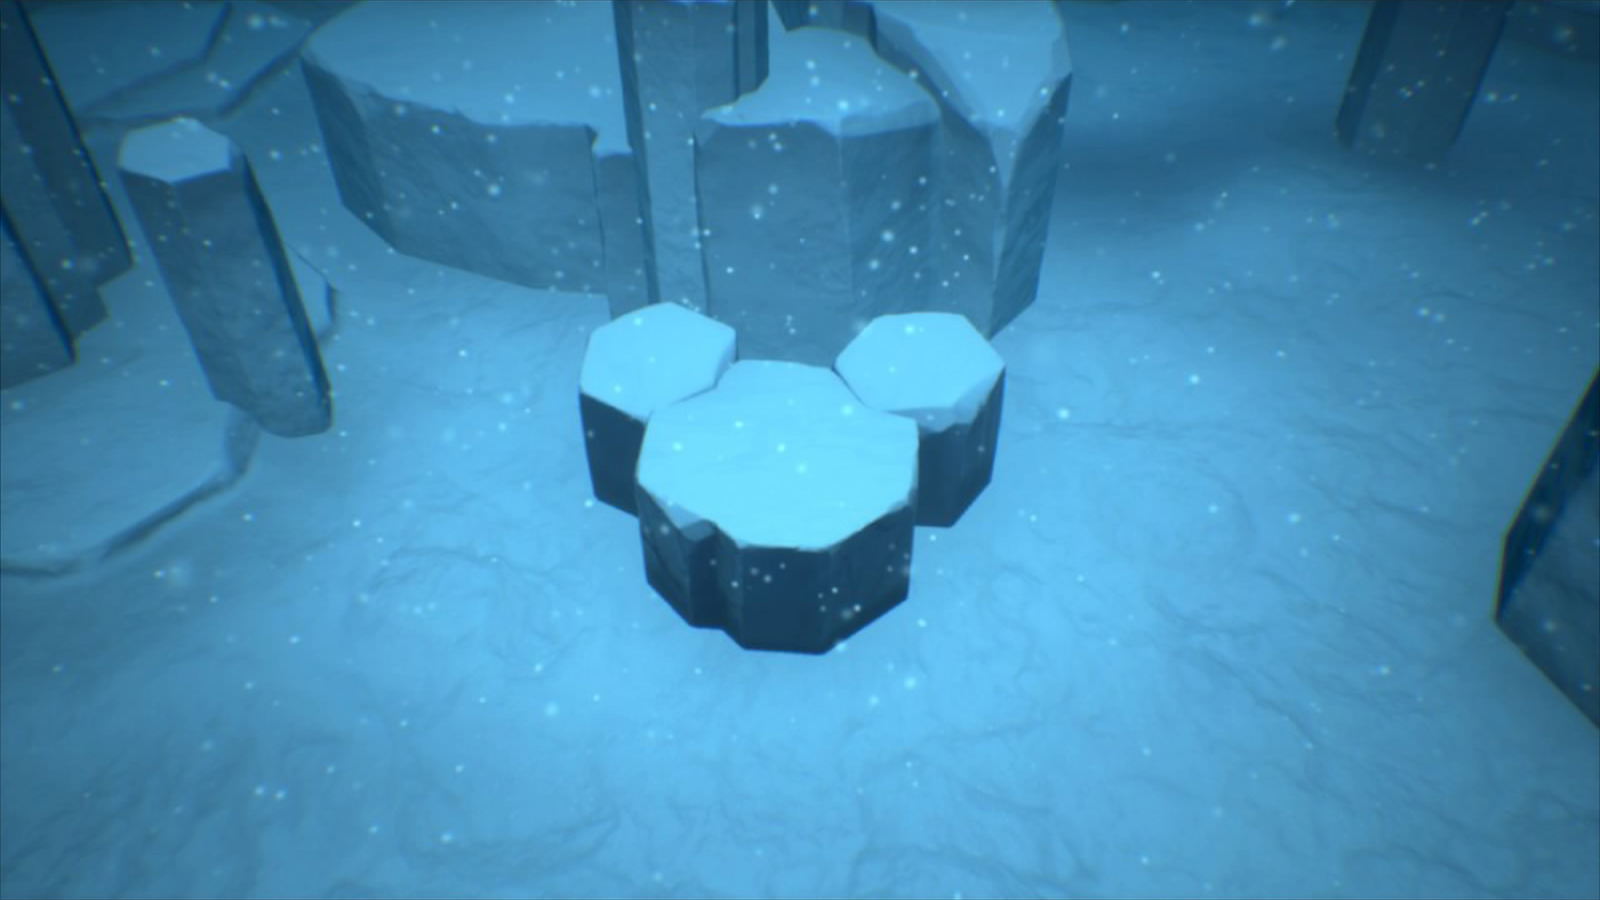 | The Labyrinth of Ice / Upper Tier | From the North Mountain / Gorge Save Point, use the portal to go inside the Labyrinth. Exit the room by using the rail, then ride the one to the northwest. Go up the platform and look down towards the north west to find the Emblem. |
| #6 |  | The North Mountain / Moutain Ridge | From the North Mountain / Moutain Ridge Save Point, go down the zigzag path until you find the Emblem engraved in stone. |
| #7 |  | The North Mountain / Frozen Wall | From #8, continue in that direction. Go down a bit and stick to the right wall, until you reach a point where you can climb it. Do it and walk towards the east until you see a slope. Fall down there, and you'll see the Emblem made of snow on the wall. |
| #8 | 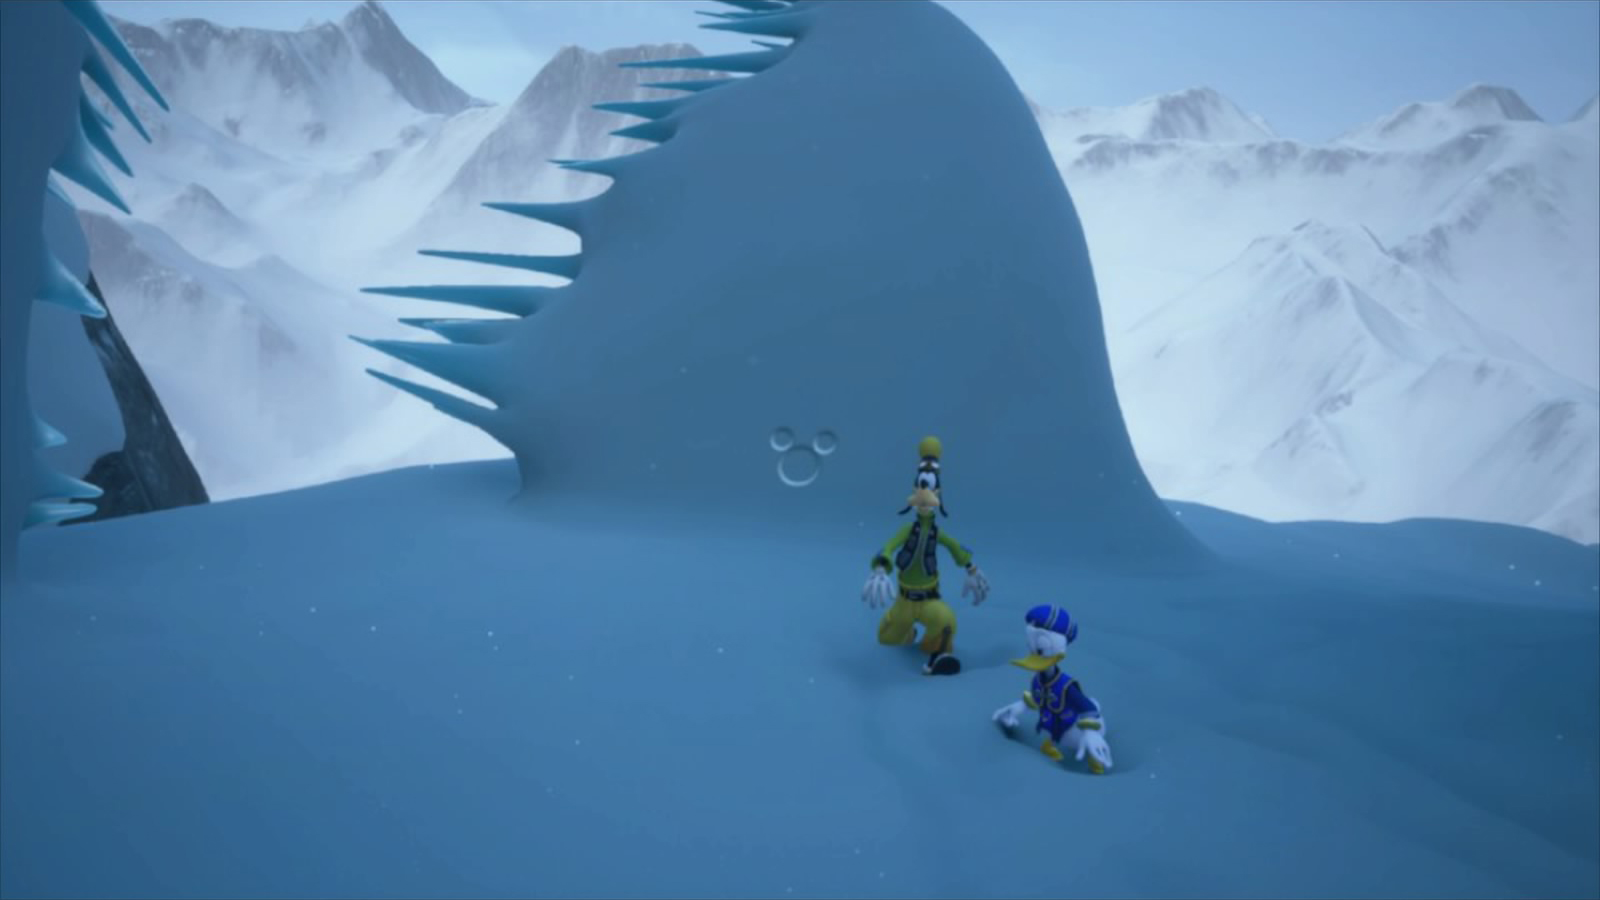 | The North Mountain / Frozen Wall | From the North Mountain / Moutain Ridge Save Point, go through the opening in the mountain and between the spiked ice until you find the Emblem. |
| #9 |  | The North Mountain / Snowfield | From the North Mountain / Snowfield Save Point, follow the path, fall down then climb up. Turn around and you'll see the Emblem carved in snow on a faraway platform. |
| #10 | 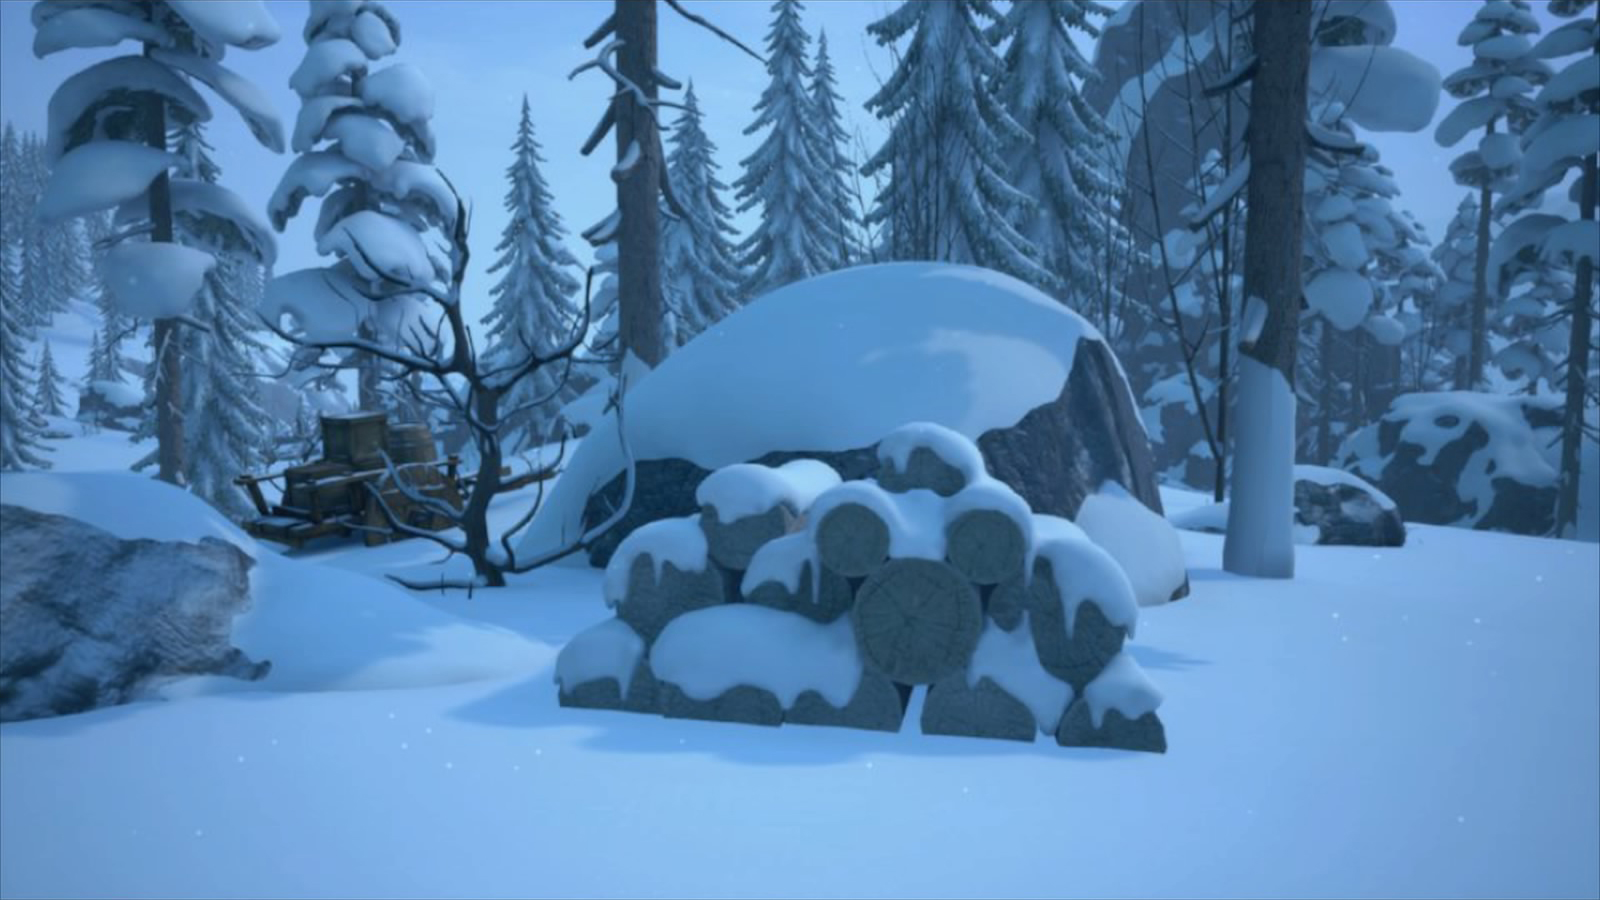 | The North Mountain / Foothills | From the North Mountain / Foothills Save Point, follow the path until you reach a larger area. There, search for a pile of wood behind a rock. The Emblem is made of three cut tree trunks. |
| #11 | 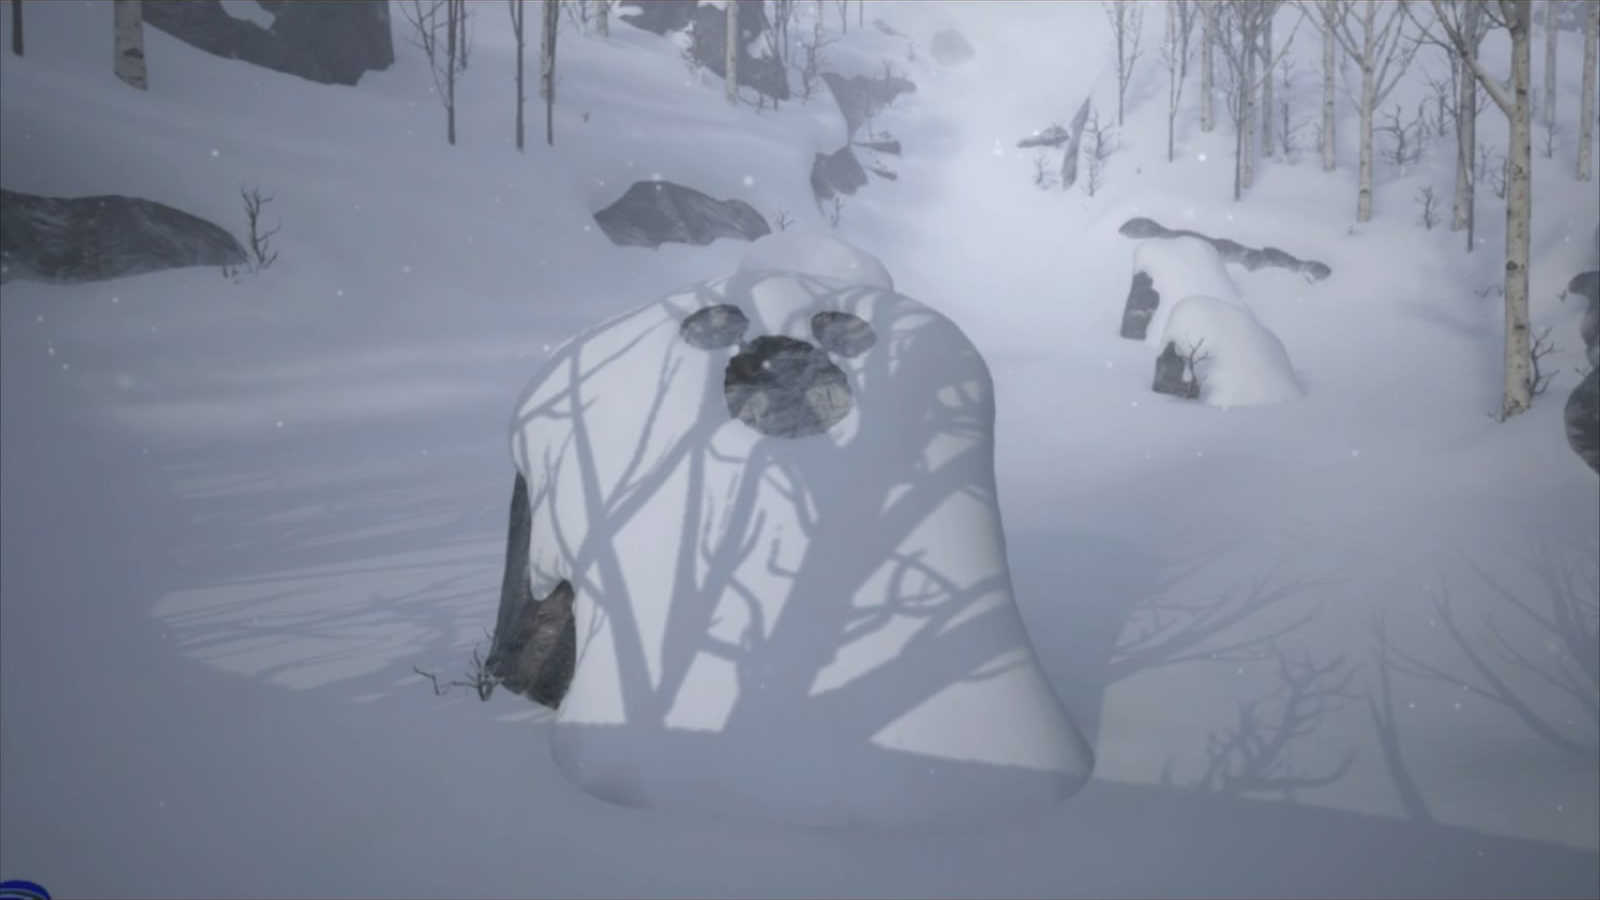 | The North Mountain / Foothills | From the North Mountain / Foothills Save Point, go to the next area and keep going forward. Check behind snowy rocks on your way as the Emblem is on one of them. |
100 Acre Wood
| Number | Picture | Location | How to find it |
|---|---|---|---|
| #1 | 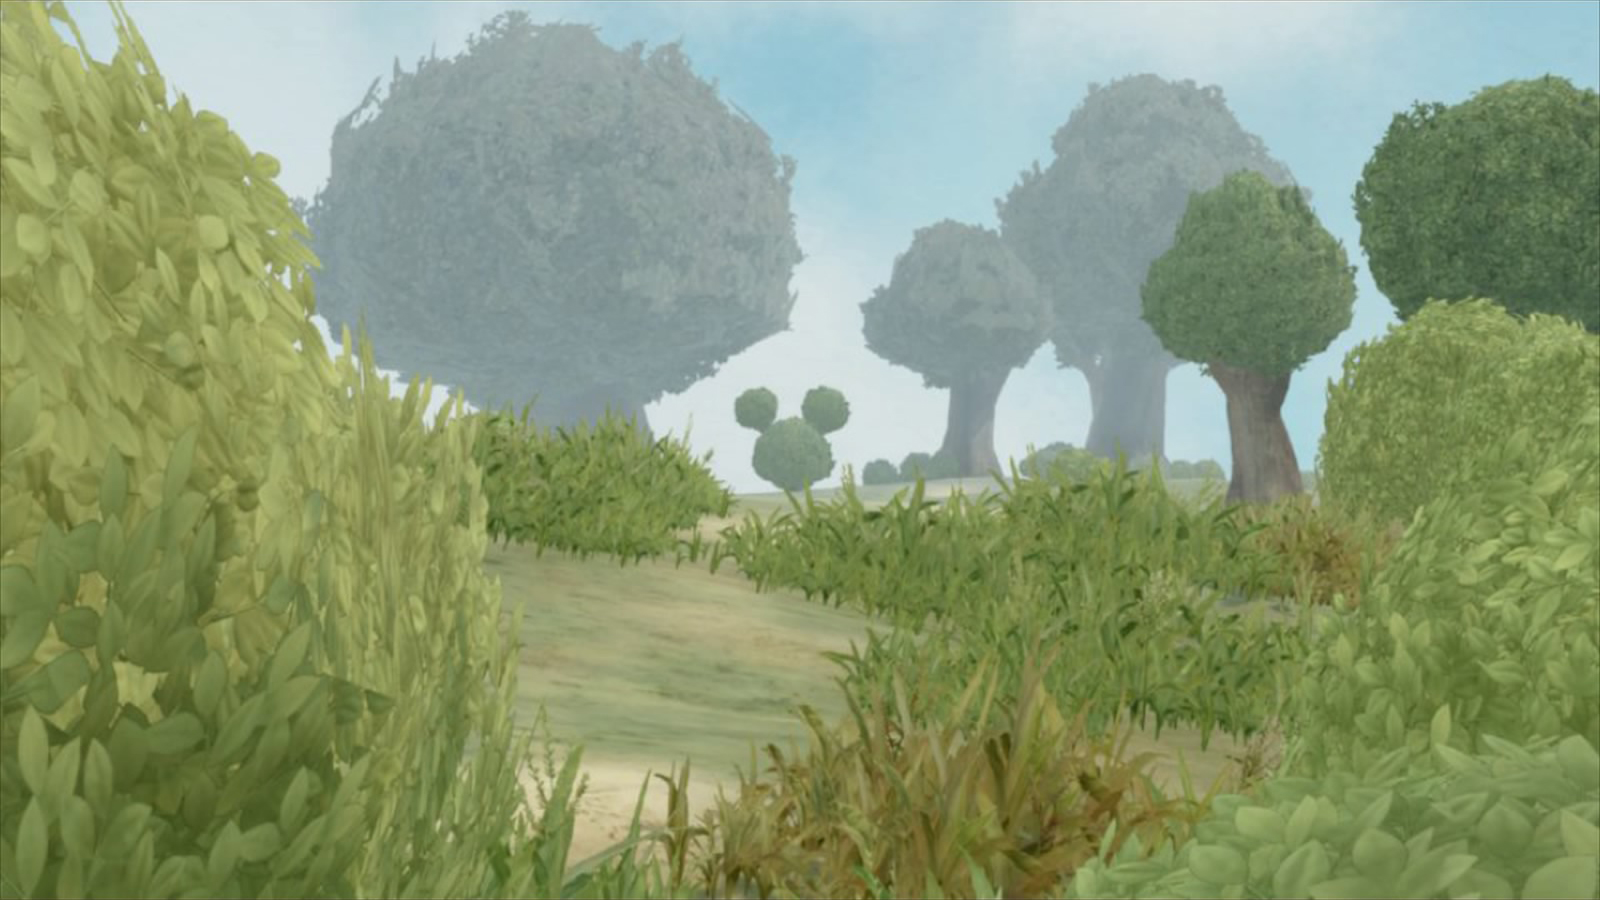 | Rabbit's House | Next to the Save Point is a tree with a beehive in it. Go between the tree and the flower patch and look far away for the Emblem. |
| #2 |  | Rabbit's House | Check behind the giant pumpkin. |
| #3 | 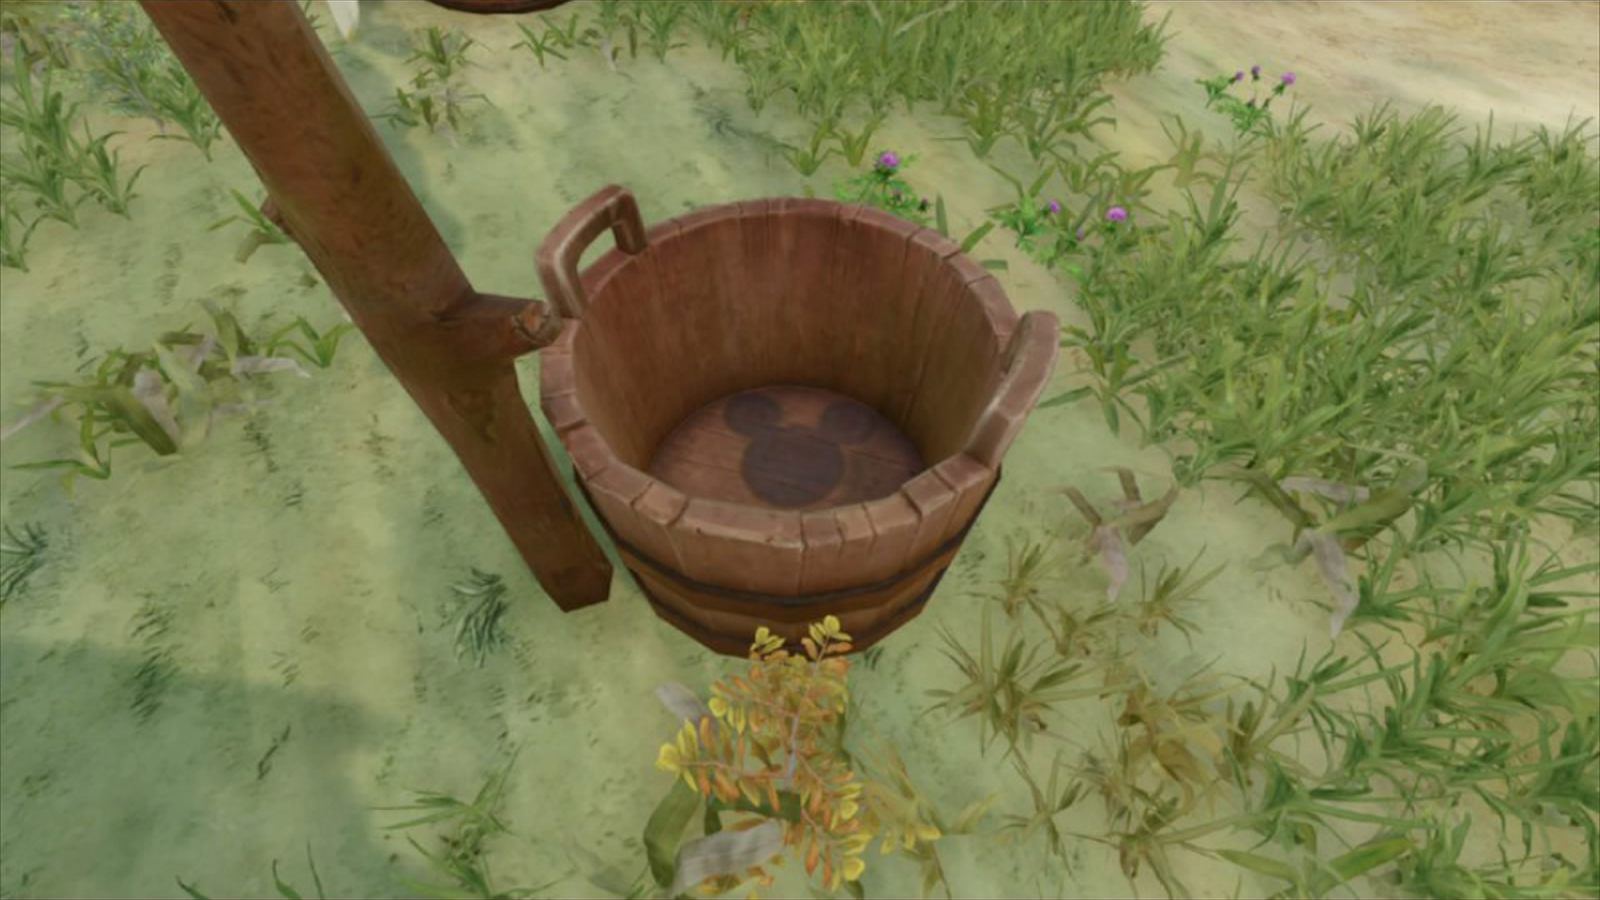 | Rabbit's House | Check inside the wood bucket next to the washing line. |
San Fransokyo
| Number | Picture | Location | How to find it |
|---|---|---|---|
| #1 |  | Hiro's Garage | The Emblem is on the wall, right of the Moogle Shop. |
| #2 | 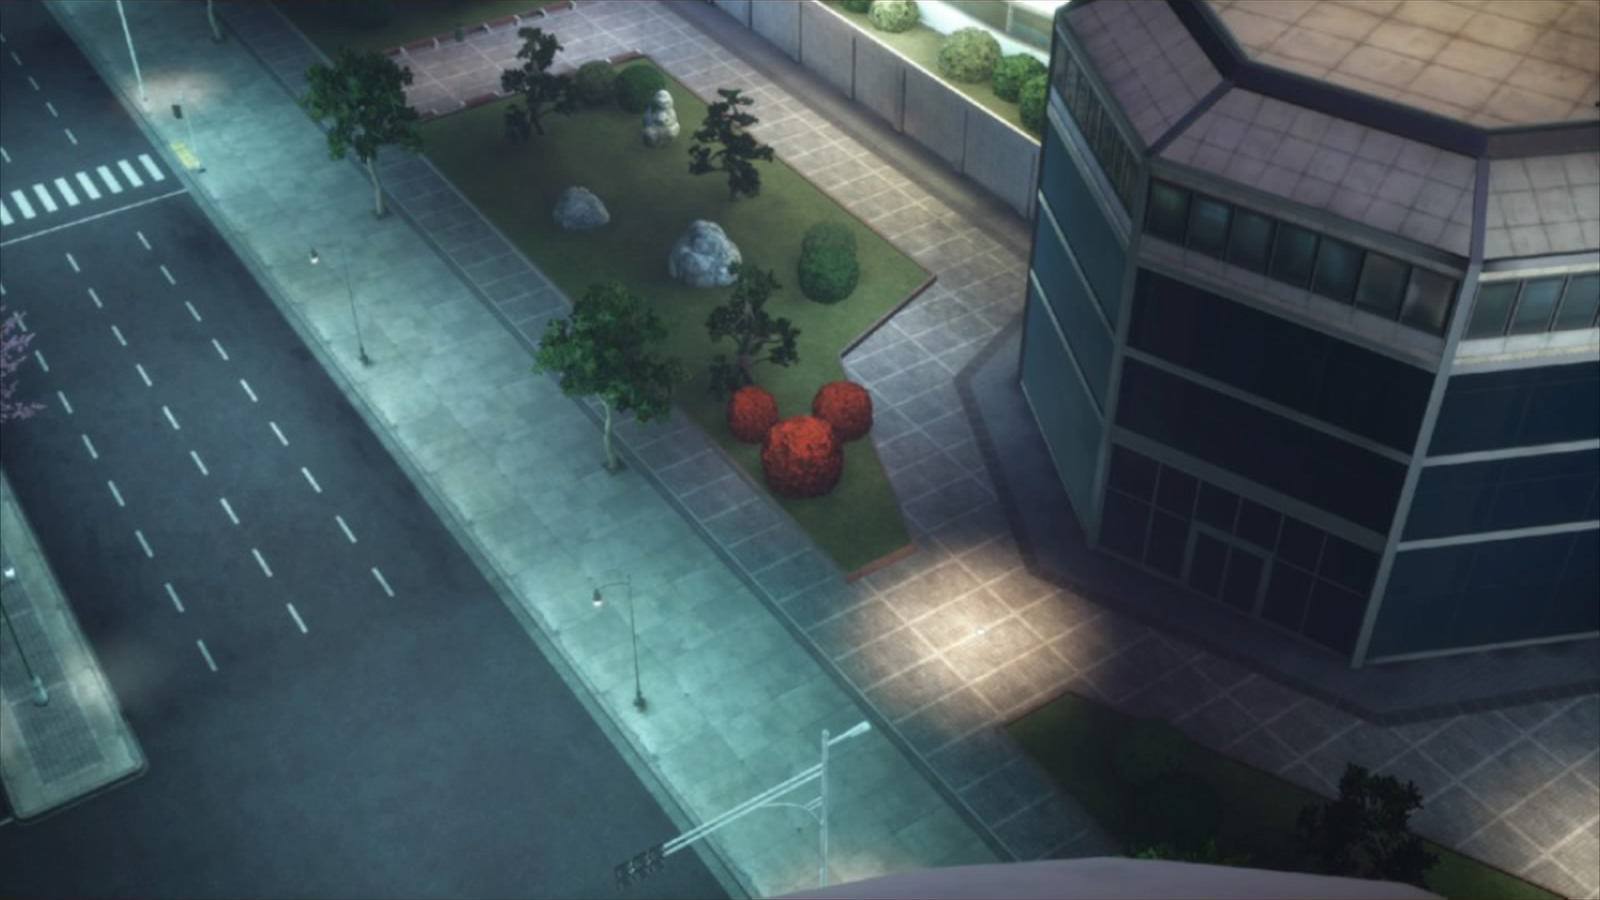 | The City / South District | From the City / South District Save Point, climb the Asian Chef statue and look down at the park to the east. Red shrubs are the Emblem. |
| #3 | 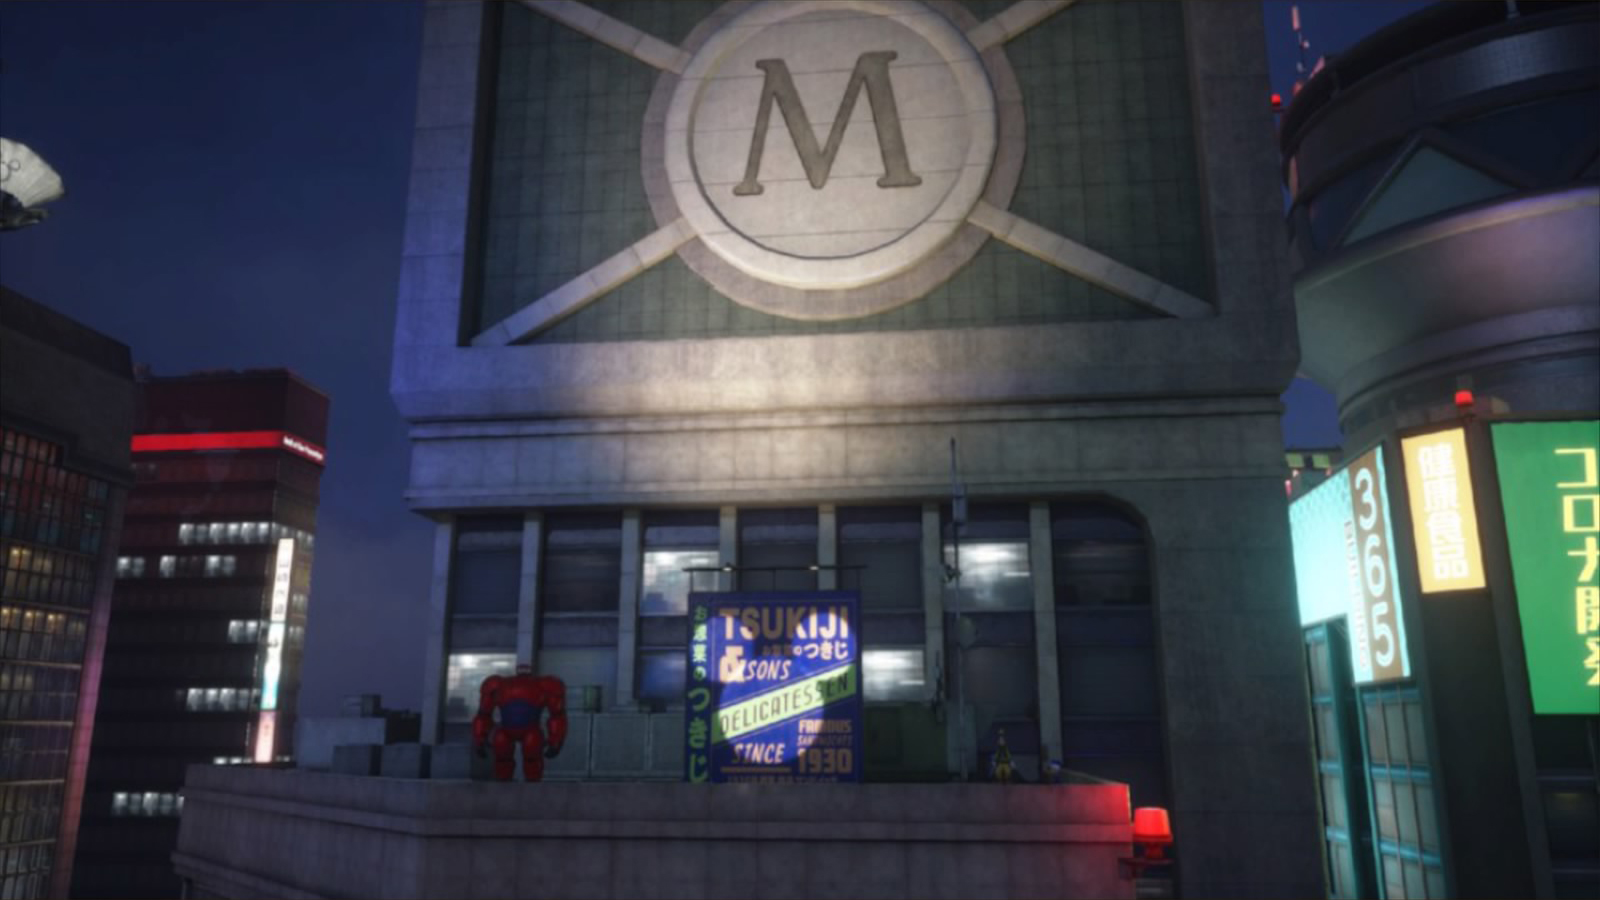 | The City / South District | From the City / South District Save Point, look for a tall building with an "M" on it. At night, the Tsukiki ad will have a light forming an Emblem. |
| #4 | 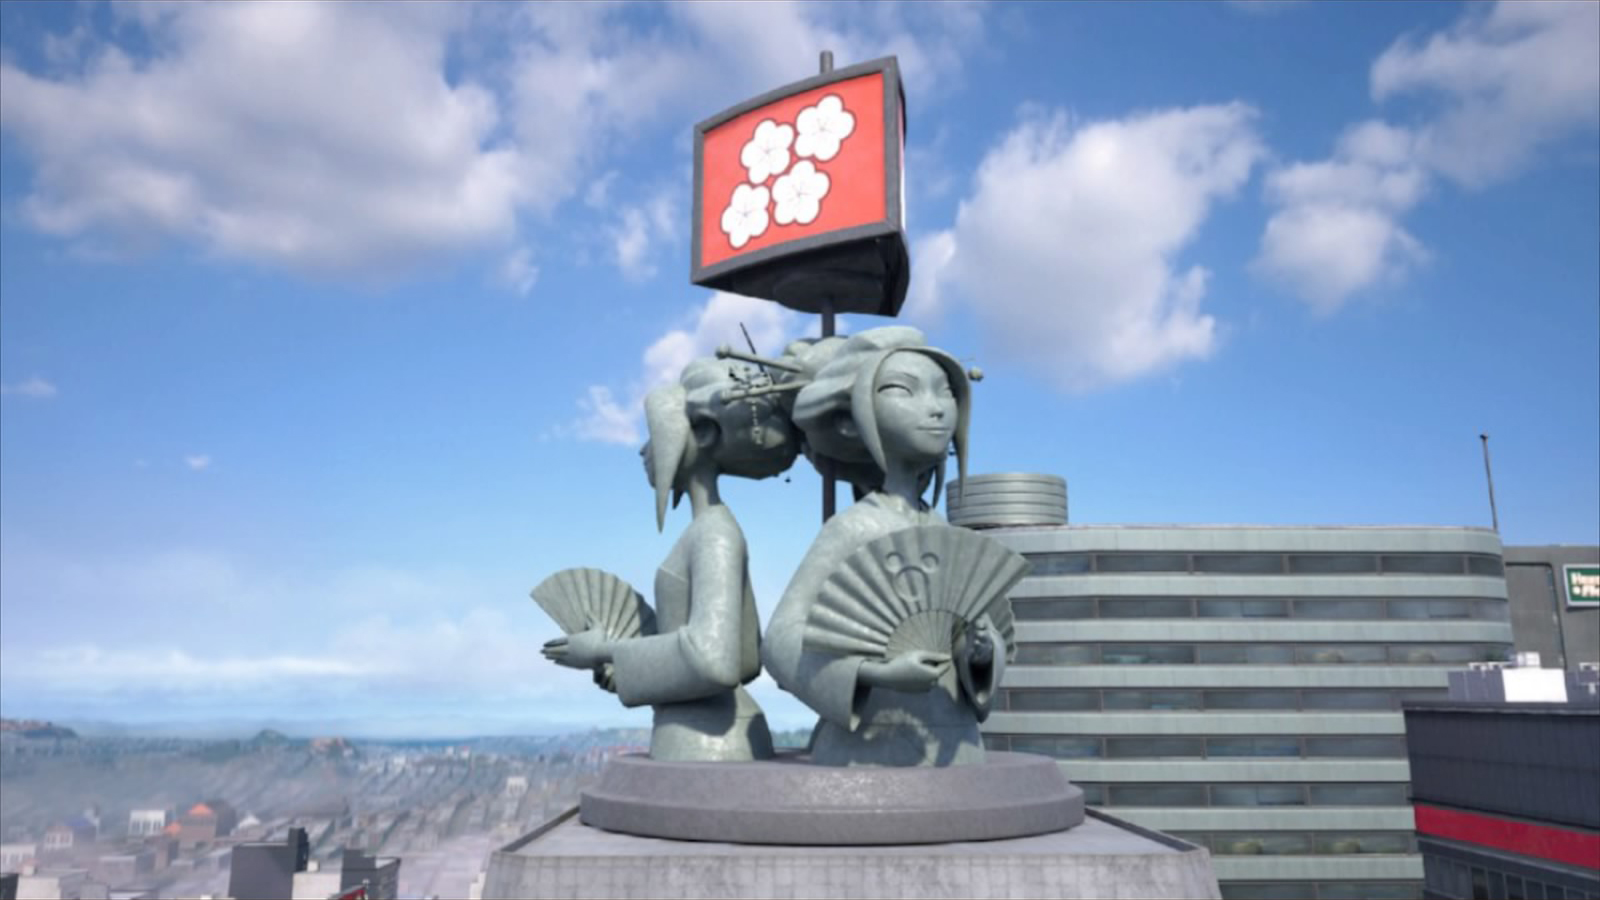 | The City / South District | From the City / South District Save Point, climb the tall building with an "M" on it. Look at the statue of women with a fan. The Emblem is on one of them. |
| #5 | 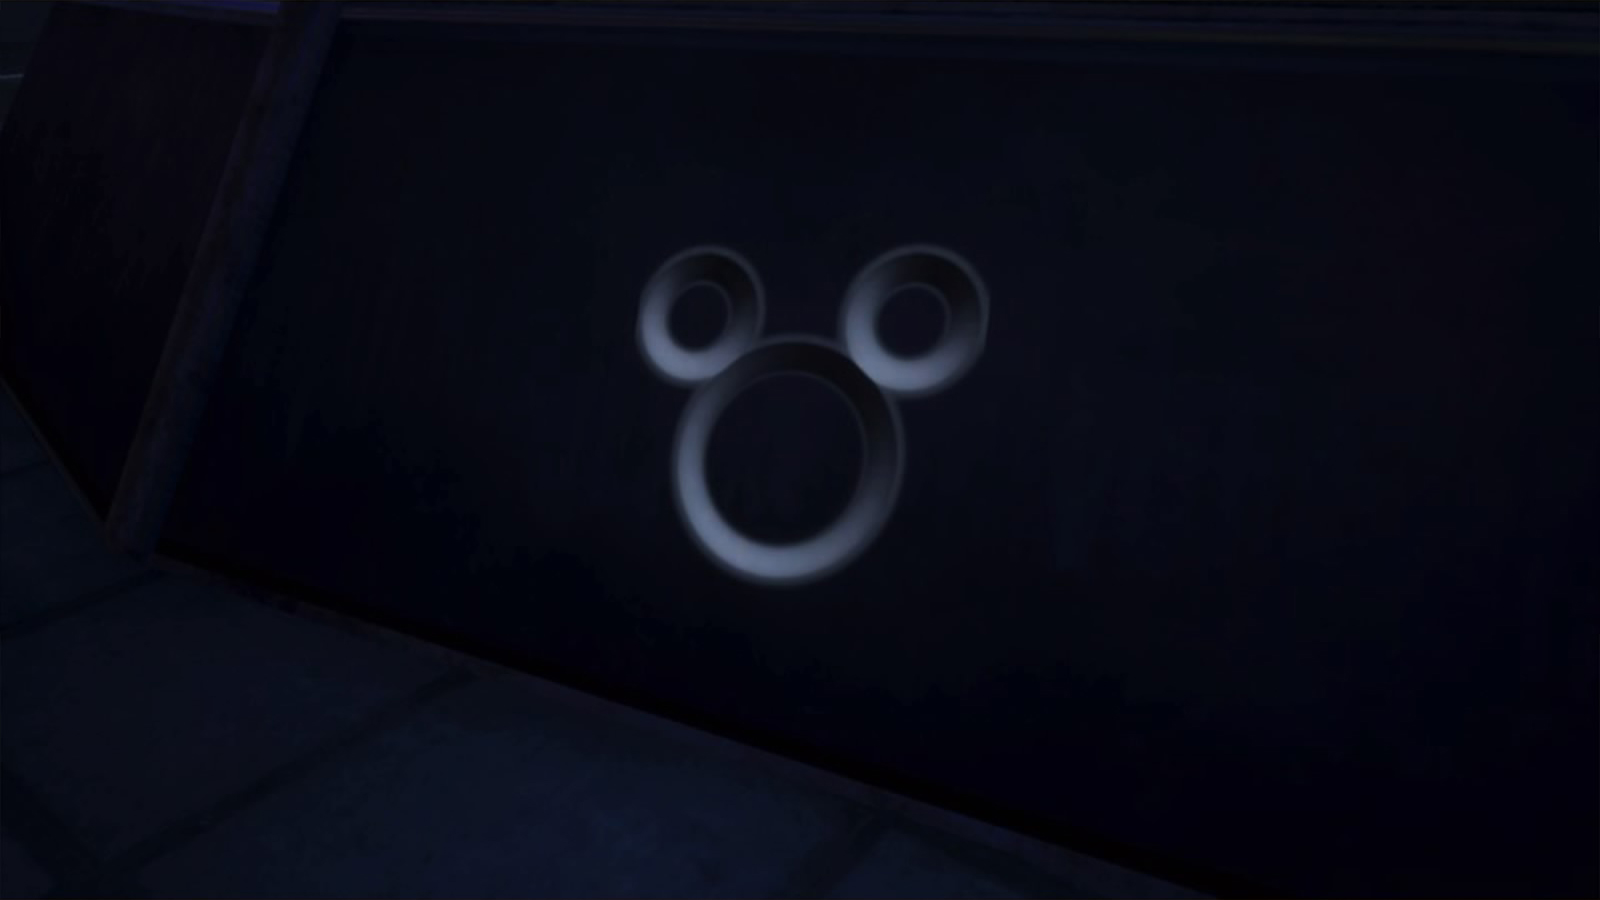 | The City / Central District | From #6, with the red flying carp on your right, look down until you see a small building with a dome on it, and green vents. Jump down and search for the Emblem on the side of the dome. |
| #6 | 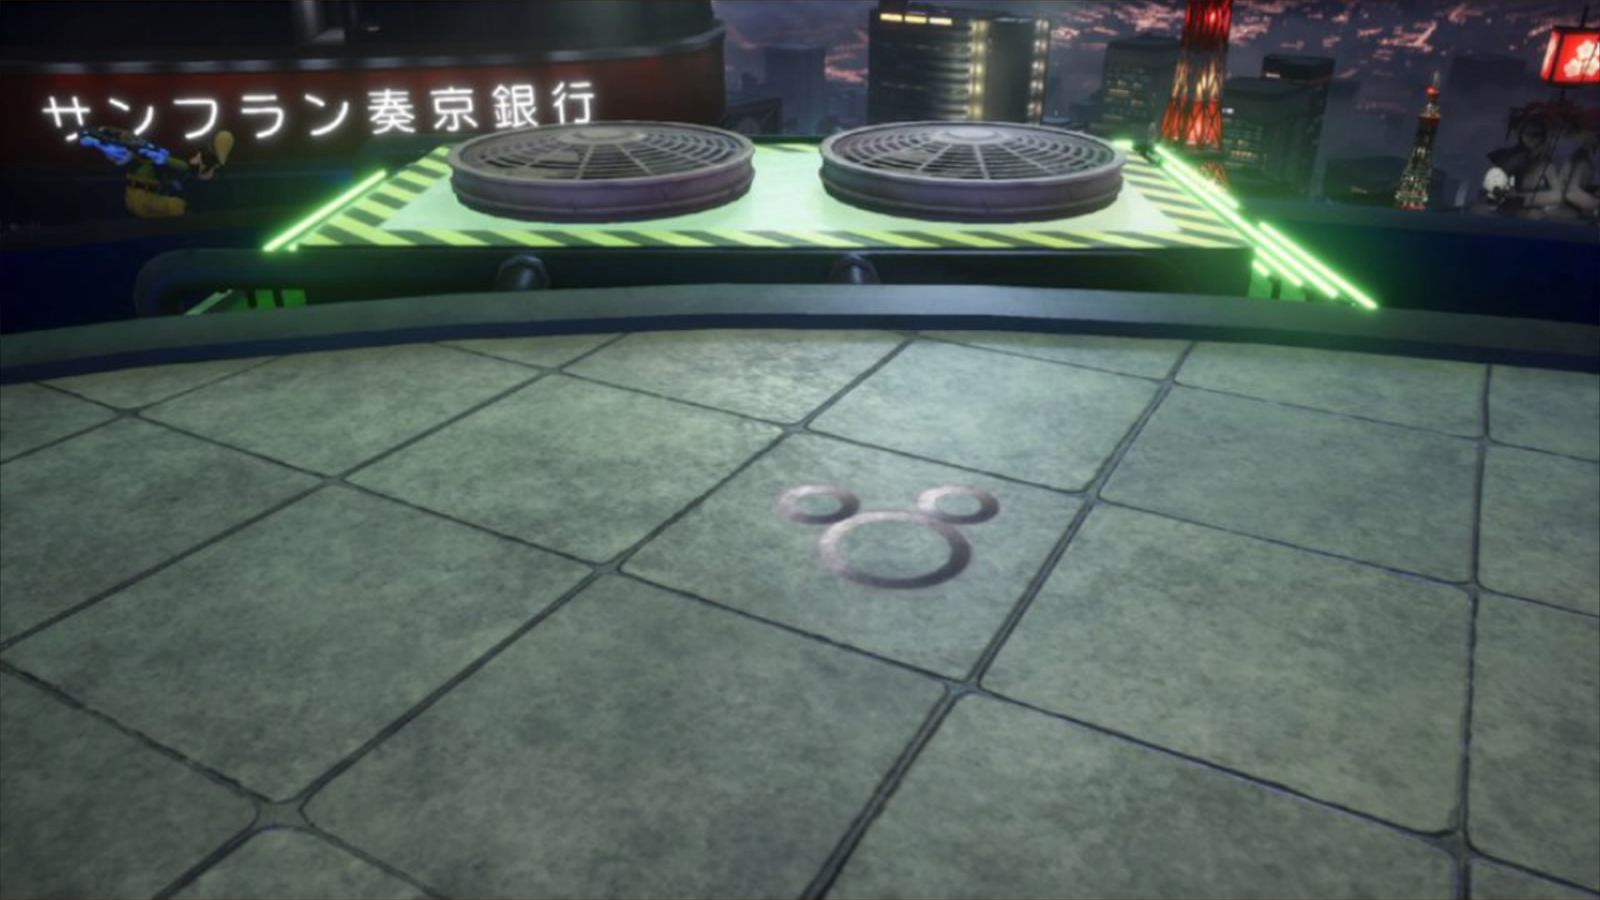 | The City / Central District | From the City / South District Save Point, go towards the Central District to the north. You want to find and climb on top of a building with green vents on top. At night, this building is shining a blue light. The Emblem is right next to the vents, on the ground. |
| #7 |  | The City / North District | From #11, Air Slide or Glide on the blue flying carp closest to the Save Point, to the east. The Emblem is on its back. |
| #8 | 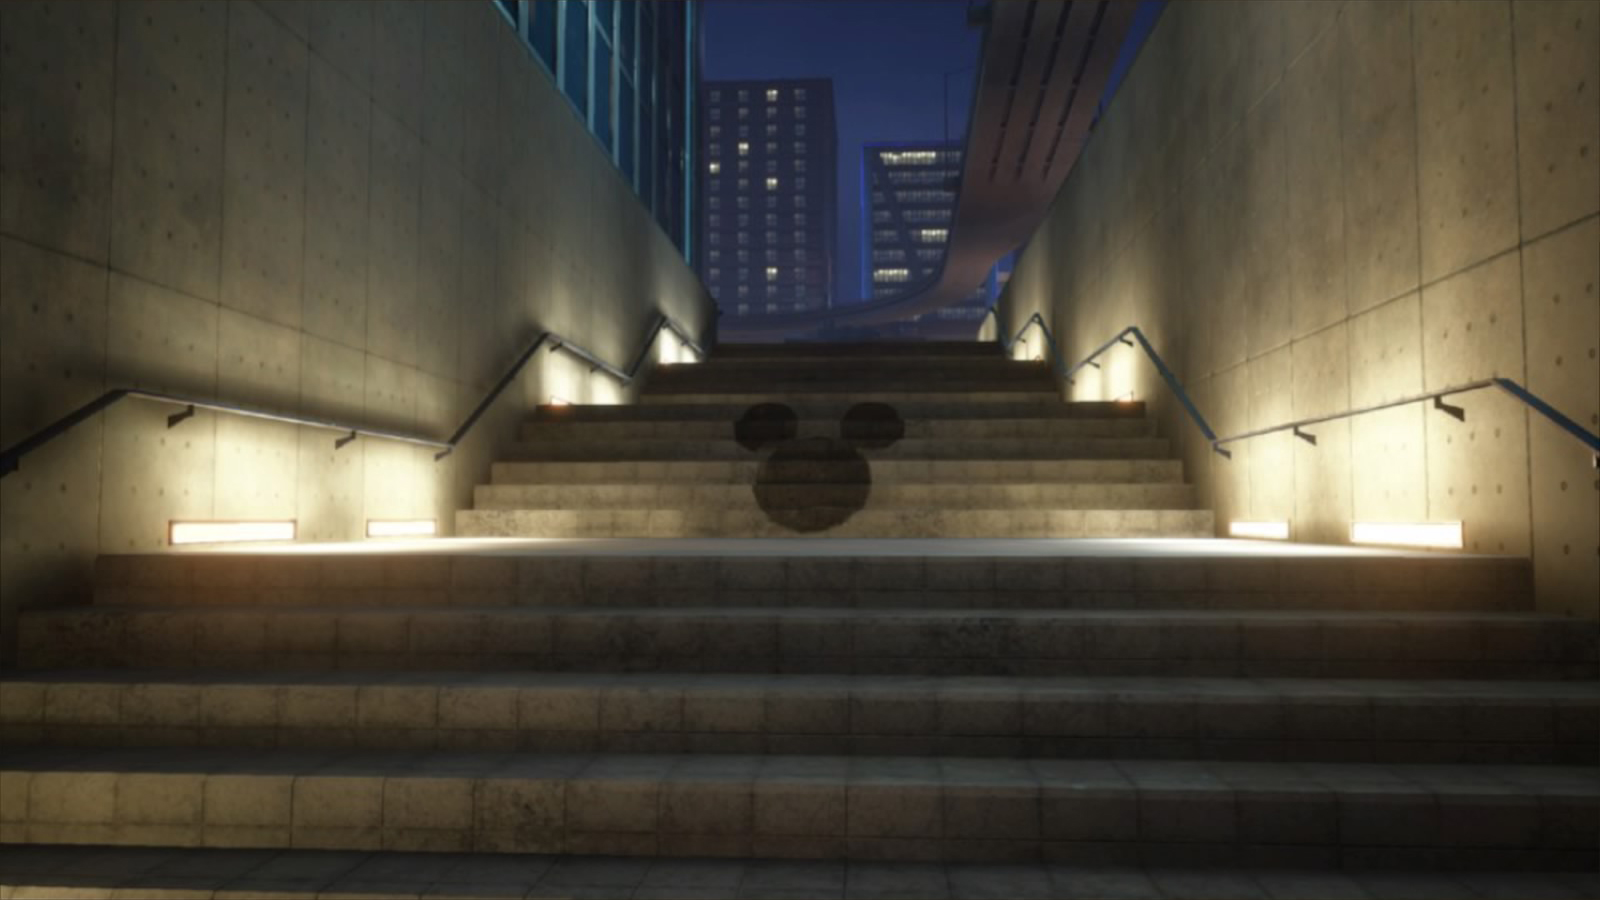 | The City / North District | From the City / North District Save Point, go through the park on the nortwest until you find some stairs. The Emblem is on the steps. |
| #9 | 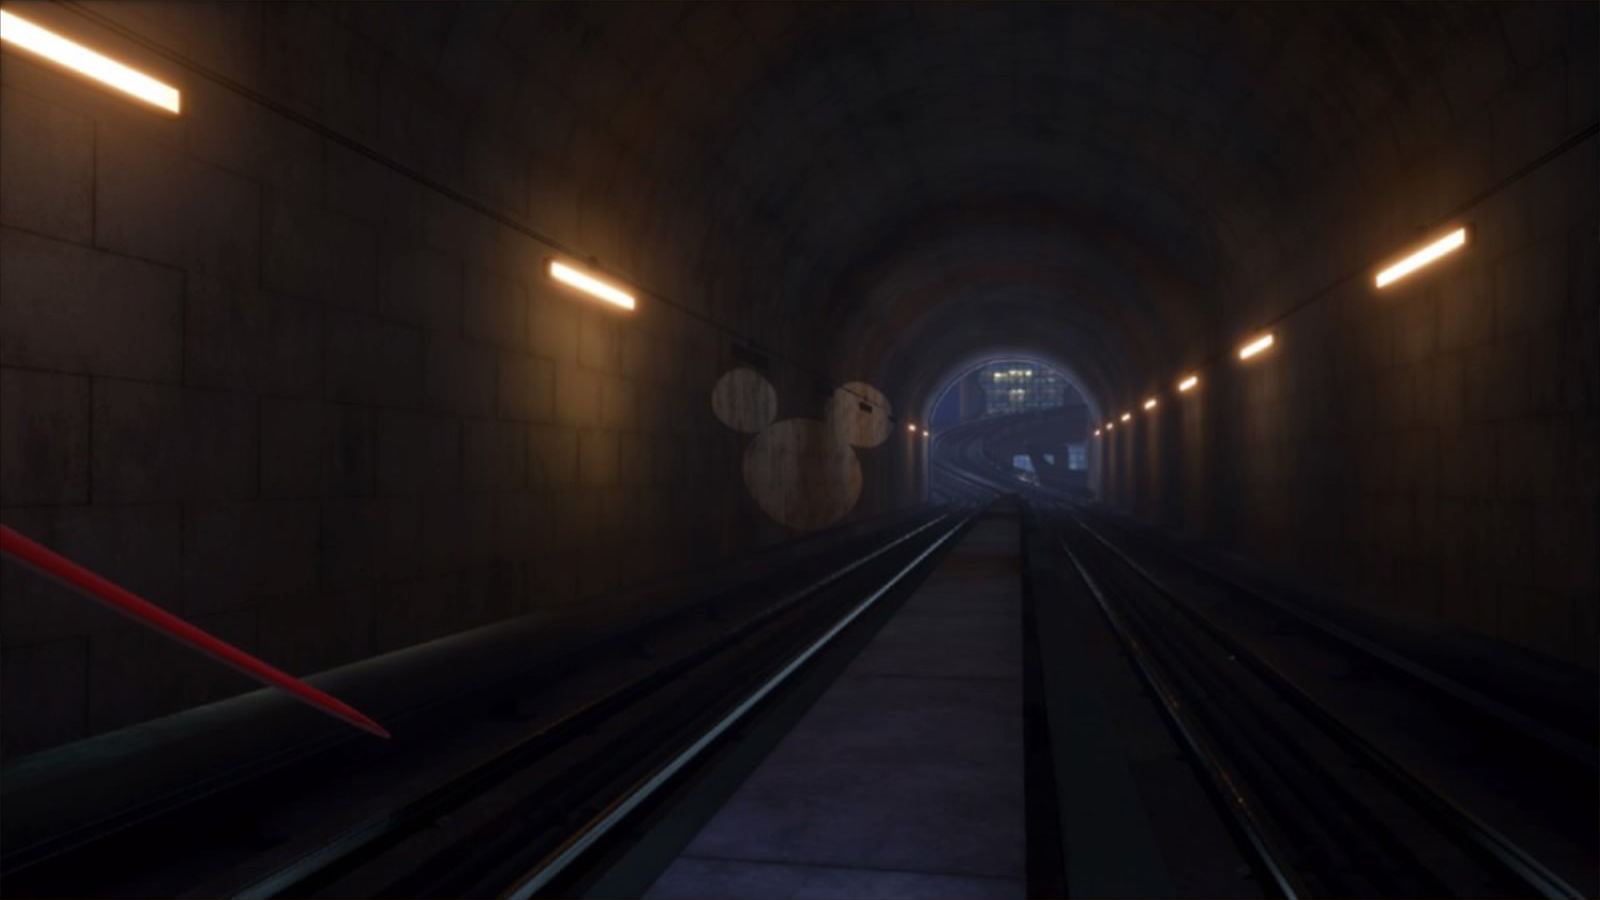 | The City / North District | From the City / North District Save Point, follow the rails passing just above it, towards the west. In a tunnel you'll see a deformed Emblem. Take a picture outside of the tunnel. |
| #10 | 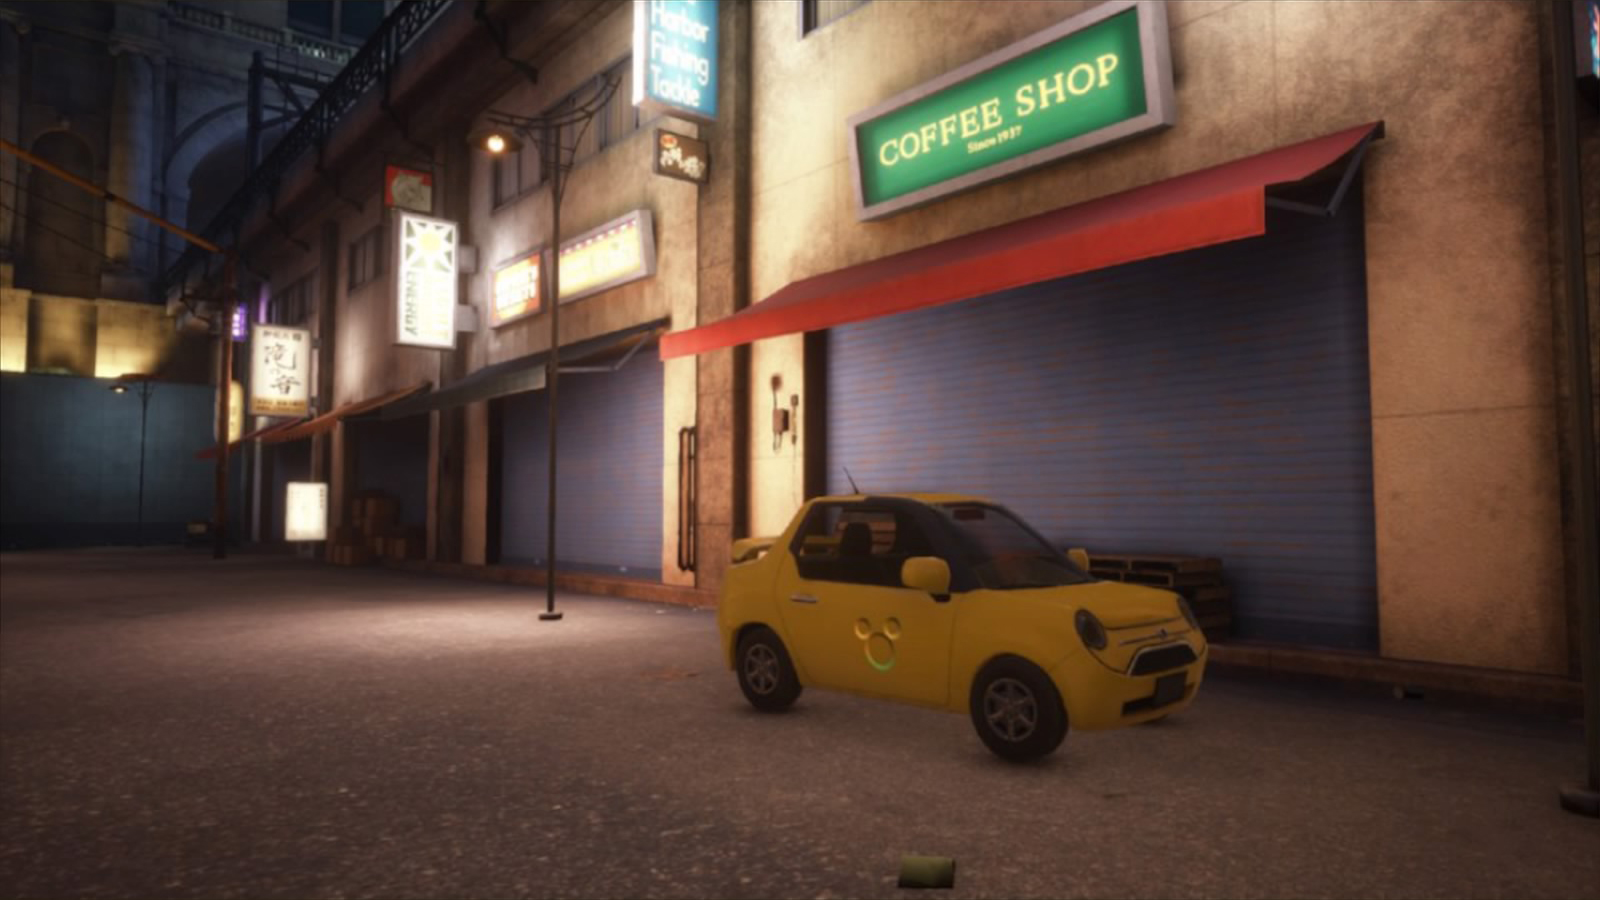 | The City / North District | From the City / North District Save Point, go to the northwest corner of the map, where you can see two roads cross on your map. There, on the ground, you'll find a yellow car with the Emblem on it. |
| #11 |  | The City / North District | From the City / North District Save Point, go to the second big building to the west that you can see on the map. The Emblem is at the top of the highest point (you'll have to stand on the red light to take a picture). |
The Caribbean
| Number | Picture | Location | How to find it |
|---|---|---|---|
| #1 | 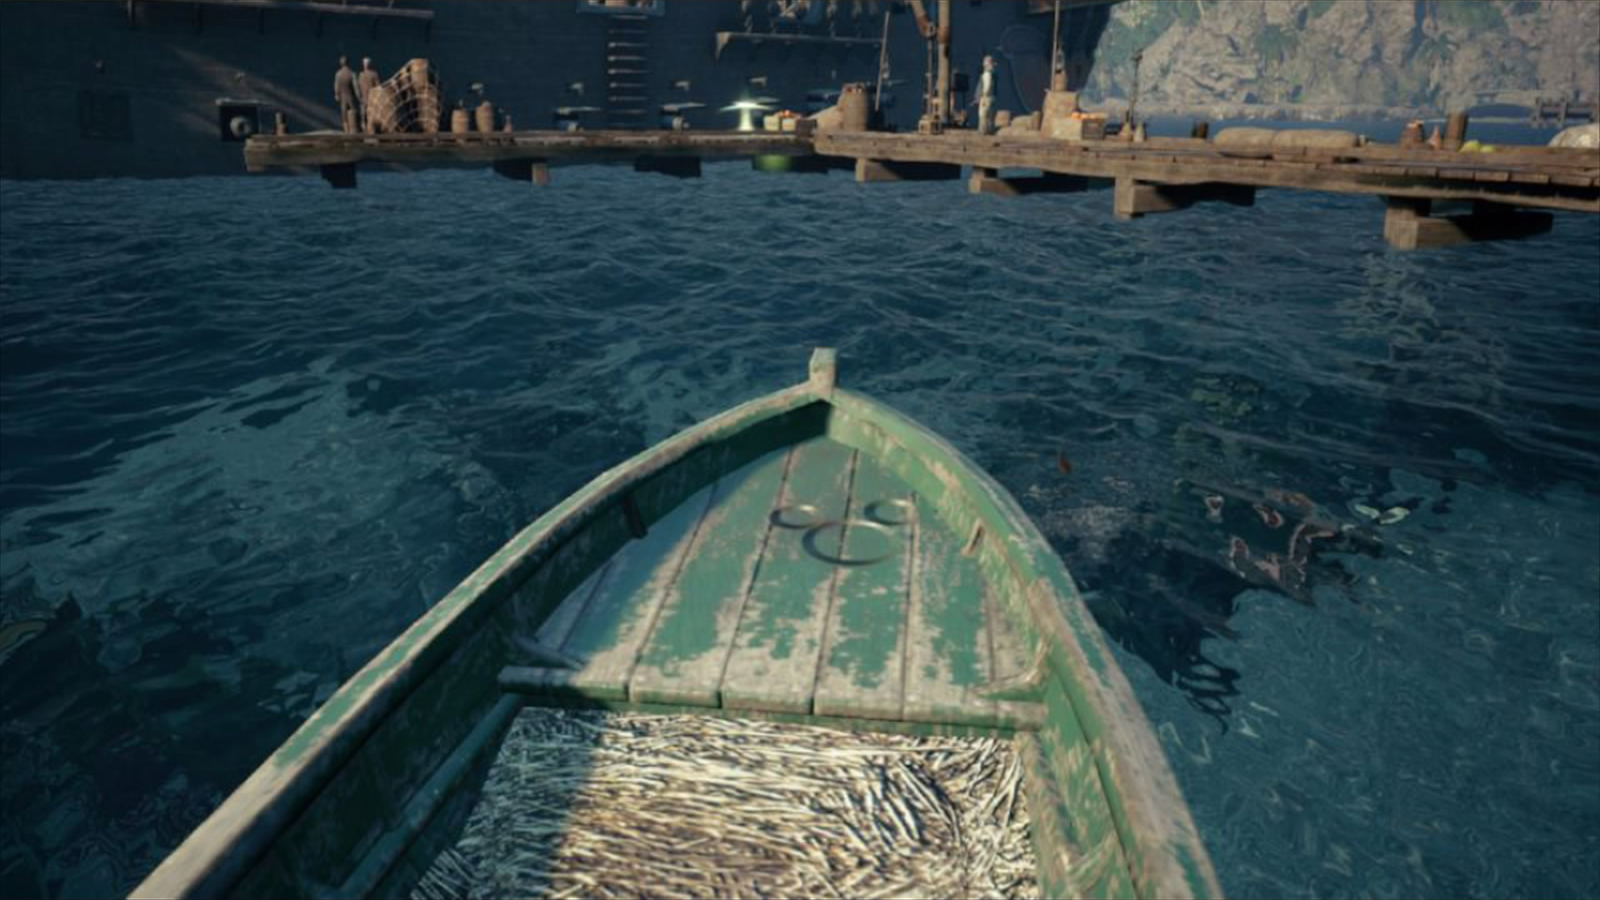 | Port Royal / Docks | From the Port Royal / Docks Save Point, climb in one of the small boats near the coast to find the first Emblem. |
| #2 | 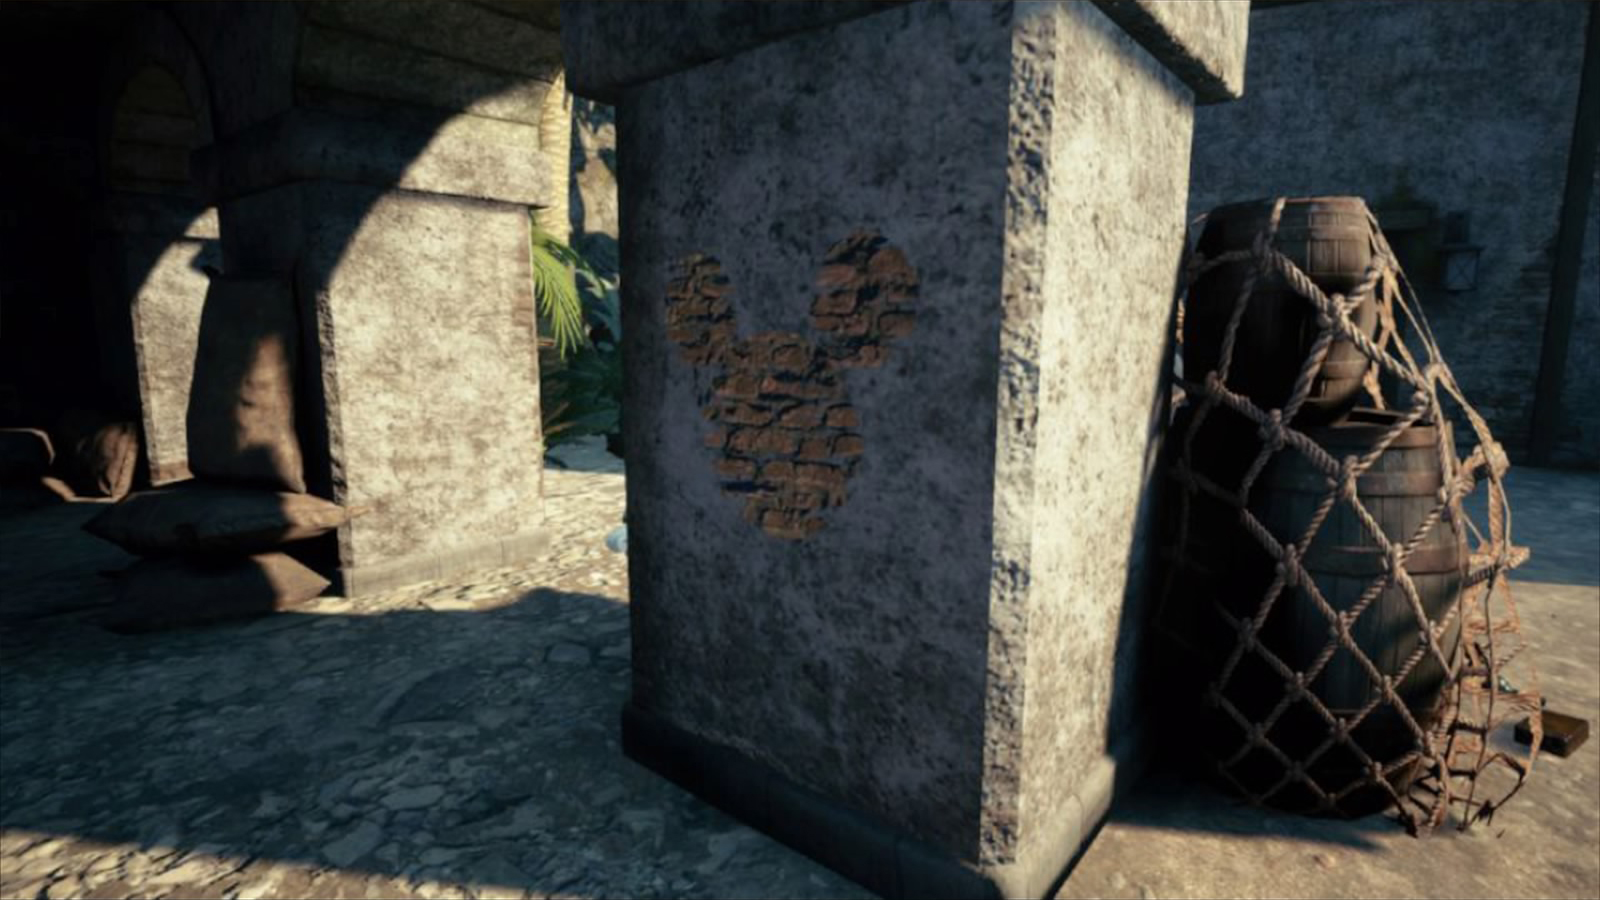 | Port Royal / Docks | From the Port Royal / Docks Save Point, exit the pier and follow the path on the left. When you reach a house half stone, half wood, break the crates next to the ladder to reveal an Emblem. |
| #3 | 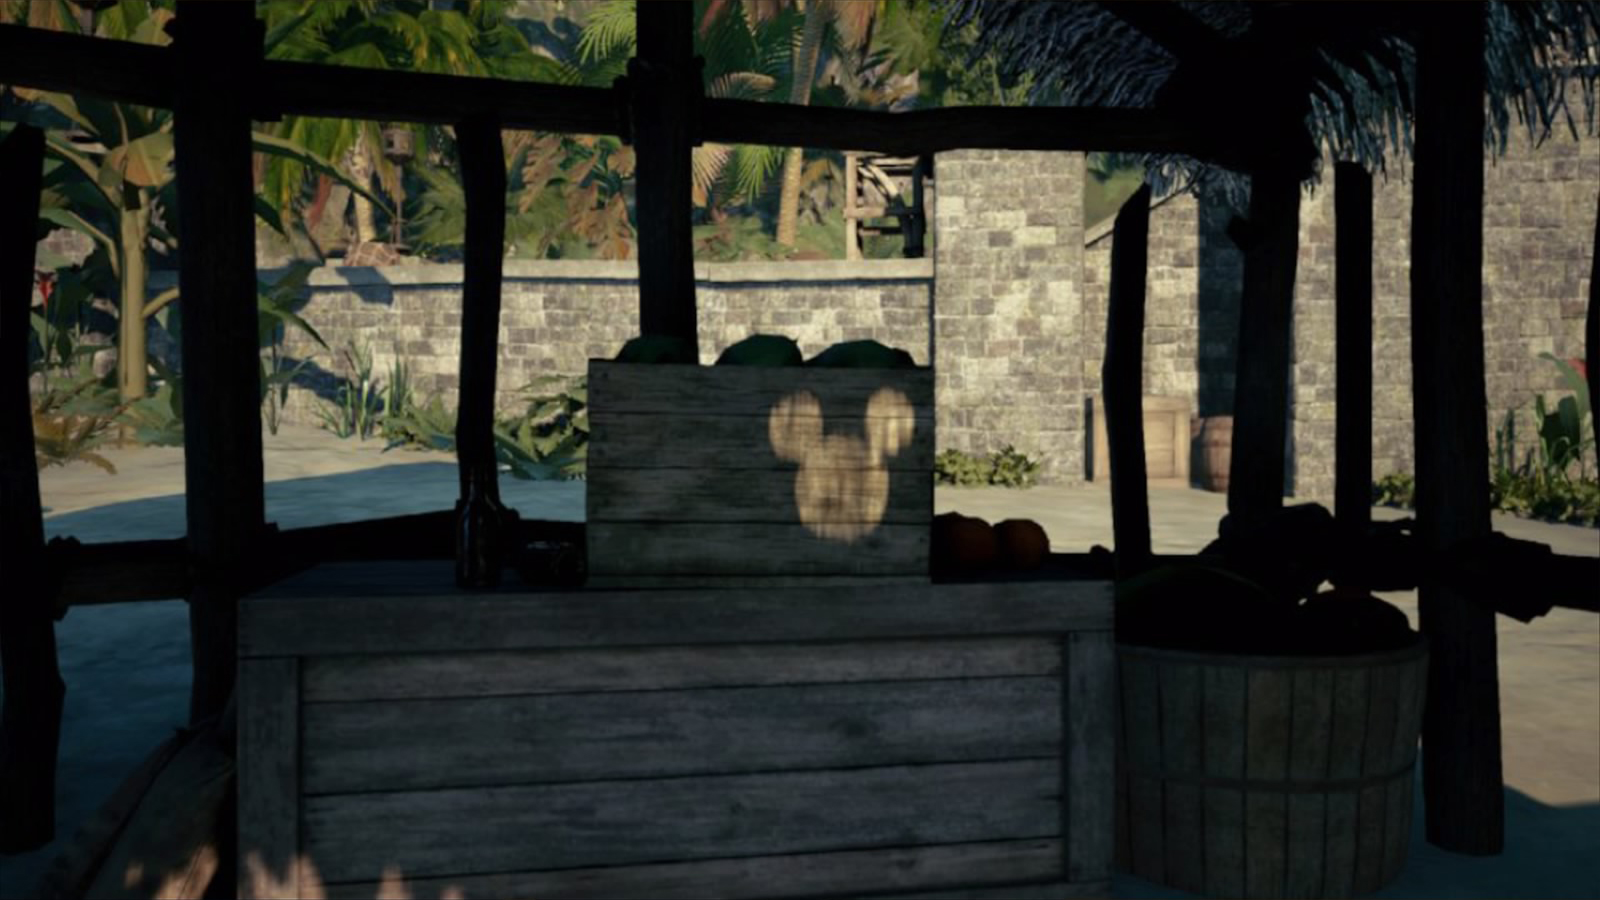 | Port Royal / Settlement | From the Port Royal / Settlement Save Point, go down the stairs and to the beach. Enter the wood hut and check the crates. |
| #4 | 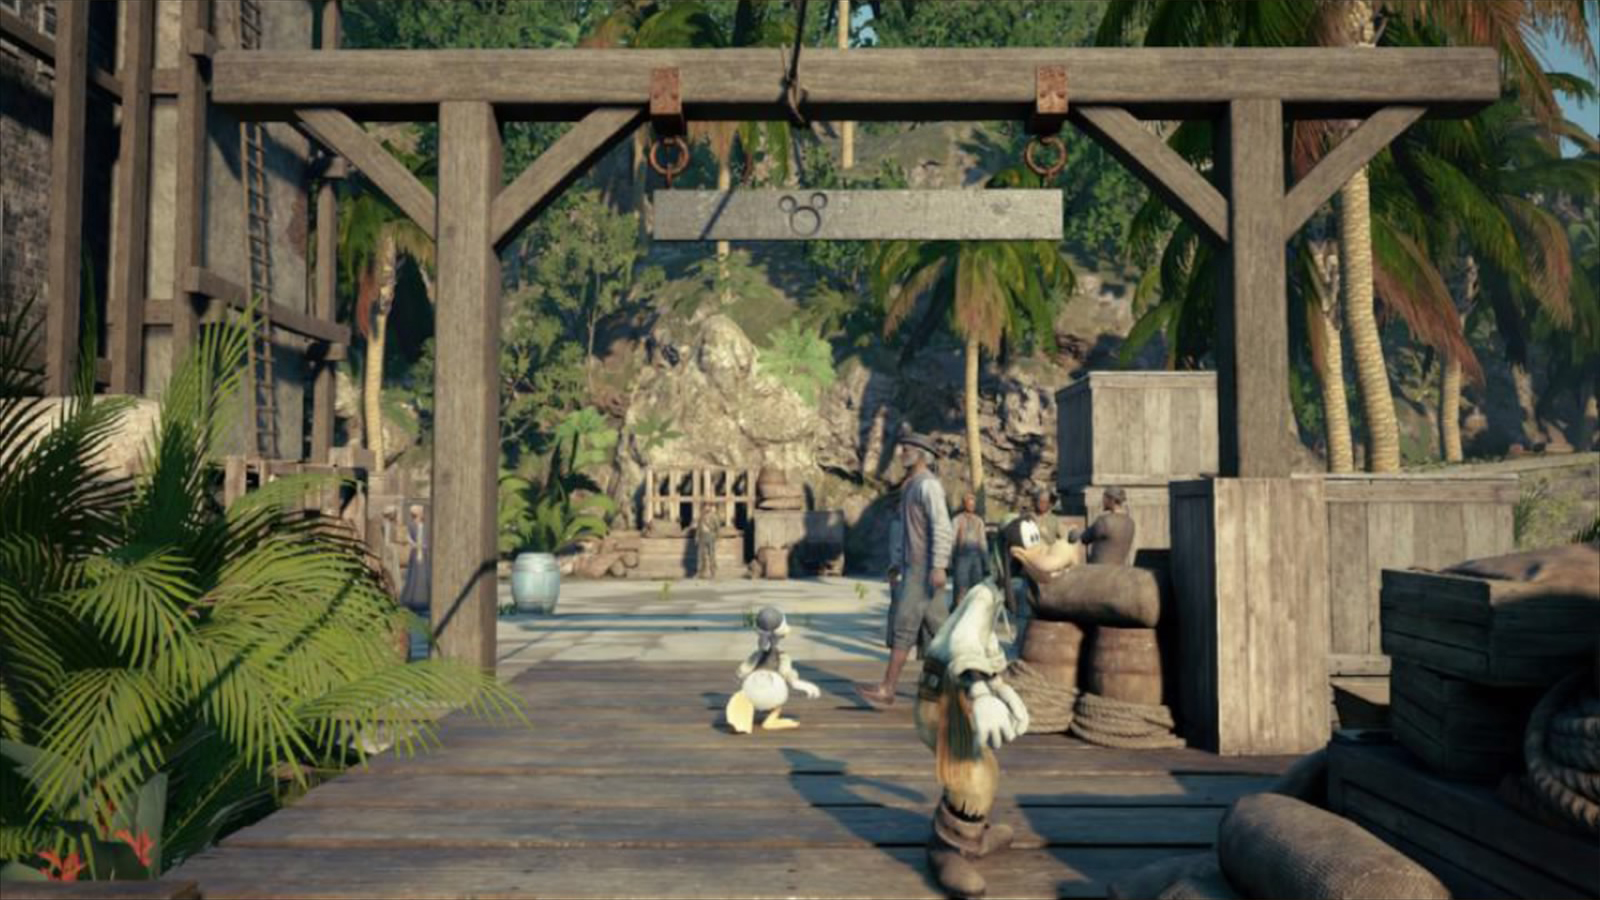 | Port Royal / Settlement | From #3, go to the pier. The Emblem is behind the "East India Trading Co." sign overhead. |
| #5 |  | Port Royal / Fort | From the Port Royal / Fort Save Point, enter the courtyard and climb next to the flag. Look down to find some ropes forming the Emblem. |
| #6 | 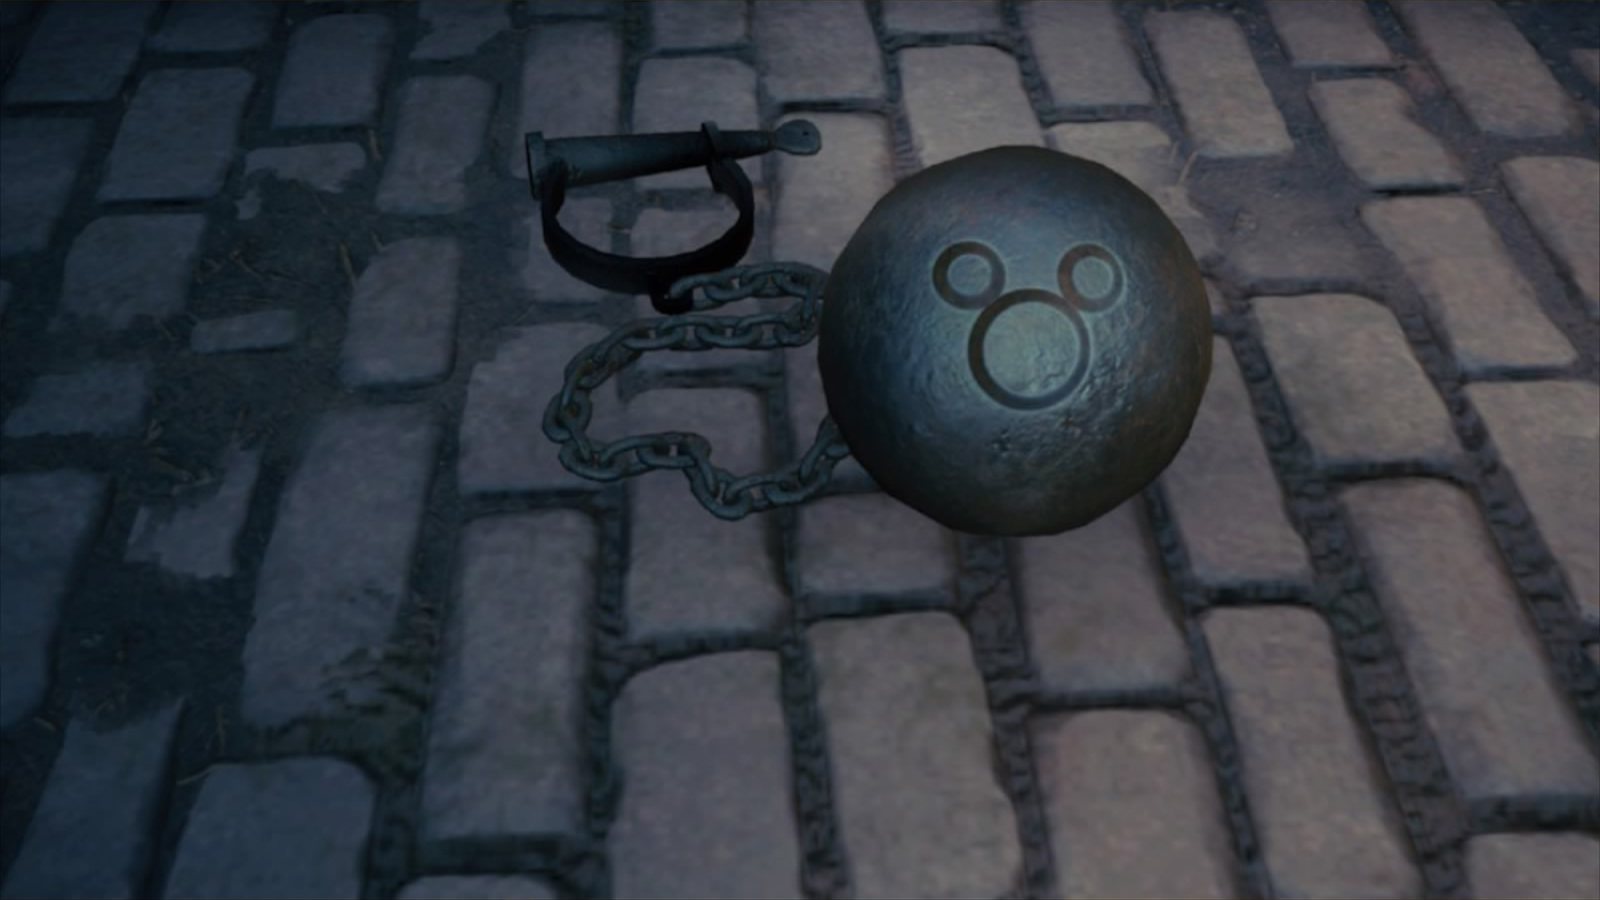 | Port Royal / Fort | From the Port Royal / Fort Save Point, go down the stairs then on your right. Enter the cell with a ball and chain, and check behind the ball. |
| #7 | 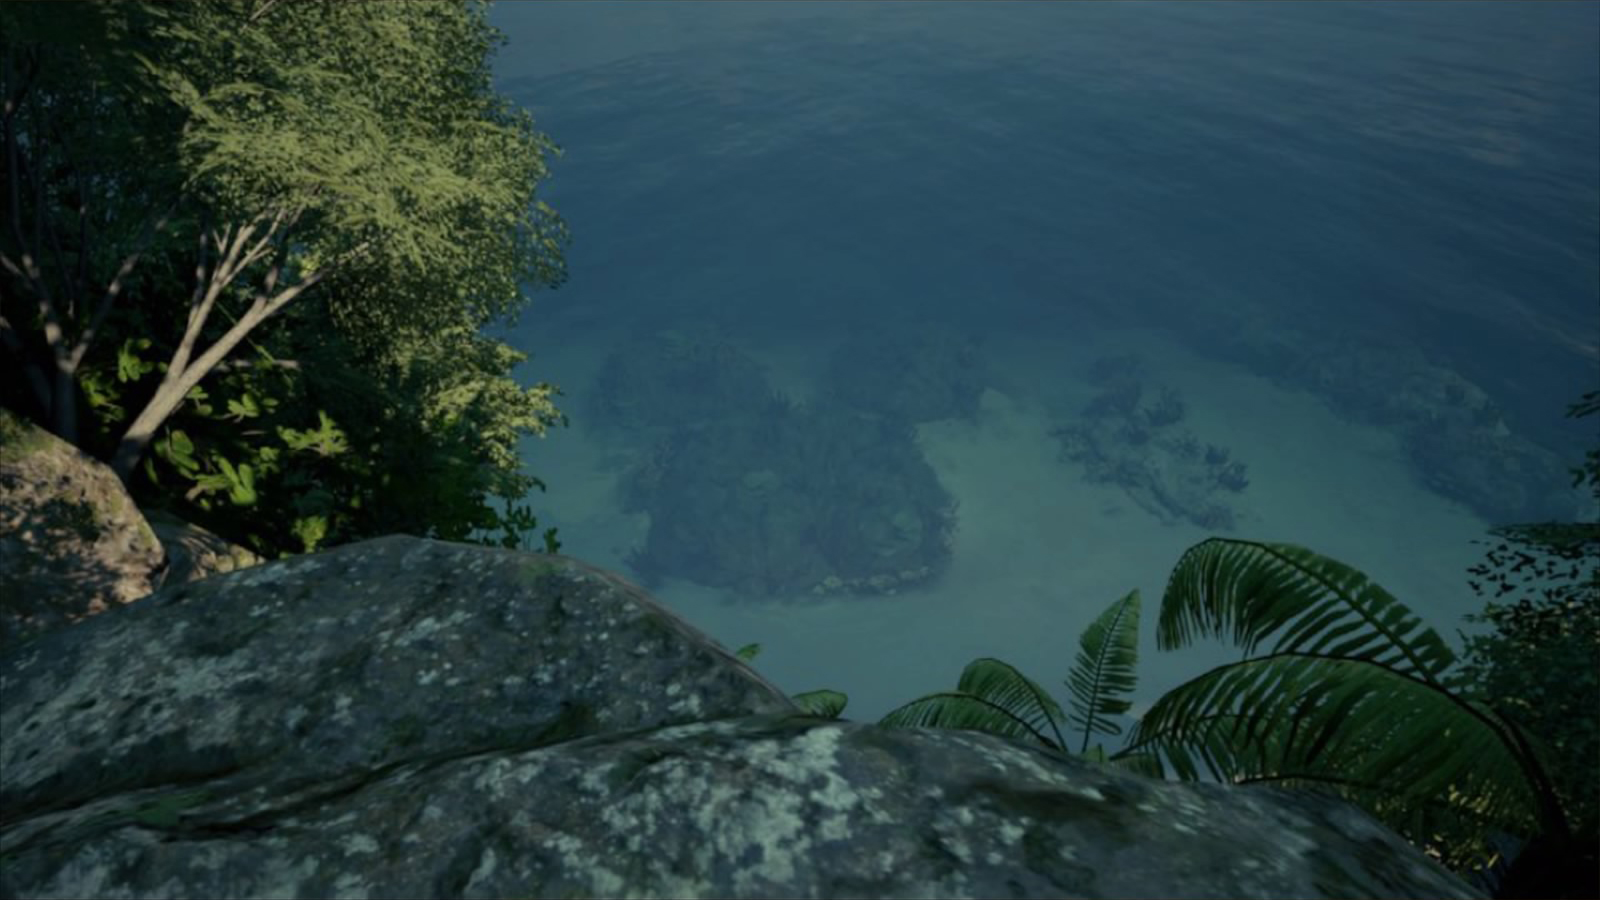 | The High Seas / Isla Verdemontaña | From the Isla Verdemontaña Save Point (an island to the northwest), follow the path to the east that goes deeper into the jungle. Stay on the ground until you can't go any further and climb the high cliff. At the intersection, go left and look down to find the Emblem in the water below. |
| #8 | 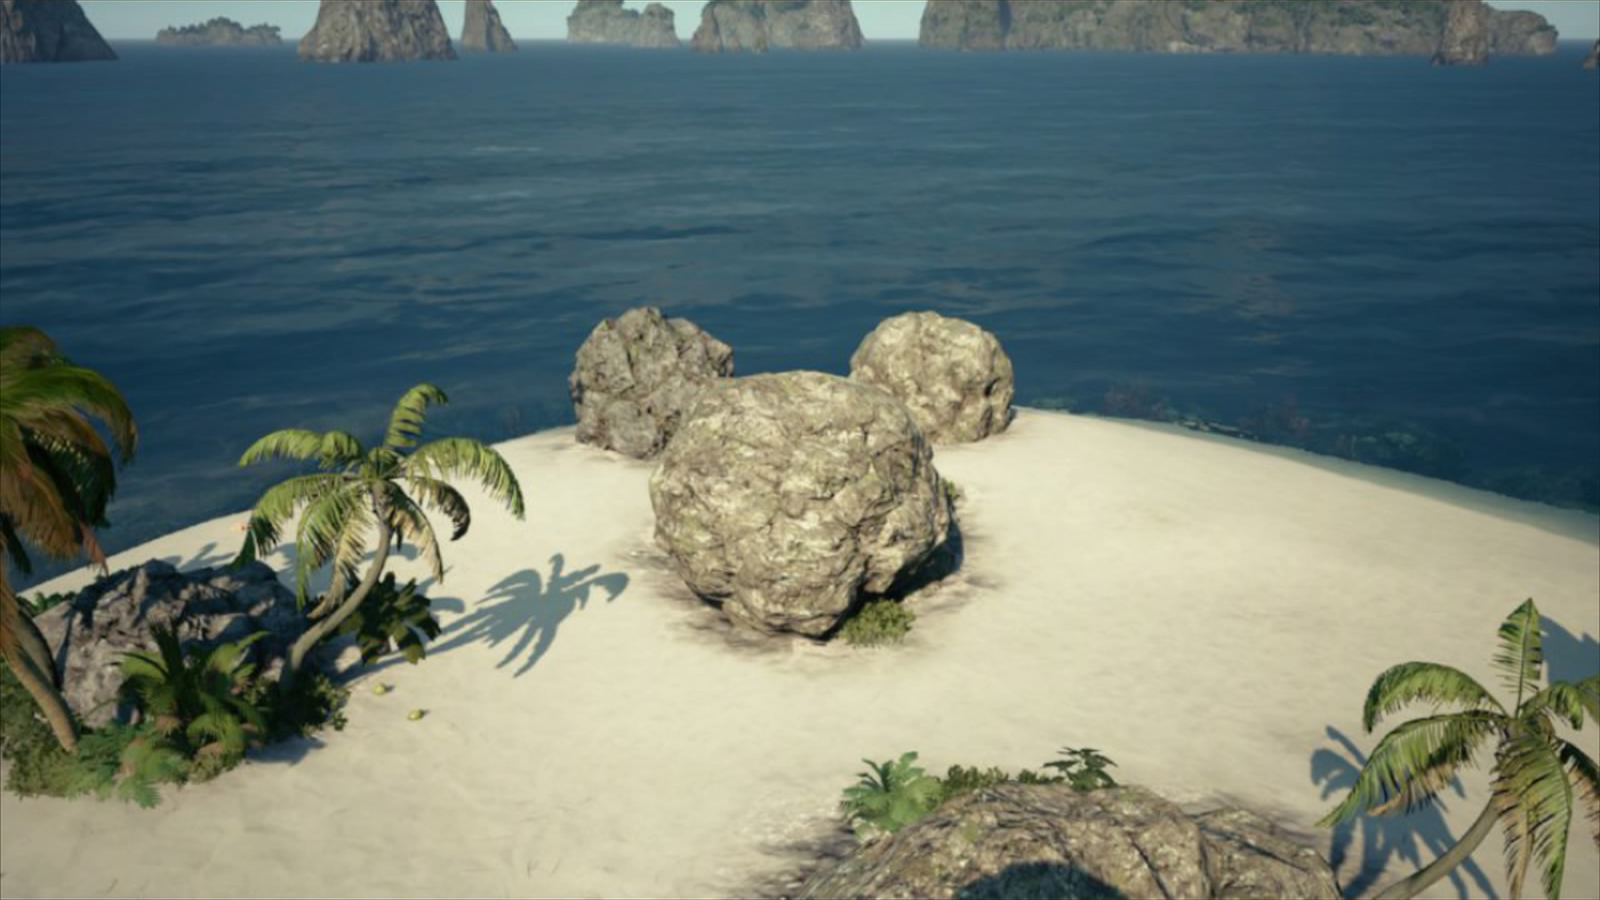 | The High Seas / Isle of Luck | From #7, use the ship to go south, to the "Isle of Luck". Climb on the rocks and look down to find the Emblem. |
| #9 | 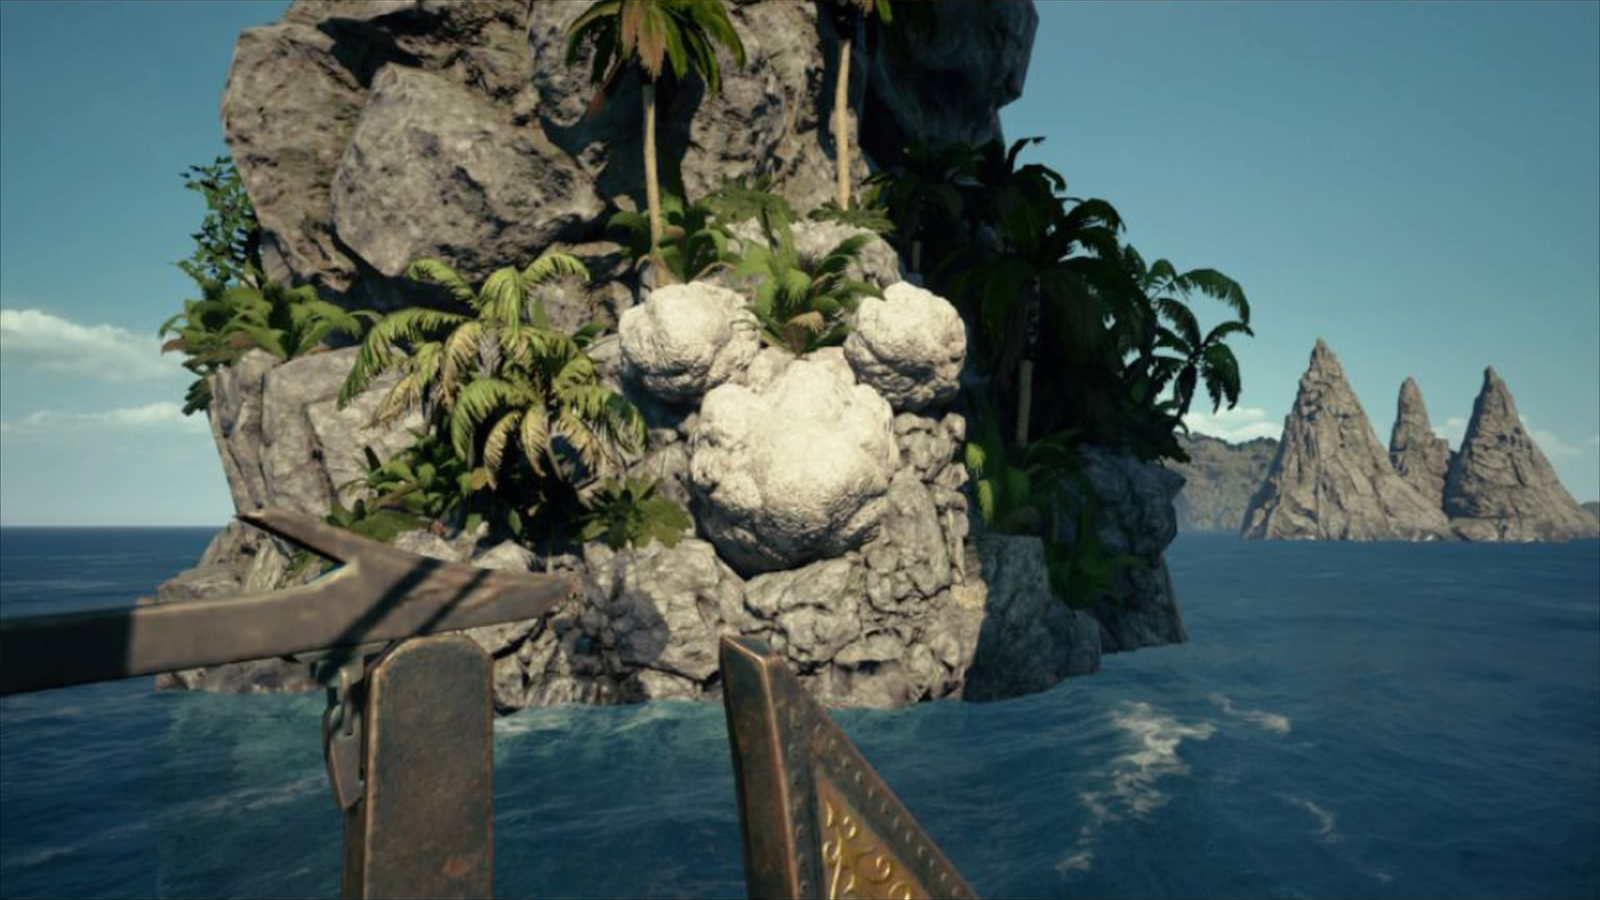 | The High Seas / Horseshoe Island | From #8, go east with your ship and pass through the arch of Horseshoe Island to find the Emblem. |
| #10 | 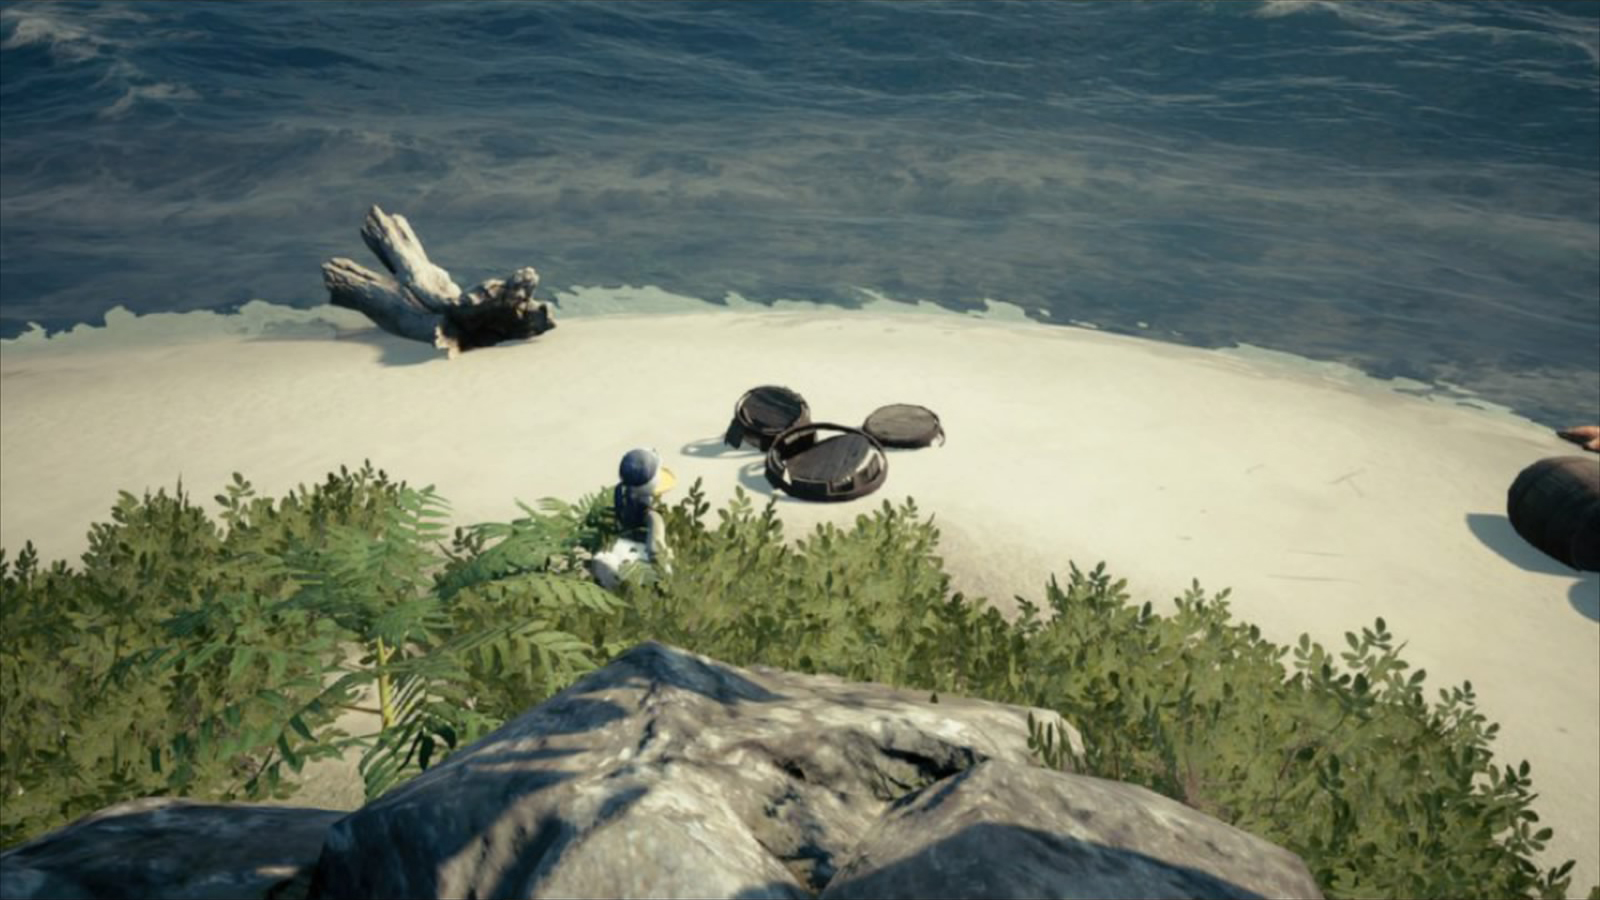 | The High Seas / Isla de los Mástiles | From the Isla de los Mástiles Save Point, go to the small island to the west. Jump on some rocks and look down to find the Emblem, made of three barrels in the sand. |
| #11 | 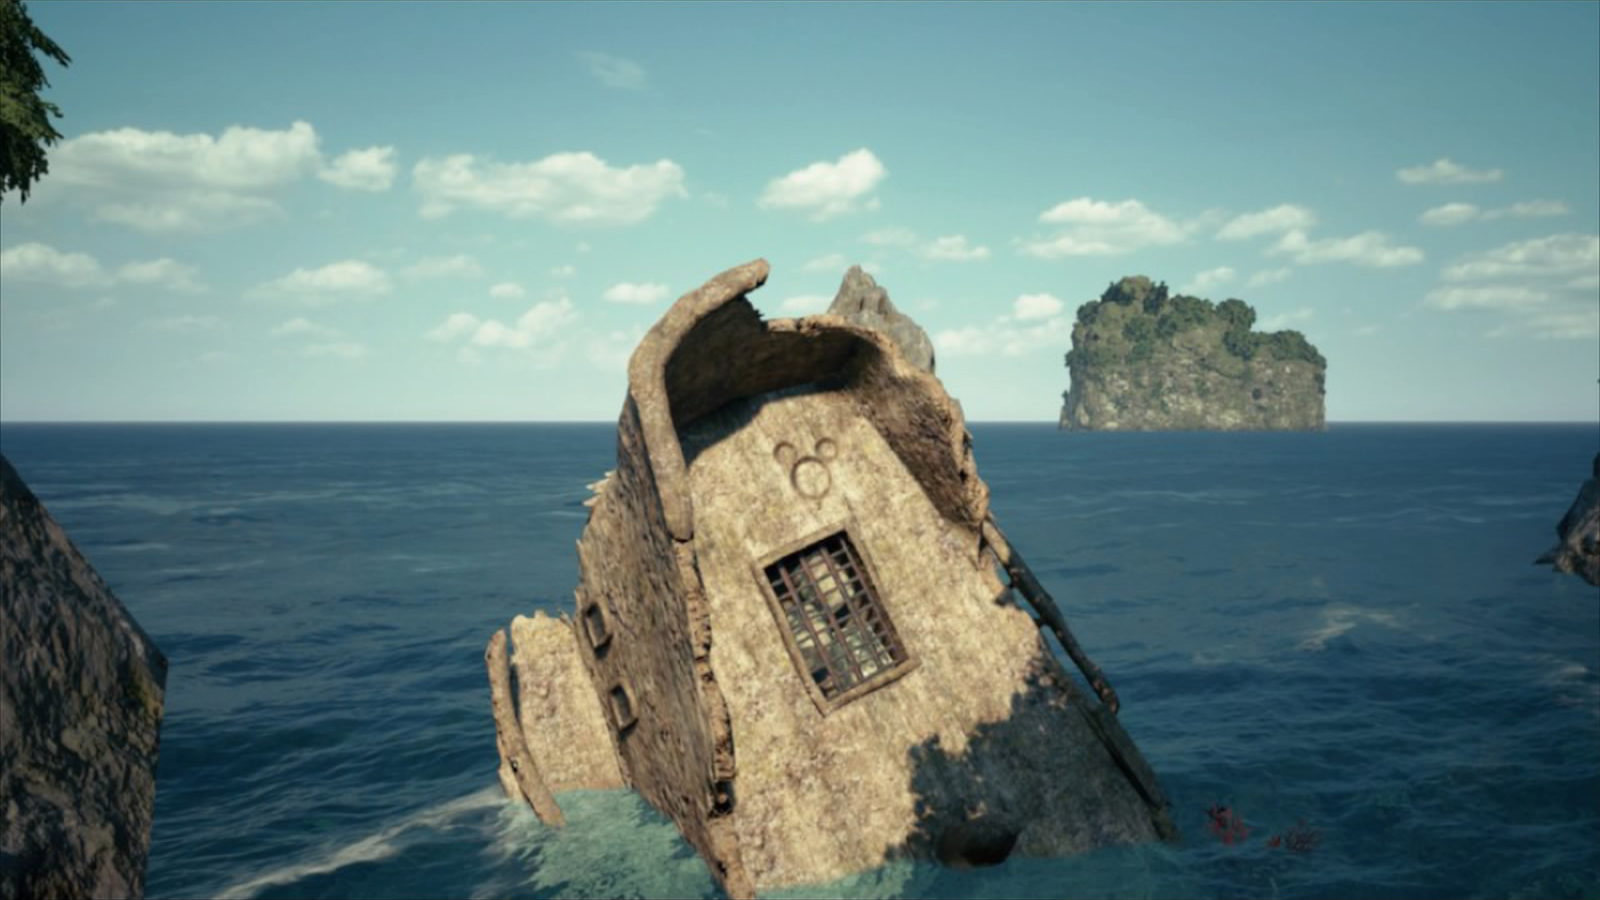 | The High Seas / Ship's End | Go to the south side of Ship's End to reach the beach. There, just go to the north of the island to reach a shipwreak with the Emblem. |
| #12 |  | The High Seas / Sandbar Isle | From #11, go east to the Sandbar Isle. Then go south on your map, towards the rocks leading to another island. Jump on them, then follow the path to the left until you see a water hole. The first Emblem is a big opening in some rocks on the side. |
| #13 | 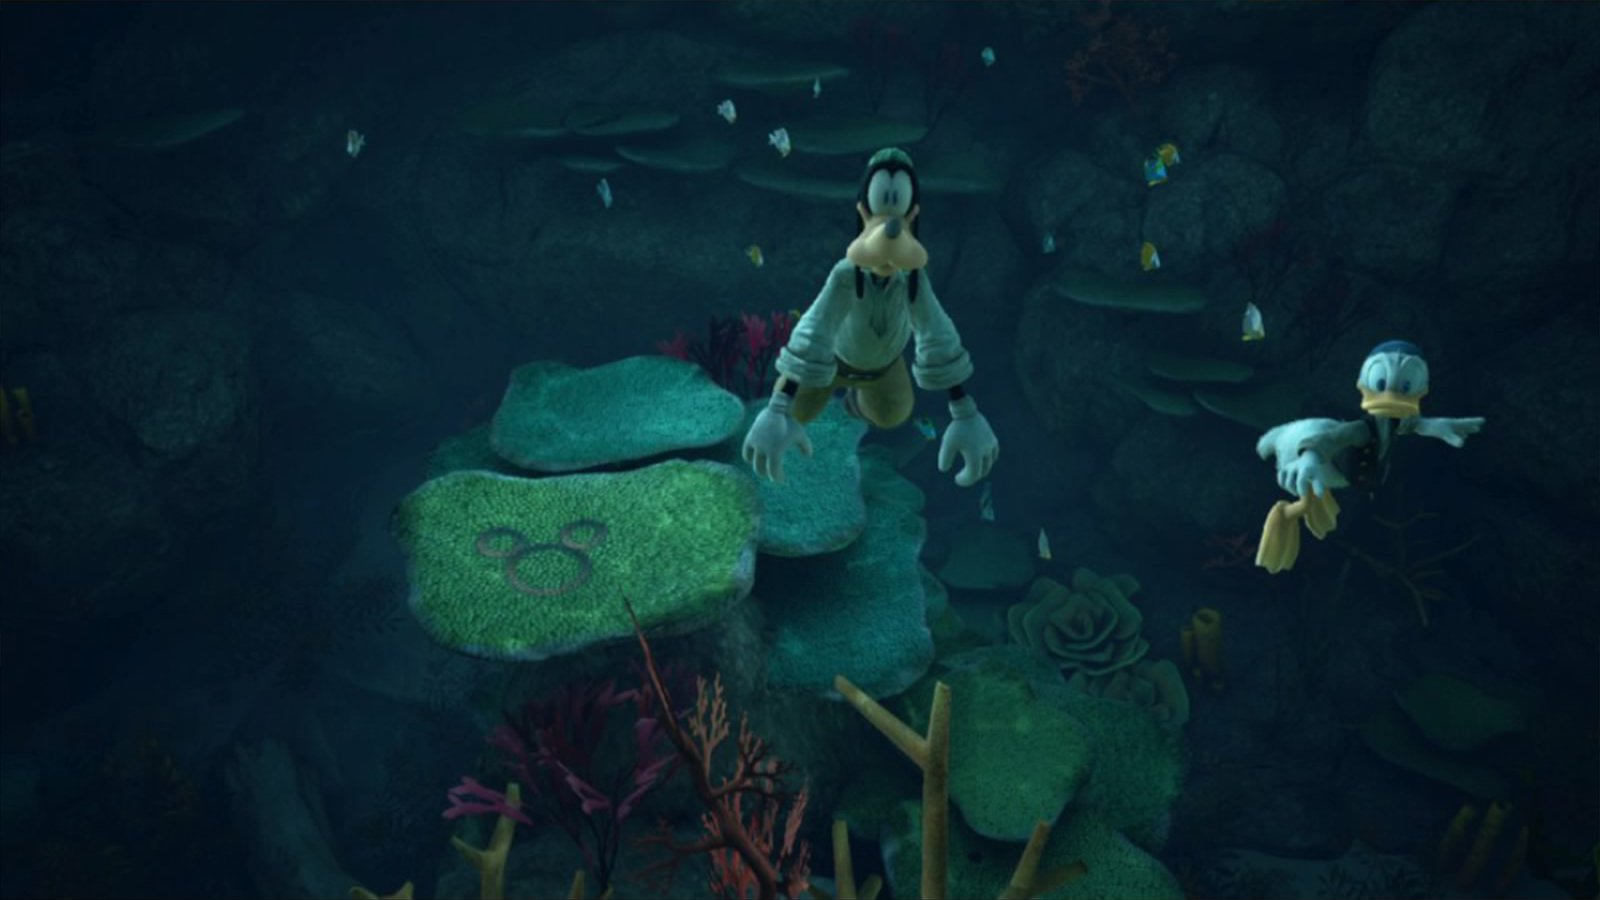 | The High Seas / Sandbar Isle | Right next to #12, this Emblem is on a coral under the sunlight. |
You receive various rewards by taking pictures of the Lucky Emblems, the last one being a PSN Trophy and a Mickey Clasp.